Foundation crack repair starts with finding the cause, then matching the method to the damage. Stable, narrow cracks often need only sealing and careful monitoring. Wider, horizontal, or growing cracks need professional diagnosis and structural repair.
This guide explains crack types, causes, inspection steps, repair methods, and costs in plain language. Additionally, it shows when a do-it-yourself repair makes sense and when expert help protects your home. Therefore, you can act early without guessing or overspending.
You will learn how to measure cracks, track changes, and compare contractor proposals with confidence. Moreover, you will find prevention steps that reduce water pressure around walls and floors. For example, simple drainage fixes often stop new cracks from forming.
What Foundation Cracks Really Mean
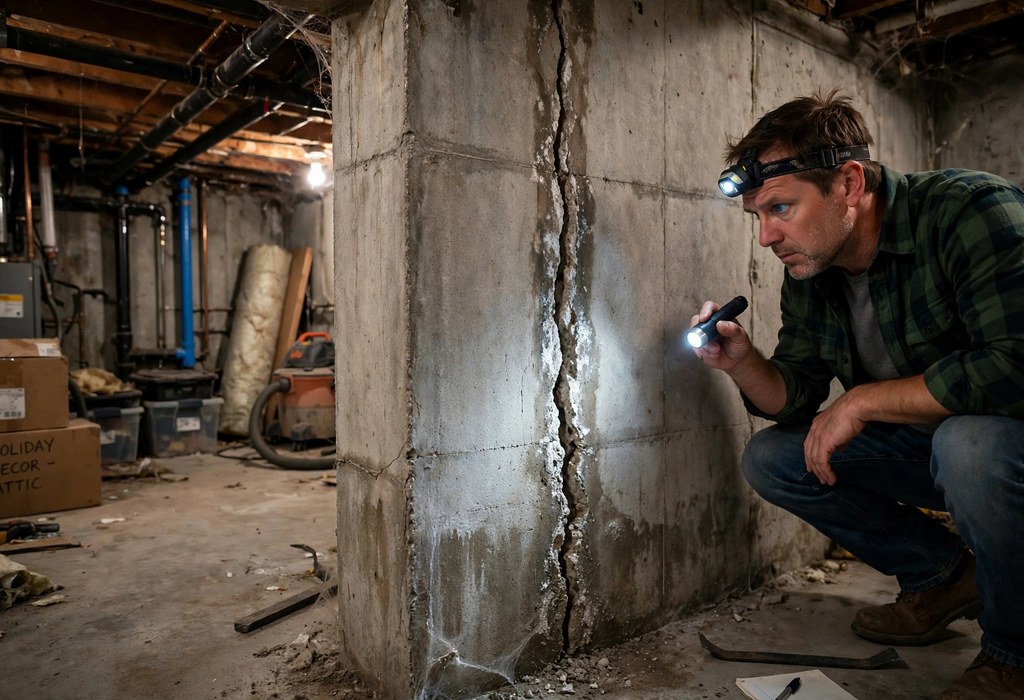
A foundation crack is a break in concrete, block, or stone that supports your home. Furthermore, it signals stress from soil movement, water pressure, shrinkage, or settlement. However, not every crack threatens structural safety or requires major work.
Concrete naturally shrinks as it cures, and soil shifts with moisture changes over time. Consequently, many homes develop thin cracks during their early life without serious harm. Nevertheless, you should inspect every crack carefully and record its size and location.
The foundation carries wall loads, floor loads, and roof loads down to stable soil. Therefore, a crack that weakens this path deserves prompt attention and clear documentation. Similarly, a crack that admits water can damage finishes, stored items, and indoor air quality.
Think of a crack as a symptom rather than a complete diagnosis by itself. Additionally, nearby clues such as sticking doors, sloping floors, and damp spots matter greatly. For example, one thin crack alone differs sharply from several cracks with a bowing wall.
Why Foundations Crack and Need Repair
Most cracks trace back to movement, moisture, or uneven support beneath the structure. Moreover, several causes often work together and amplify stress on walls and slabs. Therefore, lasting repair must address the cause, not only the visible line.
Soil Movement and Settlement
Soil expands when wet and shrinks when dry, especially clay-rich soil near foundations. Consequently, seasonal moisture swings push and pull walls throughout changing weather. Additionally, poorly compacted fill beneath a new home can settle unevenly after construction.
Differential settlement occurs when one section sinks faster than neighboring sections. Furthermore, this uneven motion stresses corners, window openings, and long wall spans. For example, a stair-step crack in block often follows mortar joints under differential settlement.
Nearby excavation, heavy traffic vibration, and tree root growth can also disturb supporting soil. Moreover, leaking pipes can wash fine soil particles away from footings over time. Therefore, an inspector should ask about plumbing leaks, grading, and recent site changes.
Water Pressure That Cracks Foundation Walls
Water collects against foundation walls when gutters overflow or soil slopes toward the home. Consequently, saturated soil exerts strong lateral pressure against basement walls. Additionally, hydrostatic pressure forces water through cracks, joints, and porous concrete.
A missing downspout extension can saturate one wall section while other sections stay dry. Furthermore, this uneven pressure increases bending stress and encourages horizontal cracking. For example, a wall facing a failed gutter often shows damp stains before visible bowing.
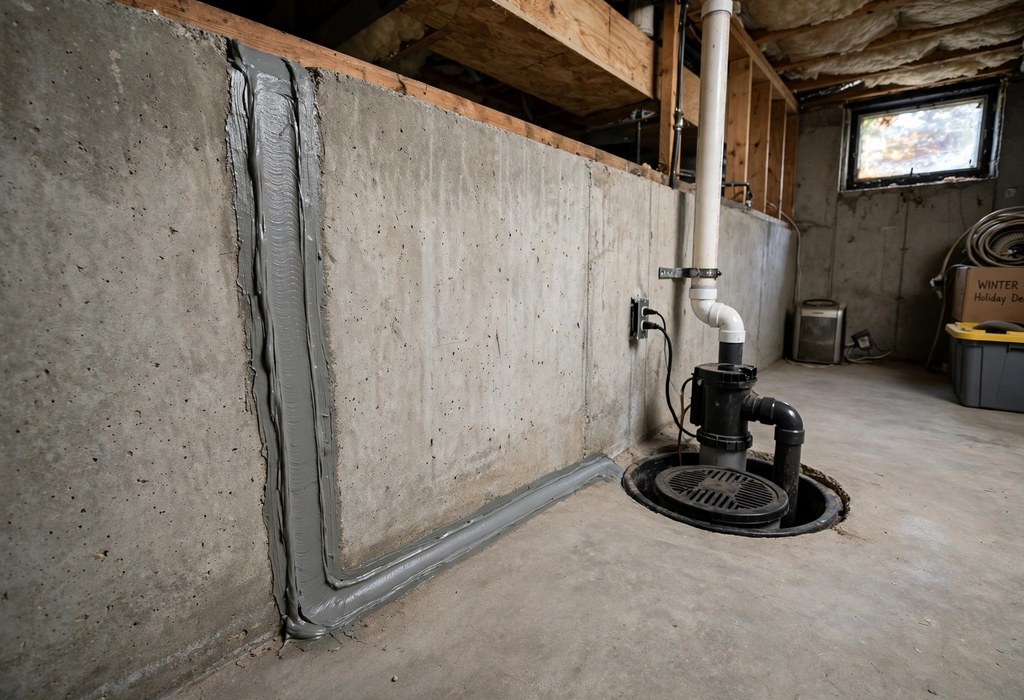
Interior drainage, exterior waterproofing, and proper grading all reduce water pressure together. Moreover, a sump pump removes collected water before pressure builds against the wall. Therefore, drainage repair often forms part of a complete crack repair plan.
Concrete Curing and Temperature Change
Fresh concrete loses moisture and shrinks slightly while it gains strength after placement. Consequently, fine shrinkage cracks can appear even in well-built foundations. Additionally, rapid drying, hot wind, or cold placement can increase early cracking.
Temperature swings expand and contract concrete, masonry, and adjacent framing materials differently. Furthermore, repeated cycles stress joints, corners, and areas around openings. For example, a garage slab often cracks near control joints designed to guide shrinkage.
These curing and temperature cracks usually stay narrow and stable after initial movement ends. However, you should still seal them to block water, pests, and freeze damage. Moreover, monitoring confirms stability before you dismiss any new crack as harmless.
Cold Weather and Freeze Damage
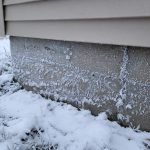
Water trapped in soil, cracks, and pores expands strongly when temperatures fall below freezing. Consequently, frozen soil can heave upward and push against walls and slabs. Additionally, repeated freezing and thawing widens small defects into larger cracks over time.
In cold regions, winter freeze thaw foundation cracks often widen during repeated freezing cycles. Furthermore, snowmelt can saturate soil just before a hard freeze arrives. Therefore, drainage and sealing matter even more in climates with long cold seasons.
Cold climate homeowners can learn more in this guide to winter freeze thaw foundation cracks and protection. Additionally, that guide explains drainage, sealing, and monitoring before freezing weather arrives. Therefore, winter preparation can prevent small cracks from widening each cold season.
Footings placed above the frost line face greater heave risk than deeper footings. Moreover, unheated crawl spaces and exposed stem walls can freeze more quickly. For example, a porch footing near a downspout often heaves after repeated winter saturation.
Trees, Roots, and Nearby Loads
Large trees draw substantial moisture from soil during dry periods and alter soil volume. Consequently, soil near mature trees may shrink and cause localized settlement. Additionally, roots can exert pressure directly against walls, pipes, and shallow footings.
New additions, heavy planters, and parked vehicles add concentrated loads near foundations. Furthermore, these loads can compress weak soil and shift wall sections unevenly. For example, a driveway slab tied tightly to a wall may transmit movement into the foundation.
Removing a large tree suddenly can also change soil moisture and cause rebound movement. Therefore, arborists and foundation specialists should coordinate major tree work near homes. Moreover, root barriers and proper planting distances reduce future pressure and settlement risk.
Foundation Crack Types and What Each Signals
Crack direction, width, location, and pattern reveal likely causes and urgency levels. Furthermore, comparing these features helps you decide between monitoring and professional evaluation. Therefore, photograph each crack with a ruler for scale and context.
Vertical Foundation Cracks
Vertical cracks run mostly up and down and often reflect shrinkage or minor settlement. Additionally, many vertical cracks stay narrow, stable, and structurally harmless for decades. However, water can still enter through a vertical crack and damage basement finishes.
A vertical crack wider than one quarter inch deserves closer inspection and professional advice. Furthermore, vertical cracks that grow, leak heavily, or show displacement need prompt evaluation. For example, one side sitting higher than the other signals uneven movement.
Learning horizontal vs vertical foundation cracks helps you judge urgency more accurately. Moreover, vertical cracks generally raise less concern than horizontal cracks of similar width. Therefore, record vertical crack measurements regularly and watch for sudden change.
Horizontal Foundation Cracks
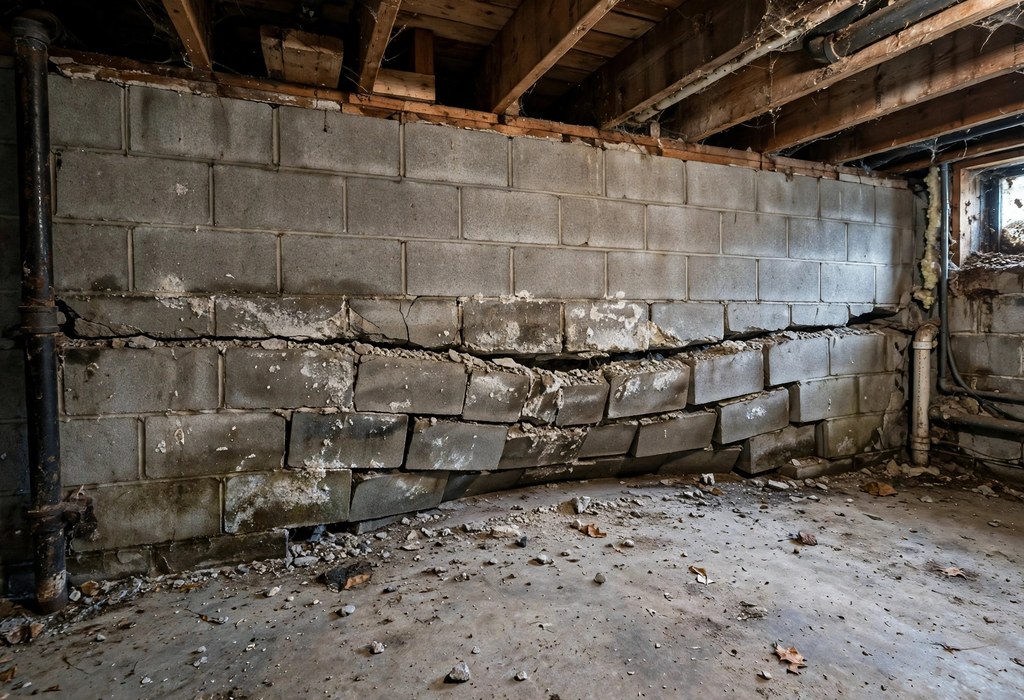
Horizontal cracks run mostly parallel to the floor and often indicate lateral soil pressure. Furthermore, they frequently accompany bowing, bulging, or inward wall movement. Consequently, most horizontal cracks require prompt professional evaluation without delay.
A horizontal crack can form where soil pressure bends a wall at its weakest point. Additionally, water-saturated soil, frost heave, and heavy backfill all increase lateral force. For example, a block wall may crack horizontally near its midpoint under sustained pressure.
Do not simply fill a horizontal crack with surface sealant and assume safety returns. Moreover, reinforcement or drainage work may be needed to relieve pressure and stabilize the wall. Therefore, treat any new horizontal crack as a priority inspection item.
Diagonal and Stair-Step Cracks
Diagonal cracks run at an angle and often signal differential settlement or shear stress. Furthermore, stair-step cracks follow mortar joints in block or brick foundations. Consequently, these patterns usually indicate uneven support rather than simple shrinkage.
A single narrow diagonal crack may stay stable, yet multiple diagonal cracks raise concern. Additionally, cracks wider at one end than the other suggest ongoing differential movement. For example, a stair-step crack near a corner often pairs with a sticking door.
Monitor diagonal patterns closely and note any widening, lengthening, or new companion cracks. Moreover, an engineer can determine whether piers, drainage, or soil stabilization address the cause. Therefore, avoid cosmetic patching until movement appears stable or controlled.
Hairline Foundation Cracks
Hairline cracks are very thin lines, often narrower than one eighth of an inch. Furthermore, they commonly result from concrete shrinkage during curing and early settlement. Consequently, many hairline cracks pose little structural risk when they remain stable and dry.
A single hairline foundation crack often reflects normal concrete shrinkage during curing. However, you should still seal it to prevent water entry and freeze damage. Moreover, a hairline crack that widens, leaks, or branches deserves closer monitoring.
Many homeowners ask whether a hairline foundation crack normal pattern needs professional repair. Additionally, the answer depends on stability, width, location, and related symptoms. For example, a stable hairline crack differs greatly from a hairline crack beside a bowing wall.
Floor and Slab Cracks
Slab cracks can appear in basement floors, garage floors, patios, and interior concrete slabs. Furthermore, shrinkage, settlement, and soil movement all cause different slab crack patterns. Consequently, floor cracks need the same careful measurement and monitoring as wall cracks.
A narrow slab crack without vertical displacement often reflects normal curing shrinkage. However, a raised edge, wide gap, or hollow sound beneath the slab raises concern. Moreover, plumbing leaks beneath slabs can erode soil and cause localized sinking.
Floor cracks that admit water, radon, or pests should be sealed even when structural risk seems low. Additionally, sloping floors above a cracked slab may indicate deeper support problems. Therefore, inspect floor cracks alongside wall cracks during every routine check.
How to Inspect a Foundation Crack Yourself
A careful home inspection gives you useful records and helps professionals diagnose problems faster. Furthermore, you can complete most basic checks with simple tools and good lighting. Therefore, inspect foundations during dry weather and again after heavy rain.
Start by walking the full perimeter inside and outside, including basements and crawl spaces. Additionally, look for cracks near windows, doors, corners, and wall-to-floor joints. For example, a crack above a window may pair with a sticking sash nearby.
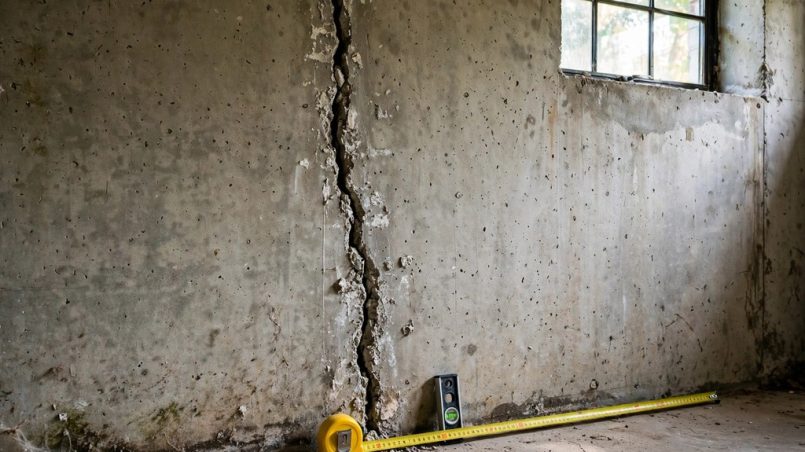
Measure width with a ruler, feeler gauge, or crack comparator card at several points. Moreover, mark crack ends with pencil lines and dates for future comparison. Consequently, you can detect growth that might otherwise go unnoticed between inspections.
- Width: Record the widest point in inches and note any tapered sections.
- Length: Measure total length and mark both ends with dated pencil lines.
- Direction: Describe the crack as vertical, horizontal, diagonal, or stair-step.
- Moisture: Note dampness, staining, efflorescence, mold, or active dripping nearby.
- Movement: Check for displacement, bowing, gaps, or doors that stick.
Photograph each crack from a distance and close up, with a ruler visible for scale. Furthermore, keep photos organized by wall, date, and measurement in one folder. Therefore, a contractor or engineer can review change over time without repeated visits.
Check floors with a long level and note slopes, humps, or gaps at baseboards. Additionally, test doors and windows for sticking, binding, or uneven gaps. For example, a door that suddenly rubs may reflect movement near a nearby foundation crack.
Inspect grading, gutters, downspouts, and sump pump operation during the same visit. Moreover, note soil erosion, ponding water, and vegetation touching foundation walls. Consequently, you can link drainage problems to specific cracks before planning repairs.
When a Foundation Crack Is Serious
Serious cracks share warning features that demand prompt professional evaluation and action. Furthermore, urgency rises sharply when several warning signs appear together. Therefore, do not wait for cosmetic symptoms to worsen before seeking advice.
- Wide opening: Treat any crack wider than one quarter inch as a priority concern.
- Horizontal pattern: Seek evaluation promptly for any horizontal crack, regardless of width.
- Active growth: Act quickly when a crack lengthens, widens, or branches between checks.
- Wall movement: Get help immediately for bowing, bulging, leaning, or displaced sections.
- Water entry: Prioritize cracks with active leaks, heavy staining, or persistent dampness.
- Multiple symptoms: Combine cracks with sloping floors, sticking doors, or separating trim.
A crack that suddenly appears after flooding, excavation, or heavy vibration needs urgent review. Additionally, cracks near load-bearing walls or structural connections raise risk further. For example, a new stair-step crack after nearby digging may signal soil disturbance.
Safety matters most when walls bow significantly, floors sink sharply, or ceilings separate. Furthermore, evacuate questionable areas and seek professional guidance before entering damaged spaces. Therefore, never ignore rapid change because the crack still looks small.
When doubt remains, an independent structural engineer provides an unbiased diagnosis and repair scope. Moreover, this report helps contractors price the same work fairly and accurately. Consequently, engineering advice often saves money despite its upfront fee.
Foundation Crack Repair Methods at a Glance
Repair methods fall into sealing, reinforcement, stabilization, and water management categories. Furthermore, the best method depends on crack type, movement, moisture, and wall material. Therefore, compare methods by cause addressed, not only by visible crack closure.
Sealing methods close a crack and block water, while reinforcement methods strengthen weakened walls. Additionally, stabilization methods transfer loads to deeper, more stable soil layers. For example, injection seals a stable crack, whereas piers address ongoing settlement.
Water management methods reduce pressure that causes cracks and prevents recurrence after repair. Moreover, drainage improvements protect injection repairs from future hydrostatic stress. Consequently, many lasting plans combine sealing with drainage and reinforcement.
Surface patching with caulk or mortar alone rarely solves structural or active water problems. Furthermore, rigid patches can crack again when movement continues beneath them. Therefore, choose a method that matches crack behavior and underlying soil conditions.
Epoxy Injection Foundation Crack Repair Explained
Epoxy injection fills a crack with a strong resin that bonds concrete surfaces together. Furthermore, the cured resin restores much of the wall’s original structural continuity. Consequently, epoxy suits stable, dry cracks that no longer move significantly.
A technician seals the crack surface, installs ports along its length, and injects resin progressively. Additionally, low-pressure injection fills narrow cracks thoroughly without forcing walls apart. For example, ports spaced closely ensure resin reaches the full crack depth.
Many contractors offer epoxy injection foundation crack repair for stable walls and slabs. Moreover, epoxy creates a rigid bond that resists water and restores tensile strength. Therefore, it works poorly where ongoing movement requires flexibility instead of rigidity.
Curing time varies with product, temperature, crack width, and injection pressure used. Furthermore, the surface seal can be removed and finished after curing completes. Consequently, epoxy repairs often look neat and remain hidden behind paint or finishes.
Epoxy injection does not fix settlement, lateral pressure, or drainage problems by itself. Additionally, a moving crack may reopen beside a rigid epoxy repair over time. Therefore, stabilize active movement and correct drainage before relying on epoxy alone.
Polyurethane Injection Explained
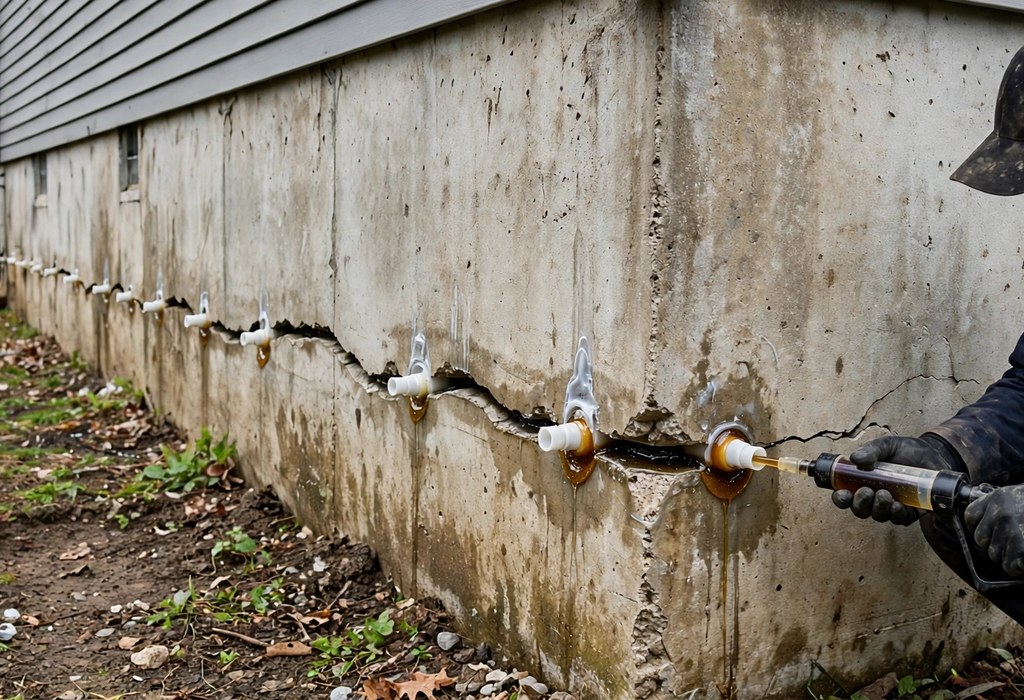
Polyurethane injection uses expanding foam or resin that fills cracks and blocks water entry. Furthermore, the material remains flexible after curing and accommodates slight movement. Consequently, polyurethane suits leaking cracks and cracks with minor ongoing motion.
A technician injects polyurethane through ports, and the material expands to fill voids and pathways. Additionally, expansion helps seal irregular cracks, honeycombed concrete, and pipe penetrations. For example, foam can chase water pathways that rigid resin might miss.
Polyurethane does not restore structural strength as completely as epoxy in most cases. However, its flexibility and water-stopping ability make it valuable for active leaks. Moreover, some polyurethane formulas cure even in wet conditions and active water flow.
Closed-cell foam resists water absorption and provides a durable, flexible seal inside cracks. Furthermore, the cured foam bonds to concrete while allowing small seasonal movement. Therefore, polyurethane often serves as the first choice for wet basement wall cracks.
Choose polyurethane carefully when structural bonding matters more than water sealing alone. Additionally, engineers may pair polyurethane sealing with carbon fiber or anchors for strength. Consequently, method selection should follow diagnosis, not product preference alone.
Epoxy Versus Polyurethane: Choosing Correctly
The choice between epoxy vs polyurethane injection depends mainly on water and movement. Furthermore, dry and stable cracks favor epoxy, while wet or slightly moving cracks favor polyurethane. Therefore, record moisture and growth before selecting either injection material.
Epoxy bonds strongly and restores strength, yet it cannot flex with ongoing movement. Additionally, polyurethane seals water effectively, yet it provides less structural bonding strength. For example, a dry vertical crack suits epoxy, while a leaking crack suits polyurethane.
Some repairs combine both materials in different sections of the same wall system. Moreover, a contractor may inject polyurethane first to stop water, then apply reinforcement. Consequently, combined approaches can address both leakage and structural weakness together.
Explore this guide to epoxy vs polyurethane crack repair for specific cases. Additionally, that comparison clarifies curing, flexibility, strength, and suitable crack conditions. Therefore, use it alongside your inspection notes when comparing contractor proposals.
Ask every contractor why a chosen material fits your crack behavior and moisture conditions. Furthermore, request product data, warranty terms, and expected performance limits in writing. For example, a warranty should state whether it covers leakage, bonding, or both.
Exterior Foundation Crack Repair and Waterproofing
Exterior repair addresses cracks and water entry from outside the foundation wall. Furthermore, excavation exposes the wall for membrane application, crack sealing, and drainage installation. Consequently, exterior work often provides the most durable waterproofing solution.
Workers excavate soil, clean the wall, seal cracks, and apply a waterproof membrane. Additionally, drainage board and exterior drain tile redirect water away from the wall. For example, a properly sloped drain tile prevents water from pooling against repaired sections.
Exterior work costs more and disrupts landscaping, driveways, and plantings near walls. However, it also corrects grading, drainage, and backfill problems at their source. Moreover, exterior membranes protect walls from future water pressure and freeze damage.
Exterior repair suits persistent leaks, severe water intrusion, and walls needing full protection. Furthermore, interior injection may remain sufficient for isolated, stable, dry cracks. Therefore, compare exterior scope carefully against interior alternatives before committing.
After backfilling, workers should compact soil in layers and restore proper surface grading. Additionally, downspouts should discharge well away from the newly waterproofed wall. Consequently, good restoration protects the repair and prevents new settlement near walls.
Structural Reinforcement Options
Reinforcement strengthens walls that have cracked, bowed, or lost load capacity over time. Furthermore, reinforcement works best after drainage and pressure causes receive attention. Therefore, view reinforcement as stabilization, not merely cosmetic crack coverage.
Carbon Fiber Straps and Staples
Carbon fiber straps bond to interior walls and resist further bending and cracking. Additionally, carbon fiber offers high strength with low profile and minimal space loss. For example, straps can stabilize a bowing block wall without major excavation.
Installers prepare the wall surface, apply epoxy adhesive, and bond straps vertically across cracks. Furthermore, straps distribute loads and prevent cracks from widening under soil pressure. Consequently, carbon fiber suits walls with limited bowing and stable support conditions.
Carbon fiber staples bridge individual cracks and hold wall sections together across fractures. Moreover, staples work well on poured concrete and block walls with localized cracking. Therefore, engineers often specify staple spacing based on wall height and pressure.
Wall Anchors and Steel Beams
Wall anchors connect a bowing wall to stable soil or rock outside the foundation. Furthermore, anchors can gradually straighten walls and prevent further inward movement. Consequently, anchors suit walls with accessible exterior soil for anchor installation.
Steel I-beams brace interior walls against lateral pressure and transfer loads to floors. Additionally, beams require solid footing connections at top and bottom for effectiveness. For example, beams help where exterior excavation proves impractical or too disruptive.
Both systems need engineering design, proper spacing, and secure connections to function safely. Moreover, anchors and beams should pair with drainage improvements whenever pressure caused bowing. Therefore, never install reinforcement without addressing water and soil pressure sources.
Piers and Underpinning
Piers transfer foundation loads from weak soil to deeper, stable soil or bedrock. Furthermore, helical piers screw into soil, while push piers drive downward under load. Consequently, piers address settlement rather than merely sealing visible cracks.
Underpinning projects require careful load calculations, pier spacing, and lifting controls. Additionally, contractors monitor movement during installation to avoid sudden shifts or damage. For example, lifting a settled corner too quickly can crack finishes and stress framing.
Pier projects cost more than injection repairs and often involve permits and engineering reports. However, they provide lasting stabilization when settlement drives ongoing cracking. Moreover, pier warranties should specify coverage, transferability, and monitoring requirements clearly.
DIY Foundation Crack Repairs Done Safely
Do-it-yourself repair suits narrow, dry, stable cracks without structural warning signs. Furthermore, careful preparation and correct materials determine success more than speed. Therefore, inspect, measure, and monitor every crack before starting any DIY work.
A guide to diy epoxy foundation crack repair can help homeowners follow surface preparation and injection steps. Additionally, that guide explains port placement, resin mixing, and curing precautions clearly. Consequently, beginners can avoid common mistakes that weaken otherwise simple repairs.
Start by cleaning loose concrete, dust, and old sealant from the crack surface thoroughly. Moreover, dry the surface when the product requires dry conditions for bonding. For example, epoxy bonds poorly to wet, dusty, or contaminated concrete surfaces.
Follow product instructions exactly for mixing ratios, working time, and safety equipment. Furthermore, wear gloves, eye protection, and ventilation protection during resin handling. Therefore, read safety data and local disposal rules before opening any repair product.
Stop DIY work and seek professional help for horizontal cracks, bowing, or rapid growth. Additionally, avoid DIY structural reinforcement, pier work, and major excavation without expertise. For example, an incorrectly braced wall can hide movement until failure becomes severe.
Repair Kits and Supplies
Repair kits package resin, ports, surface seal, applicators, and instructions for homeowner use. Furthermore, kits vary widely in resin type, crack length coverage, and included tools. Therefore, compare kit contents against your crack width, length, and moisture conditions.
Some foundation crack repair kits suit only narrow, dry, stable cracks. Moreover, kits with polyurethane suit leaking cracks better than rigid epoxy kits. Consequently, product selection should follow crack behavior, not price or packaging claims alone.
A comparison of the best foundation crack repair kits helps homeowners match kits to crack types. Additionally, that comparison reviews coverage, flexibility, curing time, and ease of use. Therefore, use it before buying a kit for a crack you have not yet measured.
Check whether a kit includes enough ports for your crack length and depth. Furthermore, confirm that surface seal, injection gun, and mixing supplies match the resin. For example, a kit covering eight feet may fall short for a long basement wall crack.
Store unused resin according to label directions and keep it away from heat and moisture. Additionally, discard expired resin because curing and bonding may fail unexpectedly. Consequently, buying a slightly larger kit beats running short during injection.
What Foundation Crack Repairs Usually Cost
Costs vary with crack type, method, wall material, access, and regional labor rates. Furthermore, multiple cracks, structural reinforcement, and drainage work increase total project costs. Therefore, treat published ranges as planning guides, not firm quotes for your home.
Understanding foundation crack repair cost helps you compare written estimates fairly. Moreover, a detailed estimate should separate diagnosis, materials, labor, and drainage work. Consequently, you can spot vague proposals that hide important scope differences.
Professional injection often ranges from about $250 to $800 per crack for minor repairs. Additionally, wider or structural cracks can range from $1,000 to $5,000 per crack. For example, reinforcement, anchors, or piers can raise a project well beyond injection pricing.
Carbon fiber straps often range from about $600 to $2,000 per strap or wall section. Furthermore, wall anchors often range from about $700 to $1,200 each installed. Consequently, a bowing wall with several anchors can total several thousand dollars quickly.
Foundation Crack Repair Cost Factors
Piers often range from about $1,000 to $3,000 each, depending on type and depth. Additionally, a full pier project may require several piers and engineering oversight. Therefore, a settling foundation project can reach five figures even with efficient design.
Engineer evaluations often range from about $300 to $1,000, depending on scope and reporting. Moreover, independent engineering advice can prevent unnecessary pier or reinforcement spending. For example, an engineer report can narrow a vague proposal to specific work.
Get at least three written estimates for major work and compare scope line by line. Furthermore, ask whether permits, cleanup, landscaping restoration, and warranties appear included. Consequently, the lowest bid may cost more when excluded work appears later.
Review this overview of foundation crack repair cost before requesting bids. Additionally, that overview explains why similar cracks can produce very different contractor quotes. Therefore, use it to prepare questions for every estimate meeting.
Choosing a Foundation Crack Repair Contractor
A reputable foundation crack repair company should explain causes before recommending work. Furthermore, trustworthy contractors inspect thoroughly, measure cracks, and document drainage conditions. Therefore, be cautious when a proposal skips diagnosis and jumps straight to sales.
Verify licensing, insurance, bonding, and local permit experience before signing any contract. Additionally, ask for references from similar crack repair projects in your area. For example, references can reveal cleanup quality, schedule reliability, and warranty responsiveness.
Request a written scope that names methods, materials, measurements, and warranty terms clearly. Moreover, the scope should state who handles drainage, permits, and follow-up inspections. Consequently, vague language creates disputes when results differ from initial promises.
Compare warranties carefully, including duration, transferability, exclusions, and claim procedures. Furthermore, a lifetime warranty means little without a stable company behind it. Therefore, check company history, reviews, and complaint records before relying on promises.
Avoid contractors who demand full payment upfront or pressure immediate decisions. Additionally, a reputable firm allows time for comparison and engineer review. For example, high-pressure tactics often accompany oversized pier proposals or unnecessary work.
- License: Confirm current licensing and insurance coverage before work begins.
- Scope: Require methods, materials, measurements, and drainage work in writing.
- Warranty: Compare duration, transferability, exclusions, and claim steps carefully.
- References: Contact past clients with similar crack types and wall materials.
- Payment: Use staged payments tied to completed milestones and final inspection.
Selling a Home With Cracks
Foundation cracks affect buyer confidence, lender requirements, and negotiation outcomes during a sale. Furthermore, undisclosed cracks can create legal disputes long after closing. Therefore, honest documentation and professional repairs protect sellers and buyers alike.
Sellers facing selling house foundation cracks should disclose known defects honestly. Moreover, disclosure should include inspection reports, repair invoices, and warranty documents. Consequently, complete records reassure buyers and reduce suspicion during inspections.
Complete repairs before listing whenever cracks show structural signs or active water entry. Additionally, a recent engineer report can explain stable cracks and completed stabilization clearly. For example, buyers accept a repaired crack more readily with documented engineering approval.
Unrepaired cracks often lead to price reductions, repair credits, or lender-required fixes. Furthermore, buyers may request additional inspections that delay closing timelines. Therefore, early repair usually costs less than concessions demanded during tense negotiations.
For detailed seller guidance, review this resource on selling house foundation cracks before listing your home. Additionally, that resource covers disclosure, documentation, pricing, and buyer communication strategies. Consequently, sellers can approach listing with realistic expectations and stronger records.
Keep before-and-after photos, measurements, permits, and warranty transfer forms together. Moreover, organize these records where buyers, agents, and inspectors can review them easily. For example, a simple repair file often shortens inspection objections and follow-up questions.
Insurance and Foundation Cracks
Insurance coverage for foundation cracks depends heavily on the event that caused damage. Furthermore, most standard policies exclude gradual settlement, soil movement, and maintenance issues. Therefore, homeowners should review policy language before assuming coverage exists.
Most homeowners insurance foundation cracks claims succeed only after sudden covered damage. Additionally, a sudden plumbing failure that damages a foundation may qualify under some policies. For example, a burst pipe causing erosion differs sharply from long-term soil settlement.
Flood damage usually requires separate flood coverage rather than standard home coverage. Moreover, earth movement, including earthquakes and sinkholes, often needs separate endorsements. Consequently, homeowners in high-risk areas should discuss endorsements with their insurer early.
Document damage promptly with dated photos, measurements, and professional inspection reports. Furthermore, report sudden damage quickly and follow insurer instructions for mitigation. Therefore, delayed reporting can complicate claims even when a covered event caused damage.
Consult this guide to insurance cover foundation cracks before contacting your insurer. Additionally, that guide explains sudden damage, exclusions, documentation, and adjuster questions. Consequently, you can present a clearer claim and avoid common coverage misunderstandings.
If coverage is denied, request the denial reasons in writing and review policy exclusions carefully. Moreover, an engineer report can distinguish sudden damage from gradual settlement effectively. For example, clear causation evidence strengthens appeals and contractor discussions alike.
Crack Types Compared in Depth
Comparing crack types side by side helps homeowners avoid overreacting or underreacting to damage. Furthermore, direction alone never tells the complete story without width and symptoms. Therefore, always combine pattern, measurement, moisture, and movement evidence together.
A detailed comparison of horizontal vs vertical foundation cracks clarifies risk differences clearly. Additionally, that comparison explains lateral pressure, settlement, shrinkage, and monitoring priorities. Consequently, homeowners can prioritize horizontal cracks while monitoring stable vertical cracks sensibly.
Vertical cracks often need sealing and monitoring, while horizontal cracks often need reinforcement. Moreover, diagonal cracks often need settlement evaluation before any sealing decision. For example, sealing a moving diagonal crack without stabilization invites repeat cracking.
Hairline patterns deserve separate attention because they often cause unnecessary alarm or false reassurance. Furthermore, a stable hairline crack differs from a growing hairline crack with moisture. Therefore, track hairline cracks with the same discipline as wider cracks.
See whether a hairline foundation crack normal finding needs action. Additionally, that discussion separates curing shrinkage from early structural warning signs. Consequently, readers can judge thin cracks without panic or complacency.
Floor cracks, wall cracks, and joint cracks each respond differently to soil and water stress. Moreover, a floor crack near a wall crack may indicate shared settlement or pressure. For example, combined patterns often point toward drainage or soil problems affecting multiple areas.
Foundation Crack Prevention and Drainage
Prevention reduces water pressure, soil movement, and freeze damage before cracks form or worsen. Furthermore, most prevention steps cost far less than structural repair after damage spreads. Therefore, treat drainage and grading as ongoing home maintenance, not one-time fixes.
- Gutters: Clean gutters regularly and keep downspouts discharging away from walls.
- Grading: Maintain soil sloping away from the foundation on every side.
- Watering: Water soil evenly during dry periods to reduce extreme shrinkage.
- Trees: Plant large trees far enough from foundations to limit root pressure.
- Pumps: Test sump pumps regularly and install battery backup where flooding threatens.
Grade soil so water flows away from walls for at least several feet. Additionally, avoid mulch dams or flower beds that trap water against foundations. For example, a low spot near a corner can saturate one wall section repeatedly.
Extend downspouts well beyond foundation walls and keep extensions connected during storms. Furthermore, inspect splash blocks, buried drains, and discharge points seasonally. Consequently, a disconnected downspout can undo otherwise excellent grading work quickly.
Maintain consistent soil moisture around foundations during prolonged dry periods. Moreover, soaker hoses can help clay soil avoid extreme shrinkage near walls. Therefore, avoid both saturation and severe drying around the same foundation perimeter.
Inspect basement walls, crawl spaces, and slabs at least twice per season if possible. Additionally, check after heavy rain, rapid thaw, and nearby construction activity. For example, seasonal checks catch new cracks while repairs remain simple and affordable.
Seal minor cracks promptly to block water, pests, and freeze expansion inside concrete. Furthermore, sealing works best when cracks remain stable and drainage issues receive attention. Consequently, prevention combines sealing, drainage, grading, and regular monitoring together.
Monitoring After Foundation Crack Repair
Monitoring confirms that a repair holds and that underlying movement has stopped. Furthermore, regular checks catch recurrence early, when correction remains simpler and cheaper. Therefore, schedule follow-up inspections after every major repair project.
Re-mark repaired crack ends and photograph them at set intervals after work completes. Additionally, record moisture, staining, and any new cracks near repaired areas. For example, monthly checks during the first season reveal problems faster than annual checks.
Watch doors, windows, floors, and trim for new sticking, gaps, or separation after repair. Moreover, note drainage changes, gutter failures, or soil erosion near repaired walls. Consequently, a returning symptom may indicate unresolved pressure rather than failed sealant.
Keep repair records, warranties, product names, and contractor contacts in one accessible file. Furthermore, share this file with future buyers, insurers, and maintenance professionals. Therefore, documented history supports warranty claims and resale confidence alike.
Contact your contractor promptly when a repaired crack reopens, leaks, or widens again. Additionally, describe measurements, photos, and timing clearly when requesting warranty service. For example, precise records help contractors distinguish product failure from new movement.
Long-term monitoring matters most for homes on expansive clay, steep slopes, or flood-prone soil. Moreover, seasonal moisture swings can stress even well-repaired foundations over time. Consequently, monitoring should continue as routine maintenance, not end after repair day.
Common Mistakes to Avoid
Many foundation problems worsen because homeowners choose fast cosmetic fixes over correct diagnosis. Furthermore, surface patches can hide movement until structural damage becomes severe. Therefore, slow down, inspect carefully, and match repairs to verified causes.
Painting over a crack without sealing or monitoring hides important change evidence. Additionally, rigid caulk over a moving crack often splits beside the original damage. For example, a painted basement wall may conceal widening cracks for months.
Ignoring drainage while sealing cracks leaves water pressure free to create new damage. Moreover, new cracks often appear near old repairs when pressure remains unresolved. Consequently, always pair crack sealing with grading, gutter, and drainage checks.
Choosing the cheapest bid without comparing scope can lead to incomplete or incorrect work. Furthermore, a low bid may exclude reinforcement, drainage, permits, or warranty coverage. Therefore, compare methods and materials, not headline prices alone.
Delaying evaluation for horizontal cracks, bowing, or rapid growth increases risk and cost. Additionally, structural repairs become more extensive as walls move further inward. For example, early anchors cost less than rebuilding a severely bowed wall.
Assuming every crack signals disaster can also lead to unnecessary spending and anxiety. Moreover, stable hairline cracks often need only sealing and monitoring, not major work. Consequently, balanced assessment protects both safety and household budgets together.
Frequently Asked Questions
Are foundation cracks normal in most homes?
Many thin, stable cracks result from normal concrete shrinkage and minor settlement.
Can a foundation crack be fixed permanently?
Permanent success depends on stopping movement, relieving pressure, and using suitable materials.
What should I budget for a typical crack repair?
Minor injection repairs often range from about $250 to $800 per crack.
Will my home policy pay for crack repairs?
Coverage usually applies only when sudden covered damage caused the crack.
When should I call a structural engineer first?
Call an engineer for horizontal cracks, bowing, rapid growth, or wide displacement.
Conclusion
Foundation crack repair starts with careful inspection, honest measurement, and correct diagnosis. Furthermore, matching the method to crack type, moisture, and movement delivers lasting results. Therefore, act early, document changes, and seek expert help for serious signs.
Seal stable cracks promptly, improve drainage around your home, and monitor repairs regularly. Additionally, compare contractor scopes carefully and keep complete records for future buyers. For example, organized documentation turns a worrying crack into a managed maintenance item.
Take the next step today by inspecting your foundation, photographing cracks, and noting measurements. Moreover, request written estimates from qualified professionals when warning signs appear. Consequently, early action protects your home, budget, and peace of mind for years ahead.
Foundation crack repair works best when diagnosis comes before any patching. Control water first, because no foundation crack repair lasts in a wet wall. Match the method to the crack, and the foundation crack repair will hold longer.
A careful foundation crack repair also protects resale value and buyer confidence. Monitor the wall after every foundation crack repair for at least one full year. Small cracks still deserve a proper foundation crack repair, not a cosmetic cover.
Get a written warranty with any professional foundation crack repair you commission. Seasonal checks catch new movement early and keep foundation crack repair costs down. When in doubt, ask an engineer before starting any foundation crack repair yourself.
A documented foundation crack repair history also reassures future buyers.