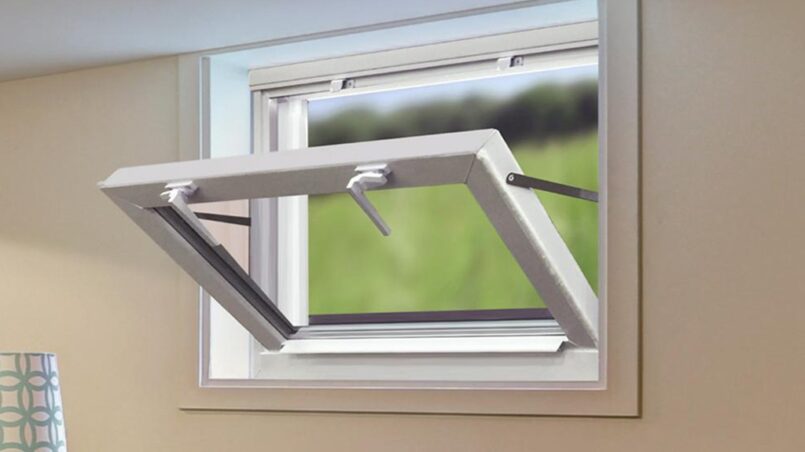
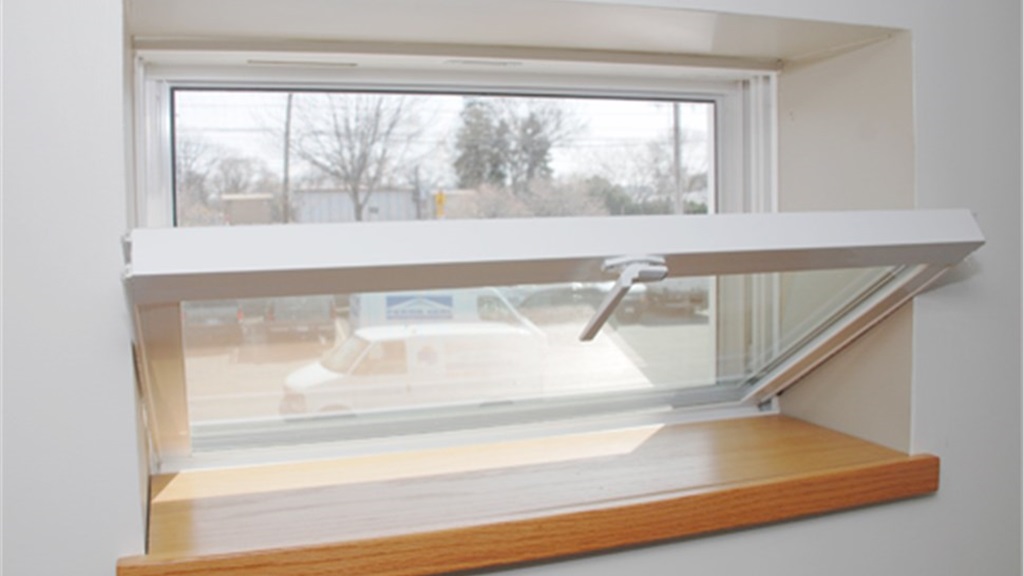
A hopper window, also known as a bottom-hinged window, is a type of window that opens inward from the bottom. Unlike traditional vertically-opening windows, hopper windows are hinged at the bottom and open by tilting inward. This unique opening mechanism makes hopper windows ideal for basements, garages, and other areas where you may want airflow but not a full-open window.
Installing a hopper window is a relatively straightforward DIY project for an experienced homeowner. You can install a hopper window in a day or two with suitable materials and some basic construction skills. Here is a step-by-step guide on everything you need to know about how to install hopper window.
Steps to Install a Hopper Window
Installing a hopper window involves removing the existing window frame (if there is one), preparing and framing the rough opening, installing the new vinyl or wood window, sealing and insulating around the window frame, and adding interior and exterior trim pieces. Here are the key steps:
Step 1: Remove the Existing Window and Frame
If there is already a window or frame in the opening, you must remove it first. Carefully pry off any interior trim and cut through the sealant around the frame using a utility knife. You may need to break the seal by tapping a pry bar around the edges. Once freed, remove the nails or screws holding the frame in place and lift it out.
Wear safety glasses when removing the window and frame to protect your eyes from debris. Also, use a pry bar and hammer carefully to avoid damaging the surrounding wall. Remove any remaining nails, screws, or old caulk from the rough opening.
Step 2: Prepare and Frame the Rough Opening
You can now work on preparing the rough opening with the old window out. This involves:
- Measuring the opening to ensure it matches your new hopper window size. The new window should be 1⁄2 to 3⁄4 inches smaller than the rough opening.
- Squaring off and straightening the rough opening sides using a chisel, rasp, or drywall saw.
- I am installing new wood framing if needed to create a secure mounting surface for the window. Use 2×4 or 2×6 lumbers secured with galvanized finish nails.
- It was flashing the rough opening edges with metal flashing. This helps divert water and moisture.
- I am applying flexible flashing tape over the base and sides of the rough opening.
Properly framing and flashing the rough opening is crucial to keeping moisture out around the window. Take your time to ensure the opening is ready for window installation.
Step 3: Install the New Hopper Window
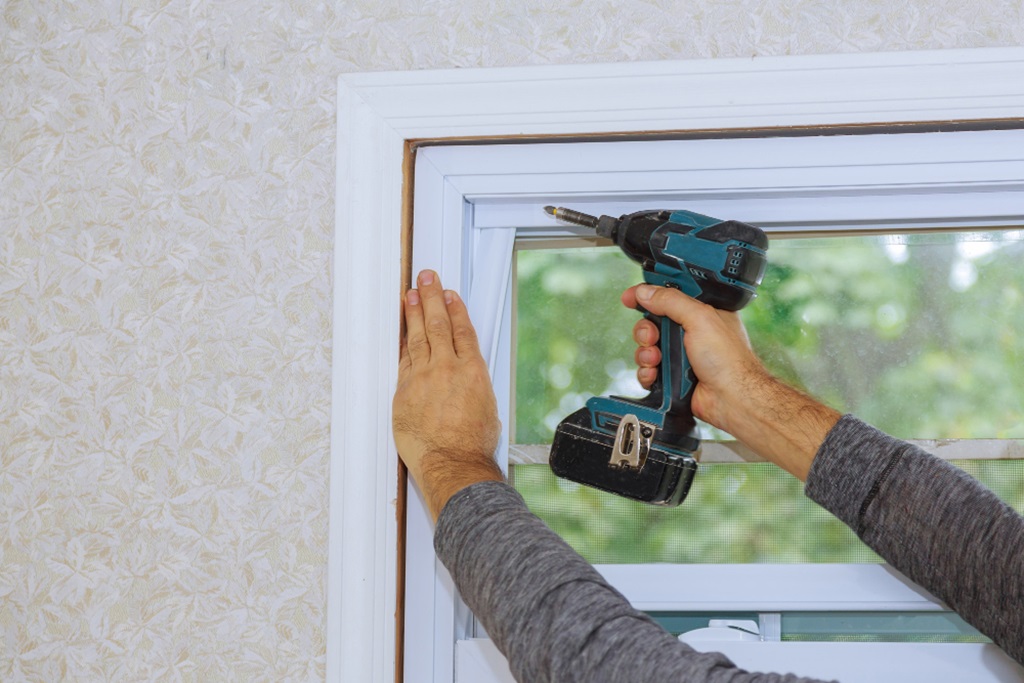
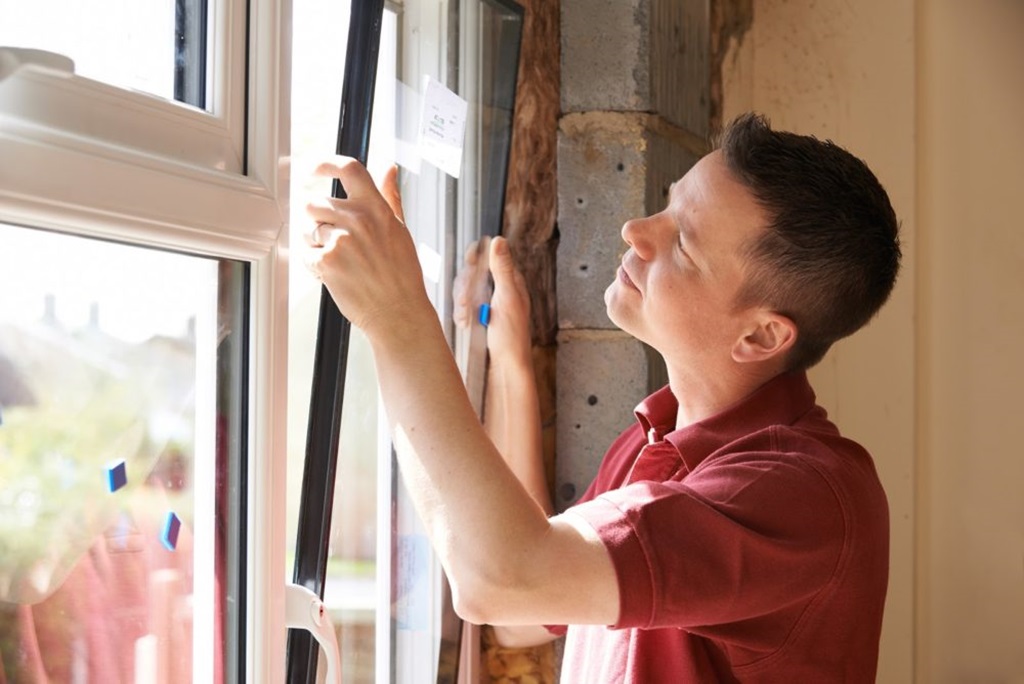
Once the rough opening is prepped, you can install the new vinyl or wood hopper window. Carefully set the window in place centered inside the opening. If possible, have a helper hold it from the outside.
- Drill pilot holes through the window frame jamb into the rough opening framing. If drilling into concrete or brick, use a hammer drill and masonry bit.
- Drive 2-3” galvanized or stainless steel finish nails or screws at each side to secure the window frame in place. Space fasteners 12-16” apart. Don’t over-tighten.
- Check that the window is plumb and level. Shim beneath the sill or jambs if needed to adjust fit and operation.
- Caulk around the exterior side of the window frame with exterior silicone sealant. Smooth with a caulking tool for a neat finish.
The window is now structurally installed. Next, you’ll want to seal, insulate, and trim it out.
Step 4: Insulate and Caulk Gaps
After installation, there shouldn’t be any gaps between the new window frame and the rough opening, but it’s important to seal any remaining spaces.
- To insulate, stuff fiberglass insulation between the rough framing and window jambs. Use a wood block or stick to pack it in tightly.
- Caulk around the interior side of the jambs and framing with interior acrylic latex caulk. Smooth with a wet finger for a clean finish.
- Consider low-expansion spray foam for more significant gaps. Let it cure entirely before trimming.
Sealing these interior gaps helps prevent air leaks, moisture issues, and energy loss around the window.
Step 5: Add Interior Trim
No window is complete without interior trim for a finished look. For a hopper window, you’ll want to install:
- Head jamb (top horizontal): Cut from 1×4, 1×6, or wider lumber, depending on your desired look. Anchor into the rough header framing.
- Side jambs (vertical pieces) – Rip vertical trim boards to fit over the side window jambs.
- Stool (bottom horizontal) – Cut a 1×4, 1×6, or wider board to run along the hopper window sill.
- Apron – Optional vertical trim below the stool covering the wall and window crank hardware (if present).
Miter cut the trim pieces for a clean, professional appearance. When installing interior trim, use finish nails and construction adhesive. Fill nail holes with wood filler and touch up with paint.
Step 6: Add Exterior Trim
You’ll also want to install exterior trim, such as brickmould or subskill trim, to give the window a finished look from the outside:
- Brickmould provides a decorative border around the window frame. Miter cut to fit.
- Subsill trim covers the bottom window sill area. Use a piece wide enough to extend past the vertical jamb trim.
- Install drip cap molding above the window to help direct water away.
Caulk around the exterior trim with a paintable exterior silicone sealant. Then, prime and paint the trim to match your home’s exterior.
That wraps up the major steps for installing a new hopper window. Follow these tips for a successful and professional-looking window installation.
How Do You Open a Hopper Window?
Hopper windows open from the bottom rather than the side. A handle or crank mechanism on the interior side allows you to unlock and crank the window open inward from the base.
To open a hopper window:
- Locate the lock or lever handle. This may be centered at the base of the window or offset to one side.
- Unlock the handle and rotate it to release the window sashes.
- Crank the handle to swing the window inward from the bottom. Some handles have extension rods for more straightforward operation.
- Open the window to the desired amount. You can keep it partially open by adjusting the handle.
- To close, crank the handle in the reverse direction until it is locked.
Be gentle when opening and closing a hopper window to avoid damage to the hinges or hardware. Make sure latches and locks engage fully when closed.
Do Hopper Windows Come Out?
Hopper windows are designed to open inward from the bottom rather than fully out like some hinged casement windows. So, no-hopper windows generally do not fully come out when opened.
The inward-swinging operation makes hopper windows suitable for basements, garages, and other low or awkward spaces. They allow ventilation without creating an open gap in the wall.
That said, it is possible to detach some hopper windows for a full cleaning or replace the entire interior. There are removable pins or access points on the hinges. But this is not a joint operation. Removing the window involves unfastening the frame and risks damaging the sealing and weatherstripping.
In most cases, hopper windows are intended to swing open from the base only. Homeowners should consult the manufacturer’s instructions before trying to force the window completely out.
How Do You Install Glass Block Windows?
Glass block windows create an energy-efficient and decorative accent in homes. Here are some tips on how to install them:
- Measure and frame out the rough opening just like a standard window. Leave room for expansion and sealant.
- Set the window sill (if used) and apply ample silicone caulk to the sill and sides.
- Place the first row of glass blocks across the sill, spacing them evenly to fit.
- Use plastic setting blocks between each block to maintain consistent gaps.
- Run silicone caulk along the vertical joints where blocks meet.
- Alternate each successive row into the open vertical joints between the blocks below.
- Use metal or nylon T spacers between blocks to maintain even horizontal spacing as you stack rows.
- Fill perimeters and open cavities between blocks with silicone caulk as you go.
- Install reinforcing rebar or metal strapping every 2-3 rows to strengthen the window.
- Apply sealant along the perimeter before installing the final row of cap blocks.
- Let the caulk fully cure before exposing glass block windows to weather or stress.
Proper preparation, spacing, expansion joints, and sealant are crucial to durable, watertight installation. Follow manufacturer specifications for the best results.
How Do You Install a Window in a Concrete Opening?
Here are some tips for installing a window in a concrete opening:
- Clean out the substantial opening thoroughly and make any repairs to cracks or spalling concrete.
- Frame the rough opening using pressure-treated wood secured with concrete anchors. Create a secure mounting surface.
- Flash the framed opening with a metal or peel-and-stick membrane to prevent moisture issues.
- Test fit the window and shim the frame so it sits level and plumb in the opening.
- Pre-drill holes through the window frame and into the rough framing. Use a masonry bit for concrete anchors.
- Anchor the window frame in place with concrete screws or epoxy anchors. Follow the anchor manufacturer’s instructions.
- Pack concrete-compatible insulation like closed-cell spray foam around the window to seal gaps and prevent air leakage.
- Install interior wood trim using construction adhesive and short concrete screws driven into the rough framing.
- Use a membrane flashing tape like Protecto Wrap on the exterior edges for an added moisture barrier.
- Finish the exterior with parging cement and stucco, or apply exterior trim pieces using adhesive and concrete anchors.
- Seal the exterior perimeter with paintable concrete caulk for a watertight and professional finish.
The key is using suitable compatible materials and anchors to secure the window frame firmly into the concrete opening. Take precautions against moisture issues.
Is Glass Block Easy to Install?
Installing glass block windows is relatively straightforward for DIYers with basic construction experience. However, it is not quite as simple as installing a regular window. Here are some factors to consider regarding ease of installation:
- Skill level – The installation of Glass blocks takes some masonry skill and care for mortar/caulk blocks. Masonry experience helps.
- Time – Factor extra time for mortaring joints, sealing, bracing, and allowing to cure. It is a multi-stage process.
- Weight – Glass blocks are heavy and fragile. Their weight makes handling the blocks challenging.
- Precision – Keeping glass blocks level, spaced evenly, and aligned requires patience and precision. Rushing can ruin the aesthetics.
- Sealant – Watertight installation depends heavily on proper caulking. Takes finesse to neatly seal joints.
- Bracing – Glass blocks require bracing/fasteners during installation until the sealant cures. This adds complexity.
Glass block windows are doable for DIYers but not as fast or straightforward as typical window kits. Having a helper makes the process much easier. For best results, follow manufacturer instructions carefully.
How Do You Install Glass Bricks?
Installing glass blocks into an opening involves careful preparation, positioning, and sealing. Here are some general tips:
- Frame out the opening just like a standard window to create a base for mounting the blocks.
- Lay out the first course of blocks on mortar or caulk on the sill. Space evenly.
- Maintain consistent gaps between blocks using plastic spacers as you stack each row.
- Offset vertical joints from row to row for stability—mortar or caulk along joints.
- To reinforce the glass block panel while curing, use bracing like rebar or steel lintels every 2-3 rows.
- Alternate between mortar and caulk when doing multiple windows for comparison.
- Pre-drill and install anchors into surrounding framing to secure perimeter blocks.
- Insert rubber setting blocks at the sill and jambs to allow for expansion and sealant.
- Let mortar or caulk fully cure before exposing the glass block window to weather.
- Finish by sealing all joints and gaps with a flexible waterproof caulk.
Work carefully and patiently for attractive, watertight results. Having an extra set of hands makes the process much easier.
Conclusion
Installing a hopper window is worthwhile for homeowners seeking increased ventilation and natural light. Following the steps outlined, you can install a hopper window even as a DIYer. Pay close attention to adequately preparing the rough opening, sealing, insulating, and trimming the window for optimal performance and durability. You can install a hopper window in standard or masonry openings with suitable materials and careful planning. Take your time, and don’t hesitate to ask for help lifting heavy window units and glass blocks. Hopper windows are a unique alternative to standard windows that can provide just the right amount of targeted airflow.
Frequently Asked Questions
Q: What tools do I need to install a hopper window?
A: Common tools needed are: tape measure, utility knife, pry bar, hammer, drill/driver, caulk gun, level, screws or nails, 2×4 lumber for framing, insulation, shims, and interior/exterior trim material. Safety gear like goggles, gloves, and a dust mask are also recommended.
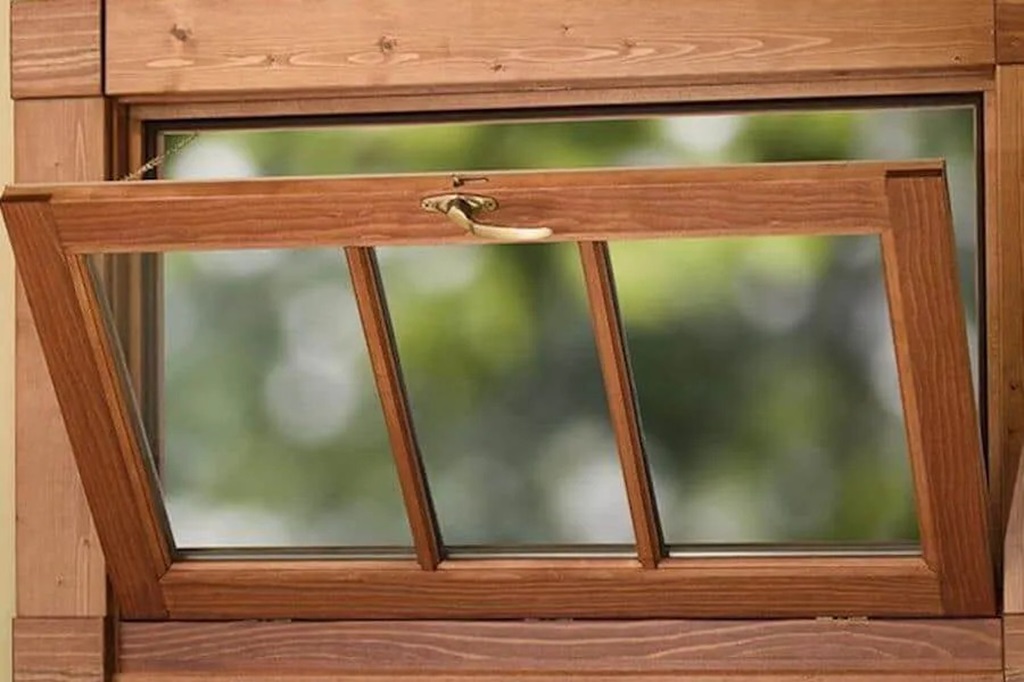
Q: Should I get vinyl or wood hopper windows?
A: Vinyl hopper windows are more affordable and offer lower maintenance than wood. But wood can provide a more attractive, custom look and tighter seal. Consider your climate, moisture exposure, and budget when deciding.
Q: How do I prepare a concrete hopper window opening?
A: Clean out the concrete opening, then frame in the rough opening using pressure-treated lumber and concrete anchors. Flash with membrane and seal perimeter gaps with concrete-compatible caulk before installing the window.
Q: What is the minimum rough opening size for a 12” x 24” hopper window?
A: For a 12” x 24” hopper window, you will need a rough opening of approximately 12 1⁄2” x 24 1⁄2”. This allows room for shims and sealant around the window frame.
Q: Can I install a hopper window in brick?
A: Yes, hopper windows can be installed in existing brick openings. It would be best if you framed in the rough opening, then secure the window using masonry anchors and non-corrosive fasteners driven into the brick framing.