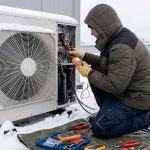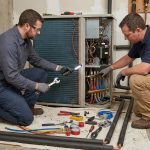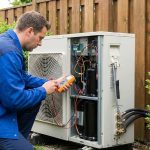
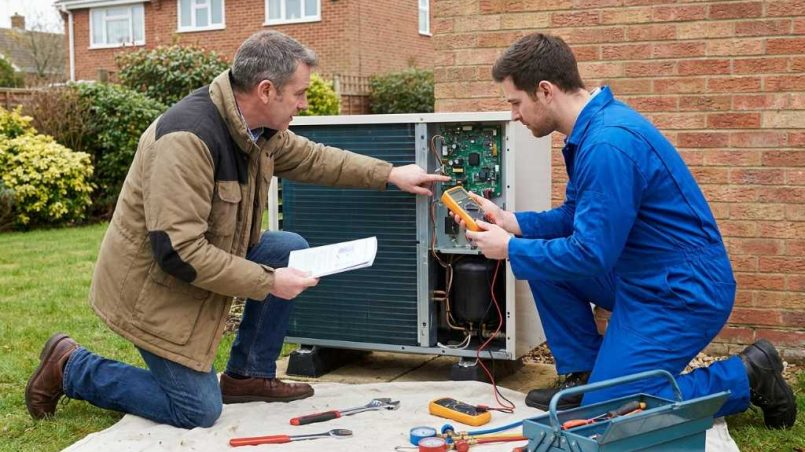
Heat pump repair ranges from a simple filter swap or capacitor replacement to a refrigerant recharge that only a licensed technician can legally perform. Most failures trace back to a short list of components, and identifying the right one saves you time, money, and unnecessary service calls. This guide covers every layer of the process so you walk into any repair situation fully informed.
A heat pump moves heat rather than generating it, which makes it remarkably efficient but also means multiple systems must work in coordination at all times. When any one part degrades, the whole unit feels it. Fortunately, most homeowners can diagnose the category of a problem within minutes by paying close attention to the right signals.
Why Heat Pumps Break Down: The Real Causes
Heat pumps fail for predictable, well-documented reasons. Understanding those causes helps you prevent most problems before they ever start.
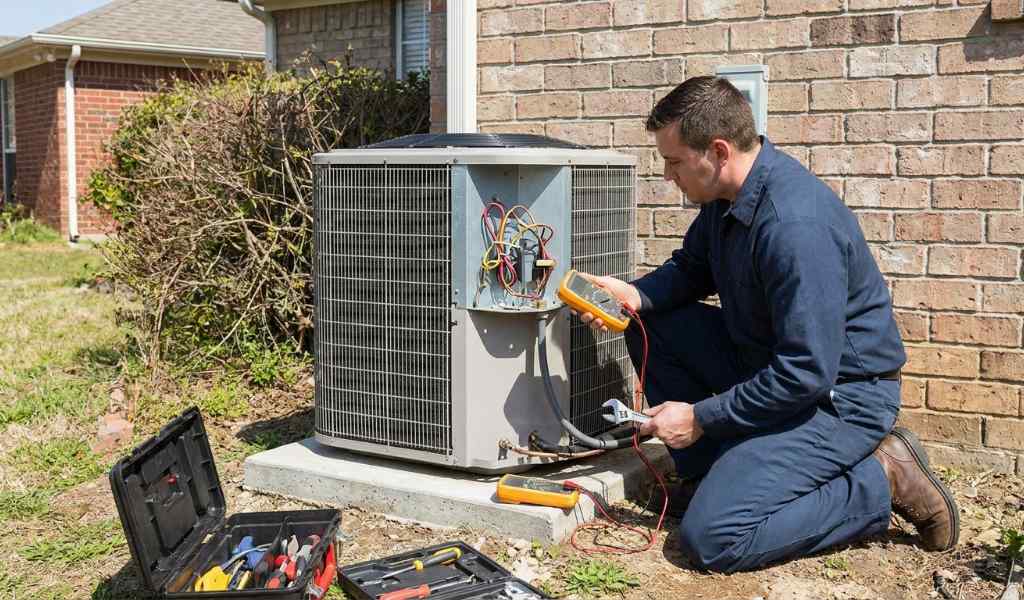
Age is the most honest culprit in the room. Most systems deliver reliable service for 15 to 20 years, but component wear accelerates sharply after year 10. Capacitors weaken, reversing valves stick, and refrigerant connections develop micro-leaks that compound quietly over time.
Neglected maintenance is the second major driver of premature failure. A clogged air filter restricts airflow and overheats the blower motor. Dirty coils force the compressor to work harder than its design allows. Each skipped tune-up adds cumulative mechanical stress that shortens equipment life measurably.
Poor installation creates chronic problems from the very first season. An undersized system short-cycles constantly, wearing components faster than a properly sized unit ever would. An incorrect refrigerant charge at startup stresses the compressor before it even completes its first full cycle.
Environmental exposure plays a role that many homeowners underestimate. Units installed in coastal climates corrode faster due to salt air. Systems in extreme cold regions hit their efficiency limits more often. Poor drainage around the outdoor unit traps moisture and accelerates rust on the cabinet and coil fins.
The Most Common Heat Pump Problems Explained
Heat Pump Not Heating or Cooling
This is the most frequently reported complaint across all system types. The unit runs, the fan spins, but the air never reaches the right temperature. Before assuming a mechanical failure, always start with the thermostat.
Confirm the mode setting matches the current season and that the setpoint sits at least 3 to 5 degrees from the current room temperature. A completely blank thermostat screen often means dead batteries, not a broken system. Replace them first and test before making any calls.
If thermostat settings are correct and the problem persists, four components cover the vast majority of these cases:
- Reversing valve: stuck between modes, causing the system to heat when it should cool
- Refrigerant leak: reduced charge lowers output and forces longer run cycles
- Failing compressor: the system runs but produces no meaningful temperature change
- Failed capacitor: the compressor or fan motor struggles to start or cannot start at all
Each of these requires a different response. Two are potential DIY fixes, and two require a licensed technician.
Heat Pump Running Constantly Without Cycling Off
Continuous operation in mild weather signals that something has shifted in the system’s balance. A properly functioning heat pump cycles on and off to maintain setpoint. When it runs without stopping, three causes cover most situations.
Low refrigerant forces the system to run longer cycles because it never fully satisfies the thermostat’s demand. You may also notice ice forming on the outdoor coil as a secondary symptom. Adding refrigerant without finding and sealing the underlying leak only delays the next service call by a few weeks or months.
A system that is too small for the home’s actual heat load runs constantly because it can never fully catch up. This is a design problem, not a mechanical one, and correcting it may require replacing the outdoor unit, adding a supplemental zone, or recalculating the building’s load with a Manual J analysis.
A dirty air filter or fouled evaporator coil can also cause constant running by restricting airflow so severely that the unit cannot transfer heat efficiently. This is the easiest cause to rule out first: check and change the filter before exploring anything else.
Unusual Sounds and What Each One Means
Heat pumps make some noise during normal operation. The fan runs, the reversing valve clicks when switching modes, and refrigerant moves through the lines with a faint whoosh. Sounds that fall outside those patterns deserve attention.
Different noises point to different components, and that distinction matters for diagnosis:
- Grinding or screeching: fan motor bearings failing inside the indoor or outdoor unit
- Persistent rattling: loose cabinet panels, debris trapped in the outdoor unit, or early compressor knock
- Clicking that never stops: a relay or contactor trying and failing to energize a component
- Hissing or bubbling: refrigerant escaping from a line, fitting, or valve connection
- Banging on startup: loose components shifting inside the compressor housing
Grinding and screeching warrant an immediate shutdown of the system. Running the unit further transforms what might be a $200 motor repair into a $1,500 compressor replacement. When in doubt, turn it off and call.
Heat Pump Blowing Cold Air in Heating Mode
In very cold weather, heat pumps extract less heat from outdoor air because the temperature differential between the refrigerant and the air narrows significantly. Most systems compensate with electric resistance backup strips that engage automatically below a set outdoor temperature, typically 35 to 40°F.
When backup heat fails to engage, start by checking the air handler’s auxiliary heat setting on the thermostat. Then inspect the heating strips themselves for a tripped secondary breaker or a visibly burned element. Either issue is diagnosable without tools beyond a flashlight.
A failed defrost control board creates a different version of this problem. Without proper defrost cycles, ice builds on the outdoor coil and blocks airflow entirely. The system runs but the coil is starved of air, so the output feels cold regardless of what the thermostat is doing.
Ice Building on the Outdoor Unit
Light frost on the outdoor coil fins during cold weather is completely normal and expected. The system’s built-in defrost cycle clears it automatically every 30 to 90 minutes. You may see steam rising from the unit during this process. That is the defrost cycle working exactly as designed.
Heavy ice that covers the entire unit, including the top panel, sides, and refrigerant lines, is not normal. It means the defrost cycle is failing to initiate, failing to complete, or cannot overcome the rate of ice formation.
Common causes of abnormal ice buildup include:
- Blocked airflow from debris, leaves, or overgrown landscaping within 12 inches of the unit
- Low refrigerant causing coil surface temperatures to drop far below freezing
- A failed defrost control board that never sends the initiation signal
- An outdoor fan motor that has stopped running, eliminating airflow across the coil
- Ambient temperatures below the system’s rated operating range
Never chip ice off the coil with any tool. The aluminum fins bend with almost no force, and refrigerant lines puncture easily. Turn the system off, allow it to thaw naturally, and schedule a service call to identify why the defrost cycle failed.
Understanding how to defrost heat pump outdoor unit correctly, including which methods are safe and which cause damage, is one of the most practically useful skills a homeowner can develop for cold-climate maintenance.
Water Pooling Around the Indoor Unit
In cooling mode, the evaporator coil removes moisture from indoor air as a byproduct of the cooling process. That moisture collects in a drain pan and exits through a condensate drain line routed to a floor drain or outside. When the line clogs with algae, mineral deposits, or debris, water backs up and overflows the pan.
Flushing the condensate line with diluted white vinegar every two to three months prevents the vast majority of clogs. If the pan is already overflowing, a wet vacuum applied to the drain line access point clears it in minutes.
Water pooling outside near the outdoor unit in winter usually indicates standing water freezing beneath the cabinet. The unit should sit on a concrete pad elevated above typical snow and ice depth. Trapped ice lifts the unit, stresses the refrigerant line connections, and can cause leaks at the fittings.
Thermostat and Control Issues
Modern thermostats communicate with heat pumps through low-voltage wiring carrying multiple signals. When a wire corrodes, loses connection, or shorts against another, the thermostat may display incorrect readings, fail to trigger specific functions, or drop into a default operating mode.
A thermostat that controls a heat pump needs specific wiring terminals that standard thermostats may not support. The O/B terminal, for example, controls the reversing valve and must be configured correctly for the brand of heat pump installed. Incorrect configuration causes the system to heat when cooling is called or vice versa.
Before replacing a thermostat, verify that the new model explicitly supports heat pump systems and that the O/B terminal polarity matches your brand’s requirements. This detail causes more installation frustration than any other single thermostat issue.
DIY Heat Pump Repairs: What You Can Safely Handle
Several genuinely common heat pump problems fall within a careful homeowner’s capability. Attempting these before calling a technician is both reasonable and potentially saves a service call fee.
Replacing the Air Filter
This single task has the highest return on investment of any heat pump maintenance action. A clogged filter restricts airflow, overheats the blower motor, reduces coil efficiency, and causes the system to run longer cycles. Check the filter first whenever performance drops unexpectedly.
Change 1-inch filters every 30 to 60 days in active households. Thicker 4-inch media filters typically last 6 to 12 months. Use the manufacturer’s recommended MERV rating for your system; filters with too high a MERV rating restrict airflow nearly as much as a dirty filter does.
Cleaning the Outdoor Coil
The outdoor coil accumulates a surprising amount of debris over a single season. Grass clippings, cottonwood seeds, and fine dust coat the fins and reduce airflow through the coil. An annual coil cleaning noticeably improves system efficiency and reduces compressor stress.
Turn the system off at the outdoor disconnect box before beginning. Rinse the coil from the inside out using a garden hose, working from the top down through the fins. Never direct the spray from outside inward, as this pushes debris deeper into the coil. Commercial coil cleaners are available at HVAC supply stores for heavier buildup.
Clearing the Condensate Drain Line
As described in the leak section above, this is one of the few heat pump maintenance tasks that requires no technical knowledge and no tools beyond a wet vacuum or a bottle of white vinegar. Make it a seasonal habit rather than a reactive response to an overflowing pan.
Performing a Full System Reset
After a power outage, a lightning event, or a tripped breaker, the control board may hold a fault code that prevents normal operation even after power is restored. A complete reset clears those codes and allows the system to restart cleanly.
Turn off the thermostat completely. Shut the system off at the breaker panel. Wait a full 30 minutes to allow the compressor’s internal pressure to equalize before restart. Then restore power, turn the thermostat back on, and test operation. This single step resolves a meaningful number of calls that would otherwise require a technician.
Replacing the Thermostat
A thermostat that fails to hold setpoints, displays erratically, or shows no response to inputs is a legitimate replacement candidate. This is manageable for most homeowners who are comfortable with basic wiring.
Photograph the existing wiring in detail before removing the old unit. Label each wire with masking tape if the connections are not already color-coded. Use the new thermostat manufacturer’s compatibility checker to confirm the model supports your specific heat pump configuration before purchasing.
Cleaning Indoor Ductless Unit Filters
Wall-mounted ductless units have washable mesh filters behind the front panel that capture dust and pet dander before it reaches the evaporator coil. These filters need cleaning every two to four weeks in active households.
Pop the front panel, slide out the mesh screens, rinse under cool water, let them dry completely before reinserting, and close the panel. This five-minute task has a dramatic impact on ductless system efficiency and indoor air quality.
Repairs That Always Require a Licensed Professional
Several categories of heat pump repair involve legal requirements, safety hazards, or technical complexity that put them firmly outside DIY territory regardless of mechanical aptitude.
Refrigerant Diagnosis and Recharge
Federal law requires EPA Section 608 certification to purchase or handle refrigerants. It is illegal to buy refrigerant without it, and it is illegal to knowingly release refrigerant into the atmosphere. Beyond the legal requirement, improper refrigerant handling creates genuine personal safety risks and can damage the system further.
Refrigerant work includes diagnosing charge level, locating and repairing leaks, and recharging the system to manufacturer specifications. All three steps require manifold gauges, a vacuum pump, refrigerant cylinders, and the knowledge to interpret the readings accurately. This is professional-only territory without exception.
Compressor Replacement
The compressor is the most expensive single component in a heat pump, ranging from $400 to $1,500 in parts alone depending on the system’s tonnage and brand. Replacing it requires refrigerant recovery, full system evacuation, compressor installation, pressure testing, and recharging to exact specifications.
The total cost of a compressor replacement frequently approaches or exceeds 50 percent of a new system’s cost. A licensed technician can run that comparison honestly and help you decide whether repair or replacement makes more financial sense for your specific situation.
Capacitor and Contactor Replacement
Capacitors deserve special attention in this category. They store a lethal electrical charge even after the system’s power is disconnected. A technician uses specific discharge tools to safely bleed the charge before handling. Without those tools and the training to use them, capacitor replacement poses a serious electrocution risk.
Contactors and control boards involve line-voltage electricity that carries the same risk. These are not components to probe with a standard multimeter without proper training. The repair cost for a capacitor or contactor runs $150 to $350, which is a reasonable price for the safety assurance a trained technician provides.
Reversing Valve Replacement
The reversing valve sits inside the refrigerant circuit, brazed directly into the copper line set. Replacing it requires cutting into that circuit, which means recovering all refrigerant first, then cutting out the old valve, brazing in the new one, pressure testing the brazed joints with nitrogen, pulling a deep vacuum to remove all moisture and air, and recharging to specification.
Each of those steps requires specialized equipment and training. A reversing valve replacement typically runs $400 to $700 total, which is actually quite reasonable given the complexity of the work involved.
Coil Replacement
Both the evaporator coil (indoor) and the condenser coil (outdoor) can develop leaks through corrosion, physical damage, or manufacturing defects. Replacing either involves the full refrigerant recovery and recharge sequence plus significant disassembly of the air handler or outdoor cabinet.
Formicary corrosion, a pinhole leak pattern caused by formic acid in indoor air reacting with copper coil tubing, has become increasingly common and is worth discussing with your technician if leaks recur after recharging.
Heat Pump Repair Cost: Real Numbers by Component
Understanding heat pump repair cost before a technician arrives changes the dynamic of every service call. You evaluate quotes from a position of knowledge rather than urgency.
Every invoice combines three elements: a diagnostic or service call fee, parts cost, and labor time. Knowing each component separately lets you identify whether a quote is reasonable or inflated.
Service call or diagnostic fee: $75 to $150 for standard business hours visits. Emergency or after-hours visits typically add $100 to $200 on top of that.
Labor rate: Residential HVAC labor runs $75 to $150 per hour in most markets. Rates in major metro areas skew toward the top of that range.
Repair cost by component:
- Capacitor replacement: $150 to $300 total (parts $10 to $50, balance is labor and service fee)
- Contactor replacement: $150 to $350 total (parts $20 to $75)
- Defrost control board: $200 to $600 total (parts $50 to $200)
- Thermostat replacement: $100 to $400 total depending on model
- Fan motor replacement, outdoor: $250 to $600 total (parts $75 to $250)
- Fan motor replacement, indoor blower: $300 to $700 total (parts $150 to $450)
- Reversing valve replacement: $400 to $700 total
- Refrigerant recharge with leak repair: $300 to $1,000 or more depending on leak location
- Evaporator or condenser coil replacement: $700 to $2,000 total
- Compressor replacement: $1,200 to $2,500 total
Always ask for an itemized quote that separates parts from labor. Cross-reference parts pricing against published distributor catalogs online. If parts are marked up more than 30 to 40 percent above distributor cost and the technician cannot explain why, request a second opinion before authorizing the repair.
Repair vs. Replace: A Clear Decision Framework
The 5,000 Rule gives you a reliable starting point for this decision. Multiply the unit’s age in years by the repair cost in dollars. Results above $5,000 typically favor replacement. Results below $5,000 typically favor repair.
A 14-year-old unit facing an $800 reversing valve replacement scores 11,200. Replacement makes clear financial sense. A 6-year-old unit facing the same repair scores 4,800. Repair is straightforward.
Additional factors that strengthen the case for replacement:
- The system uses R-22 refrigerant, which is now extraordinarily expensive due to phase-out
- The SEER rating falls below 14, meaning a new system would cut energy costs significantly
- Two or more repairs have occurred within the past 24 months
- The compressor has failed on any system older than 10 years
- The unit has a history of refrigerant leaks requiring repeated recharging
Additional factors that strengthen the case for repair:
- The unit is under 8 years old with a strong maintenance history
- A single clearly defined component has failed with no other symptoms
- The system uses R-410A refrigerant, still readily available
- The repair carries a 30 to 90 day warranty from a reputable contractor
When the 5,000 Rule produces a borderline result, energy savings from a new high-efficiency unit often tip the decision. A system jumping from 14 SEER to 20 SEER can reduce annual heating and cooling energy costs by 20 to 30 percent, which accelerates the payback on a replacement investment.
Heat Pump Repair Across Different System Types
Not all heat pumps share the same architecture, and repair considerations differ meaningfully between configurations. Knowing your system type helps you ask the right questions before a technician arrives.
Standard Split-System Air-Source Heat Pumps
This is the most common residential configuration: an outdoor condensing unit connected to an indoor air handler via refrigerant lines and low-voltage wiring. Most of the scenarios described in this guide apply directly to this type. Repair is generally the most accessible and cost-predictable of all heat pump categories.
Ductless Mini-Split Systems
Ductless heat pump repair shares the same refrigerant-cycle fundamentals as split systems but adds failure points unique to the wall-mounted cassette design. Condensate pumps built into the wall units fail when debris clogs the float switch or the pump motor wears. Blower wheels hidden behind the front panels accumulate a thick film of dust and moisture over time, reducing airflow and producing musty odors.
Communication wiring between indoor and outdoor units also creates a failure category not present in ducted systems. Digital communication errors appear as alphanumeric fault codes on the remote control and require brand-specific diagnostic knowledge to interpret accurately. Always look up your model’s fault code list before assuming a major repair is needed.
Geothermal Heat Pumps
Geothermal heat pump repair involves two entirely separate systems that require different technician expertise. The indoor refrigerant circuit works on the same principles as any heat pump and can be serviced by a qualified HVAC technician with geothermal experience.
The buried or drilled ground loop is a different matter entirely. Loop leaks, failed circulation pumps, degraded antifreeze concentration, and air trapped in the loop pipes all reduce performance or cause system failure. Diagnosing loop problems requires pressure testing equipment, flow measurement tools, and in some cases, thermal imaging or tracer gas injection to locate buried leaks. Seek contractors with IGSHPA certification for any ground loop diagnosis.
Commercial Systems
Commercial heat pump repair operates on a larger scale with higher stakes and stricter compliance requirements. Variable Refrigerant Flow systems serving multiple zones simultaneously require brand-certified technicians with access to proprietary diagnostic software. Water-source heat pump systems serving multi-tenant buildings add a shared water loop to the repair equation. Failures in commercial settings carry productivity and lease compliance consequences that residential systems simply do not.
Heat Pump Water Heaters
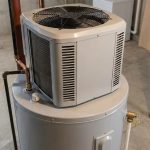
Understanding how does a heat pump water heater work provides essential context for its repair needs. These units extract heat from surrounding air using the same refrigerant cycle as a space-conditioning heat pump, then transfer that heat to the water tank. Common repair items include a washable air filter on the unit itself (often neglected because owners do not know it exists), failed fan motors, refrigerant leaks, and depleted anode rods in the tank.
The same professional boundaries apply to refrigerant work in water heaters as in any other heat pump system. EPA certification is required, and the diagnostic approach mirrors what a technician uses for a standard split system.
Emergency Situations: Acting Fast When the System Fails in Extreme Weather
When heat pump failure coincides with a heat wave or a deep freeze, the situation shifts from inconvenience to potential health risk. Emergency heat pump repair situations demand clear thinking and fast prioritization.
Before calling anyone, run through the basic checks. A tripped breaker, dead thermostat batteries, or an accidentally switched disconnect box resolves a larger percentage of apparent emergencies than most homeowners expect. Confirm all of these in under five minutes before committing to an emergency service call.
If the system is genuinely failed and temperatures are dangerous, 95°F or above or 20°F or below, contact HVAC companies advertising 24-hour emergency service. Confirm pricing upfront. Emergency rates typically run 1.5 to 2 times standard rates, and confirming that number before authorizing a visit prevents billing surprises.
While waiting for a technician:
- Use portable space heaters in rooms with vulnerable family members in winter
- In summer, block direct sun from windows, run ceiling fans, and move activity to the lowest floor
- Identify anyone in the household who may need to temporarily relocate
- Document symptoms, error codes, and when the problem started to speed the technician’s diagnosis
Your home warranty, if active, may cover emergency service fees. Call the warranty company’s emergency line before calling an independent contractor to understand your coverage options in that specific situation.
Seasonal Maintenance: The Highest-Return Investment You Can Make
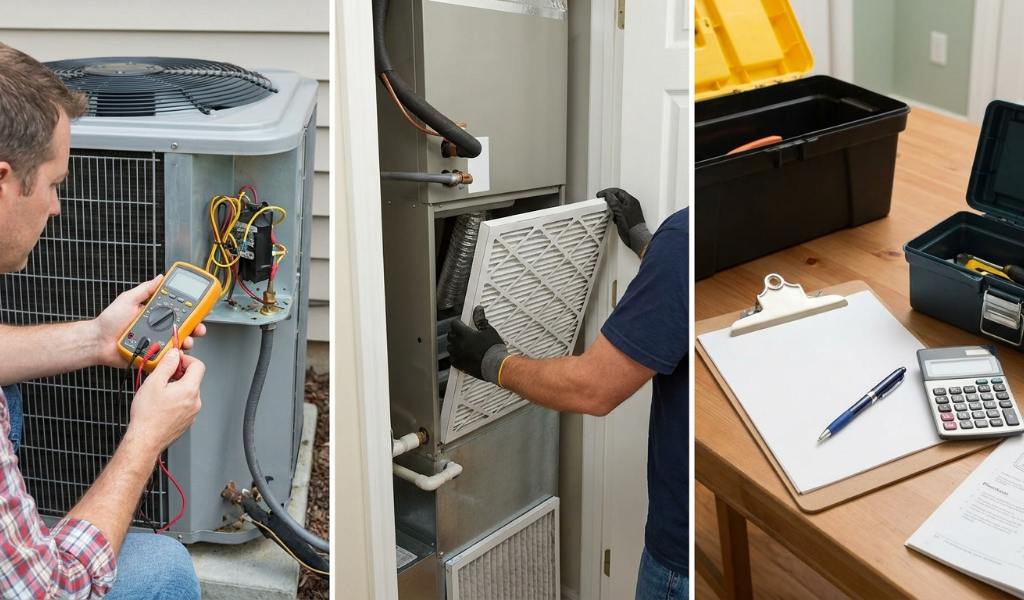
Consistent seasonal maintenance eliminates the majority of avoidable heat pump failures. The technician call you invest in preventively costs far less than the one you make reactively after a mid-season breakdown.
Spring Checklist (Before Cooling Season):
- Replace or clean the air filter before the first extended cooling run
- Clear debris from around the outdoor unit, confirming 12 inches of clearance on all sides
- Rinse the outdoor coil fins from the inside out with a garden hose
- Flush the condensate drain line with diluted vinegar
- Test the system in cooling mode on a mild day before temperatures make it critical
- Inspect the refrigerant line insulation for cracks, gaps, or deterioration
Fall Checklist (Before Heating Season):
- Repeat filter replacement and coil cleaning
- Test the system in heating mode and confirm the auxiliary electric strips engage
- Observe the outdoor unit during cold weather for proper defrost cycle activity
- Test the emergency heat setting on the thermostat
- Inspect the outdoor unit’s base pad for settling or water pooling underneath
Annual Professional Tune-Up
Schedule one professional maintenance visit per year, ideally before the season you rely on the system most heavily. A trained technician checks refrigerant charge with manifold gauges, measures motor amp draws against manufacturer specs, inspects all electrical connections for corrosion and tightening, cleans the indoor coil if accessible, and identifies developing problems before they become failures.
Professional maintenance costs $75 to $150 for a residential system. That annual investment statistically eliminates a significant share of mid-season breakdowns that cost five to fifteen times more to repair.
How the Defrost System Works and Why It Fails
The defrost cycle is one of the most misunderstood aspects of heat pump operation. Many homeowners see steam rising from the outdoor unit in cold weather and assume something is wrong. It is the opposite situation that warrants concern.
The control board monitors both outdoor temperature and coil surface temperature. When coil temperature drops below a set threshold while outdoor conditions favor frost formation, the board initiates defrost. The reversing valve switches briefly to cooling mode, sending warm refrigerant back through the outdoor coil to melt accumulated frost. The outdoor fan shuts off during this process to prevent cold air from counteracting the warm refrigerant.
The whole cycle takes two to ten minutes and repeats every 30 to 90 minutes in cold, humid conditions. Steam rising from the unit, the outdoor fan pausing, and the reversing valve clicking are all normal defrost cycle indicators.
When the defrost system fails, one of three components is typically responsible. The defrost control board fails to send the initiation signal. The defrost sensor provides incorrect temperature readings, so the board never sees conditions that trigger defrost. Or the reversing valve sticks and cannot switch modes even when the board sends the correct signal.
All three require a professional diagnosis. The sensor and control board are relatively affordable repairs. A stuck reversing valve during defrost diagnosis often confirms the valve needs full replacement, which is the more significant repair in this chain.
How to Evaluate a Heat Pump Repair Technician
The quality difference between reliable HVAC contractors and problematic ones is wider than most homeowners realize. These criteria filter effectively before you authorize any work.
EPA 608 certification: Required by federal law for anyone handling refrigerants. Ask to see documentation. Any hesitation is a warning sign.
NATE certification: North American Technician Excellence certification represents documented technical competency beyond the minimum licensing requirements. Not every excellent technician holds it, but its presence is a strong positive signal.
Specific local reviews: Look for reviews that name individual technicians, describe actual problems diagnosed, and confirm transparent pricing conversations. Generic five-star reviews without specifics are easy to fabricate and offer little useful information.
Written estimates before work begins: A reputable company provides a written scope of work and itemized pricing before any parts are ordered or installed. Verbal estimates allow prices to shift after the fact.
Warranty on parts and labor: Quality HVAC contractors warranty their repair labor for 30 to 90 days and pass through manufacturer warranties on parts. Ask about this specifically before authorizing work.
No pressure on same-day decisions: A technician insisting that you must authorize a major repair immediately or face permanent system damage is applying undue pressure. A genuine professional gives you time to consider and, if needed, get a competing quote.
Clear diagnostic communication: A trustworthy technician explains what failed, what evidence supports that conclusion, and what the repair involves before discussing price. Vague diagnoses like “your system needs a full service” in response to a specific symptom are not diagnoses at all.
What a Professional Repair Visit Actually Looks Like
Knowing what a proper service visit involves helps you recognize whether a technician is being thorough or cutting corners.
A quality visit begins with a conversation. The technician asks about symptoms, how long they have been occurring, and whether anything changed recently. This context guides the entire diagnostic process and prevents time spent chasing irrelevant components.
Visual inspection follows. Both the indoor and outdoor units receive a physical check for obvious problems: ice formation, oil stains indicating refrigerant leaks, visibly damaged wires or components, and debris inside the outdoor cabinet.
Electrical testing comes next. The technician checks voltage at the disconnect, measures capacitor microfarad values against specification, tests contactor contact resistance, measures motor amp draws against nameplate ratings, and inspects the control board for burned terminals or stored fault codes.
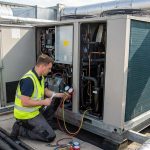
Refrigerant-side testing involves attaching manifold gauges to the service ports and reading suction and discharge pressures. Combined with temperature measurements at multiple points in the system, these readings tell a trained technician the refrigerant charge status, compressor efficiency, and reversing valve function in minutes. No guessing is involved in a proper refrigerant diagnosis.
The technician then provides a written, itemized diagnosis with specific parts and labor pricing before you authorize a single dollar of repair work. That written document is your protection as a consumer. Never allow work to proceed without it.
Understanding Refrigerant Types and Their Impact on Repair
The refrigerant your heat pump uses significantly affects repair options and ongoing costs. This detail matters more now than it did a decade ago.
R-22 (Freon): Production ended in 2020 under the Montreal Protocol’s phase-out schedule. Existing supplies are now very limited and extremely expensive, with prices sometimes exceeding $100 per pound. If your system uses R-22 and develops a leak requiring recharge, the refrigerant cost alone may make the repair uneconomical. Verify your system’s refrigerant type before receiving any repair quotes.
R-410A (Puron): The dominant residential refrigerant through the 2010s and early 2020s. Still widely available and reasonably priced. If your system uses R-410A, refrigerant-related repairs remain economically viable in most cases.
R-32 and R-454B: Newer refrigerants with lower global warming potential, now appearing in systems produced after regulatory updates. These require technicians familiar with their specific handling properties, as R-32 is mildly flammable. Both remain relatively niche in the installed base but will become increasingly common in new systems going forward.
Knowing your refrigerant type lets you have a more informed conversation with any technician you call, particularly around leak repair and recharge decisions.
Heat Pump Efficiency and How Repairs Affect It
A heat pump’s efficiency is measured by its Coefficient of Performance (COP) in heating mode and its Seasonal Energy Efficiency Ratio (SEER) in cooling mode. Both decline as components wear or fail, often before a complete breakdown occurs.
A refrigerant charge that is 10 percent low reduces system efficiency by approximately 5 percent and forces longer run cycles. A 20 percent undercharge can reduce efficiency by 20 percent or more. Homeowners notice this as higher utility bills long before the system stops working entirely.
A dirty outdoor coil reduces heat transfer efficiency similarly. Studies on coil fouling consistently show that a coil with a thin layer of debris operates at meaningfully lower efficiency than a clean one. The annual coil cleaning described in the maintenance section is not cosmetic. It is a direct efficiency intervention.
A failing capacitor causes the compressor to draw higher starting current each cycle. Higher current draw stresses the compressor motor windings and increases operating costs. Replacing a weak capacitor before it fails completely is one of the best-value preventive repairs available, typically costing $150 to $200 on a proactive basis versus $250 to $300 as an emergency call after complete failure.
Proactive Parts Monitoring: What to Ask Your Technician
During an annual professional tune-up, ask your technician to measure and record these values for future comparison. Tracking them over multiple visits reveals developing problems before they cause failures.
- Capacitor microfarad reading: Capacitors are rated at a specific value. When measured capacity falls more than 10 percent below the rated value, the capacitor is weakening. Replacing it proactively costs less than an emergency call.
- Motor amp draws: Both the compressor and fan motors have nameplate amp ratings. When measured draw approaches or exceeds those ratings, the motor is working harder than designed. Early motor replacement prevents mid-season failures.
- Refrigerant subcooling and superheat: These calculated values confirm the refrigerant charge is correct. Tracking them across years reveals slow leak development before the charge drops to a problematic level.
- Entering and leaving air temperatures: A properly functioning system should produce a specific temperature differential across the coil. Shrinking differential indicates declining heat transfer efficiency.
A technician who willingly shares these readings and explains their significance is a technician worth keeping. These numbers tell the real story of a heat pump’s health more accurately than any visual inspection.
Frequently Asked Questions
How long does a typical heat pump repair take?
Most single-component repairs take one to three hours once the technician arrives with the correct part in hand.
Can I add refrigerant to my heat pump myself?
No, handling refrigerants requires EPA Section 608 certification, and purchasing refrigerant without it is federally illegal.
What is the first thing to check when a heat pump stops working?
Check the thermostat settings and batteries first, then inspect the breaker panel for a tripped circuit before calling a technician.
How do I know if my heat pump needs repair or full replacement?
Multiply the unit’s age in years by the repair cost in dollars; if the result exceeds $5,000, replacement is typically the smarter financial decision.
Is it normal for a heat pump to blow cool air in heating mode?
Briefly cool air during the defrost cycle is normal, but consistently cool air in heat mode indicates a backup heating or refrigerant problem.
Conclusion
Heat pump repair is rarely a mystery once you understand the system and know what to look for. Start with the simple checks every time. Understand clearly where the DIY boundary sits and where the professional’s territory begins. Know real price ranges before any technician arrives so you evaluate quotes from a position of knowledge.
A well-maintained heat pump reliably delivers 15 to 20 years of efficient service. The homeowners who get that full lifespan are the ones who change filters consistently, schedule annual tune-ups, act on early warning signs, and choose technicians based on credentials and transparency rather than lowest price.
If your system is showing any of the symptoms covered in this guide, do not wait for a complete breakdown. Contact a licensed HVAC technician, ask for a written diagnosis, and make your repair or replace decision with real numbers in hand. Taking action early almost always costs less than waiting for the worst possible moment.