Replacing flexible ductwork with rigid is one of the best infrastructural improvements you can make to your home. Flexible ducts are easy to install and replace, but over time they become brittle and inefficient conductors of heat. When this happens, it can lead to higher energy bills, so replacing your old ducts with new ones made from stronger materials is a smart move.
Tips for replacing flexible ductwork with rigid
Flexible ductwork is more difficult to install than rigid. However, if you’re just looking for something that’s easier to fit in tight spaces and don’t care much about how long it lasts, then flexible ductwork may be for you. But if your goal is long-term performance or durability, rigid ductwork is the way to go.
The reason why flexible ductwork may last shorter than rigid is because of its material flexibility and susceptibility to damage from bending and pulling. This can lead to cracks or tears in the rubber casing which can leak air flow—sometimes even causing fire hazards as a result! On top of this, flexible pipe also tends to get damaged more easily by insects like cockroaches and rodents chewing through them (if they’ve found their way into your home).
In terms of efficiency at conducting heat/cold: Rigid pipe conducts heat better because metal pipes are better conductors than plastic ones! The same applies when it comes insulating noise as well; metal will block out more sound waves than plastic ones would because metal has lower acoustic impedance than plastic does – which means less sound travels through it without getting lost along the way!
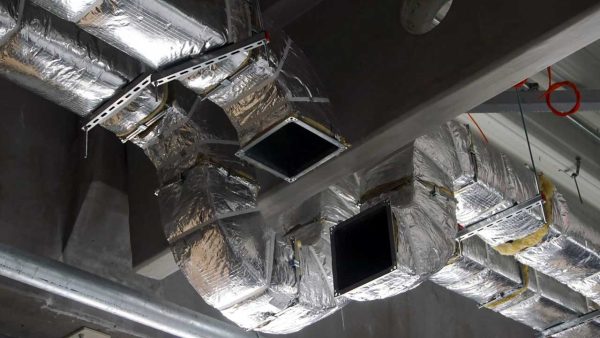
Replace flexible ductwork with rigid and then insulate it
To prevent the heat from escaping, insulate the ductwork with a layer of insulation. The best type of insulation to use is fiberglass, which can be found at most hardware stores and home improvement centers. Once you have purchased your fiberglass rope and installed it into your new rigid ductwork, your entire system will be ready for use!
When replacing flexible ductwork with rigid and then insulating it, keep in mind that some materials may not be compatible. For example: if you decide to cut up an old couch mattress or old piece of carpeting for some extra padding for your heating system’s outer walls (this step isn’t necessary), make sure that these products aren’t made out of formaldehyde or other toxic substances that could affect anyone who comes into contact with them over time–even if they’re just temporarily touching them while walking through their house every day after work!
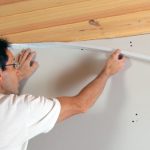
Make sure you have the strength to remove the flexible ductwork
It’s important to note that you will need to be strong enough to handle the removal and installation of both flexible and rigid ductwork. Specifically, if you are working alone, it will be difficult for you to remove flexible ductwork without help. You might consider having a helper on-site or enlisting some “muscle” for assistance if possible.
If your flexible ductwork is attached to the ceiling joists or rafters, it may be necessary for someone else with an additional set of hands—or even two people—to lift the rigid metal ductwork up while you cut through any existing connections between them.
Use a saw to cut through the metal (ductwork)
To cut through the metal (ductwork), use either a hand saw or power saw with a metal cutting blade. Make sure you have the strength to cut through the ductwork, and wear eye protection and gloves to protect yourself from flying debris. Wear ear protection as well—the noise from cutting will be loud! Keep in mind that your surroundings may get dusty or dirty when you’re working on this project, so keep everyone else out of the area until you’ve finished.
Put on safety goggles before you begin cutting the metal
The first thing you should do before beginning any work is to put on safety goggles. Safety goggles will protect your eyes from metal shavings that can fly into them while cutting through metal. This is a good idea for anyone who’s cutting through metal, whether they’re replacing flexible ductwork with rigid or doing any other kind of construction/remodeling project that involves metal.
Wear work gloves when you are cutting through the metal so that your hands don’t get cut by the sharp edges
Wear work gloves and safety goggles when you are cutting through the metal so that your hands don’t get cut by the sharp edges, and wear a dust mask to protect your lungs from dust and debris. We suggest wearing a hard hat too, especially if there is a chance that something could fall on you.
Cut through all of the screws first before removing them
The first step to removing flexible ductwork is to cut through all of the screws first before removing them. This is important because if you remove a screw before cutting it, there is a chance that it could fall down and cause injury or damage. After you’ve cut through all of the screws, remove them from their holes and put safety goggles on so that you don’t accidentally poke your eyes out with tiny pieces of metal while working on your project. Finally, wear work gloves so that if there are any sharp pieces left over after removing the flexible ductwork they do not slice open any part of your body while working on your project!
Put a tarp on the floor in case there are any loose screws or sharp pieces that fall down while working on your project
We recommend putting a tarp on the floor before you begin working on your project. This will protect your floor from any loose screws or sharp pieces that may fall down while you’re changing out the flexible ductwork with rigid. If you don’t have a tarp, be careful when working during this process!
Conclusion
If you are having trouble with your flexible ductwork, then it is time to replace it with rigid. This will be a much better choice for your home than the old flexible ducts. It will also save you money in the long run because this type of insulation lasts longer than standard fiberglass insulation.