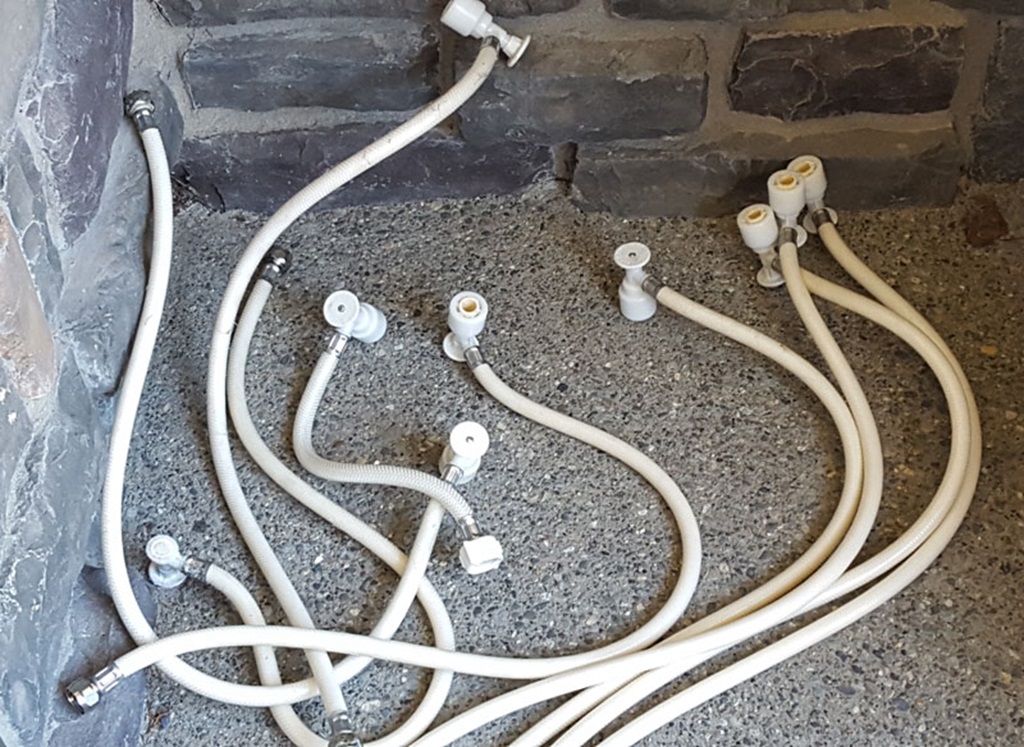
Plastic push-pull valve are a popular type of water shut-off valve found in many homes. As useful as they are for quickly stopping water flow, push-pull valves can develop problems over time that prevent them from working properly. This can lead to leaks, the inability to turn the water fully on or off, and other annoying issues.
In this guide, I’ll cover the most common plastic push pull water valve problems with push-pull water valves and how to troubleshoot them. Whether you’re dealing with a leaky valve, stiff valve, or completely stuck valve, this guide will walk you through the likely causes and solutions. Read on to learn how to diagnose and fix plastic push-pull valve problems yourself.
How Do Push-Pull Water Valves Work?
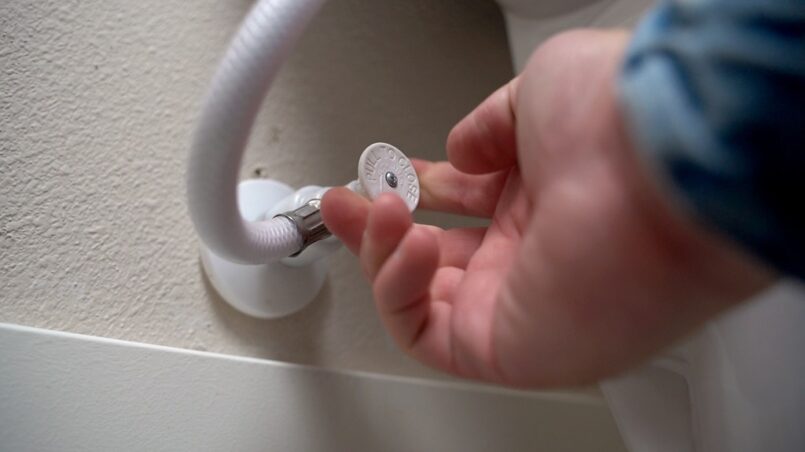
Before diving into troubleshooting, let’s quickly review how these valves work. A plastic push-pull valve is a shut-off valve that allows you to manually turn the water flow on and off with a simple push or pull of the valve handle.
Pushing the handle in opens the valve and allows water to flow. Pulling the handle out closes the valve and stops water from flowing through. Inside the valve, a plastic stem with seals moves up and down as the handle is pushed and pulled. This direct mechanical action provides quick and easy water shut-off capability.
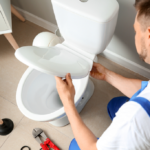
Push-pull valves are commonly installed under sinks on the water lines supplying faucets and appliances. They allow you to individually turn off water to a specific sink or appliance as needed for repairs. They also serve as emergency shut-off valves in case of leaks or other water emergencies.
What Causes Plastic Push Pull Water Valve Problems?
There are a few common reasons plastic push-pull water valves start having issues:
- Mineral buildup – Hard water deposits and mineral sediment can collect on the internal seals and mechanics of the valve over time. This interferes with the sealing and movement of the valve’s internal stem.
- Seal failure – The rubber seals inside the valve stem can wear out or get dislodged. This allows water to leak through the valve even when it’s supposedly closed.
- Internal parts warping – Plastic internal components can warp or bend over time, preventing smooth operation and sealing.
- Corrosion – In metal-body valves, corrosion can impact the valve’s performance.
- Sediment or debris – Particles and debris in the water lines can sometimes get lodged inside the valve.
Regular maintenance like exercising the valve can help prevent some of these issues. But after years of use, malfunctions are common. Let’s look at the specific symptoms and solutions for the most frequent plastic push pull water valve problem.
Troubleshooting a Leaky Push-Pull Valve
One of the most annoying push-pull valve issues is when the valve leaks from the spout after you shut off the water. This is typically caused by worn or damaged internal seals.
Here’s how to fix it:
Step 1 – Turn off the water supply lines to the valve if possible. This minimizes water leakage during the repair.
Step 2 – Dismantle the valve by removing any handle screw or cover and taking out the internal stem assembly. Inspect the seals for wear or cracks.
Step 3 – Replace the valve stem seals with new equivalents. Apply the plumber’s grease before reinserting the stem. This improves sealing.
Step 4 – Reassemble the valve and turn the water back on. Test for leaks with the valve in the closed position. If it still leaks, further disassembly and replacement of additional seals may be needed.
Step 5 – If leaks persist after replacing all seals, the entire valve likely needs replacement. Severe internal corrosion or warping can prevent full sealing even with new seals.
Replacing worn seals is often the solution to a leaky push-pull valve. But if seals are cracked or valve damage is extensive, a new valve will be the only permanent fix.
Fixing a Stiff or Sticking Push-Pull Valve
Hard water buildup and corrosion are common causes of push-pull valves that are difficult to operate or get stuck partway through their range.
Here are tips for freeing up a stiff valve:
Step 1 – Spray penetrating oil or lubricant like WD-40 into the inner workings of the valve. Work the valve handle back and forth to spread the lubricant internally.
Step 2 – Mix a bowl of hot vinegar and let the valve stem soak for 30-60 minutes. The acidity helps dissolve mineral deposits that may be jamming the valve.
Step 3 – Use an old toothbrush or pipe cleaner to gently scrub the valve seals and stem while holding the valve partially disassembled. This removes hard water deposits.
Step 4 – If the valve handle moves but water doesn’t fully shut off, replace the valve stem seals as previously described. Worn seals prevent complete closure.
Step 5 – For a thoroughly stuck valve, take it apart, inspect it for warping or damage, and replace any warped parts. A valve that cannot be taken apart may need to be cut out and replaced.
With some cleaning and manual loosening, you can often get a sticky valve working smoothly again. But if the inner parts are badly corroded or bent, a replacement will be needed. Try the lubricating and soaking steps first before replacing the entire valve.
What To Do With a Completely Stuck Push-Pull Valve
A push-pull valve that’s completely stuck and won’t budge at all is highly frustrating. This is often caused by severe internal corrosion or deformation of the valve body and stem.
You can attempt these steps to free a stuck valve:
Step 1 – Use a penetrating lubricant like Liquid Wrench or PB Blaster. Spray it into the valve openings and let it soak for 15-20 minutes. The lubricant may loosen things up.
Step 2 – Tap gently around the sides of the stuck portion with a hammer. The vibration can help break loose corroded or stuck parts.
Step 3 – Try wedging a wood block or dowel into the valve openings and tapping firmly to wedge things loose. Don’t damage the valve body.
Step 4 – If possible, remove any decorative covers or the valve handle to access the valve internals. Attempting to twist or pry the valve stem directly can free it up.
Step 5 – Heat expands metal. Using a hair dryer or heat gun, apply heat around the stuck portion of the valve for several minutes then try working it loose while still warm.
Step 6 – If all else fails, cut the valve out with a rotary tool or reciprocating saw and replace it. Severe internal seizure usually requires valve replacement.
A totally stuck valve often must be cut out to restore water flow. But first try less destructive measures like lubricants, vibration, and heat to revive the valve if possible before replacing it entirely.
Additional Push-Pull Valve Troubleshooting Tips
Here are a few other helpful pointers for diagnosing and fixing issues with plastic push-pull water valves:
- Exercise the valve regularly by fully opening and closing it several times per year. This prevents mineral deposits from cementing it in place.
- Lubricating the seals with a plumber’s grease can improve valve closure and prevent leaks. Re-apply grease when servicing the valve.
- If water flow through the valve is reduced, check for trapped debris or sediment in the valve body and clean it out.
- Slow leaks may be fixed by tightening the valve’s packing nut to compress the stem seals. Don’t over-tighten.
- For frequent valve use, install a metal-body valve rather than plastic. Metal resists wear better in the long term.
- Ensure any parts replaced during repairs match the originals. Mixing valve components can impair performance.
With proper maintenance and some DIY troubleshooting when problems arise, a push-pull valve can provide decades of reliable service. Follow the steps in this guide to get your leaky, stiff, or stuck valves working properly again.
Conclusion
Plastic push-pull valves provide a convenient way to quickly turn water on and off in sinks, appliances, and more. But they can wear out over time, leading to leaks and stiff operation. With the troubleshooting tips provided in this guide, you can now confidently diagnose common plastic push pull water valve problems and make necessary repairs.
Key steps include replacing worn seals, removing mineral deposits, lubricating stuck parts, and forcing out corroded components. In extreme cases where the valve refuses to budge, replacement may be necessary. But often these valves can keep working properly for years longer with some occasional TLC. Maintain and repair your push-pull water valves using the advice in this article to keep them functioning smoothly.
Frequently Asked Questions
1. What are the main causes of push-pull valve leaks?
The most common causes of leaks in push-pull valves are worn-out or cracked internal seals and O-rings. Mineral deposits, corrosion, and general wear over many years can cause seals to fail. Replacing these seals usually fixes minor leaks.
2. How do I get a push-pull valve unstuck?
To free a stuck push-pull valve, use penetrating lubricants and let them soak in for 15-20 minutes. Gently tap on the stuck portions with a hammer to vibrate things loose. As a last resort, you may need to cut out the valve if it refuses to budge.
3. Should I replace a leaky push-pull valve or try to rebuild it?
Try rebuilding and resealing the valve first. If the internal components are too corroded or damaged to seal properly after rebuilding, then full replacement is needed. But rebuilding can often extend the valve’s life.
4. What precautions should I take when servicing a push-pull valve?
Shut off the water supply lines before disassembling the valve to prevent splashing or leaks. Wear protective eyewear when disassembling valves as trapped water pressure may cause parts to spring outward.
5. How often should I maintain or exercise my push-pull valves?
You should fully exercise each push-pull valve at least 2-4 times per year. This helps prevent mineral deposits from gluing the valve internals in place over time with a lack of use. If you have hard water, exercising the valves every couple of months is even better. Just remember to fully push in and pull out the valve handle all the way during exercise.