In the dining room at home, there is a wall that looks like a natural place for a fireplace. If we add to this the beauty, it can bring to the place and everything that having a fireplace represents. It seems like a good option. Like any project I face, it begins with a paper, a drawing in broad strokes, and then a more serious plan of the work — problem Statement. In this article, we present how to make a fireplace more efficient.
How to make a fireplace more efficient?
To start thinking about this, I start with the most important thing, the chimney itself, that is the flue pipe. My house has 2 floors, and it is not easy to put a home in the ideal place for that and go to heaven with a hole. Of all the options we considered, we decided on a 20 cm diameter tube that we can put in such a way that it is inside the home and that it passes through the gallery on the top floor, radiating heat to the environment.
That diameter results from the following calculation
The rule dictates that the smoke outlet area must be at least 1/12 of the air intake area. There we have about 60 x 90 cm (if the rest of the cobblestones would be about 55 x 90 that gives me 4,950 Cm². The 20 cm diameter tube has an area of 10² x 3.14 that is 314 Cm². The twelve-part of the entrance is 412 cm². I am a little down. I estimate that being so tall and straight, it will work anyway.
After taking the measurements, I make a cardboard template where I make the whole layout of the upper floor and on the other side, the part of the ceiling of the dining room so that when I present it above and below, I can project the position of the chimney.
With those traces I begin to design the home, as I am a screwed I intend to take full advantage of the calories generated so the design contemplates hollow walls, with oriented air circulation. It will be heated by convection and will bring the heat to the environment.

Design
I will use concrete bricks for its construction since they are easy to install, fast forward and given their cavities allows me to do the internal circulation. I make plans by layers, to calculate exactly the necessary materials and use a plan for each upward course. Maybe it’s not the best way, but it’s the first thing that occurred to me.
After designing how to make a fireplace more efficient, I start to solve how to continue. I have everything more or less resolved up to the forty meters high, but continuing up to these blocks seems crazy, they are very heavy, expensive and not justified.
Let’s start, first I raise the floor of the previous area drawn with chalk of the place; It should be noted that the dining room floor will be the next thing I will attack since everything is broken for several reasons that are not relevant, the truth is that little ball I give the matter as it will be changed. I put the concrete bricks that will be the base to see what it is. I manufacture 2 templates of the 2 types of bricks that I will use in order to make the relevant holes for communication between them.
Assembling
I assemble the base with the matching holes in the rear’s case and the sides. The objective of this is that through the 4 central alveoli between fresh ambient air and circulate by simple thermal through the bottom wall, then leaving gaps for that air to escape in the upper part; the same will happen with alveolus 0 and 5 say, but feeding the side walls. In this way, I take full advantage of calories and save on thermal insulation. I separate the whole of the wall with a cementitious plate, which, although I have not bought yet, I already have the design and I now put a Durlok hitch to leave the space. The design is very simple, stack the bricks and climb. I will make the base with 10 x 10 pavers, which I am choosing for its shape and size.
Structure
I anticipate the corners that will be two similar brick, filled with rubble and tile up. We already have 3 courses of concrete bricks. The corners and the base of cobblestone fire. We take care of the surrounding floor; I’m preparing templates with pizza boxes and cutting the pieces. In parallel, I go up with the structure, I arrive at the third row of the gaps and start working on the closure. I put an angle of 2″ to support the tiles; It is robust because they are very heavy, I make openwork in the bricks so that they contain the angle.
I also make some holes to put some ¾” pipes that I had thrown on the terrace to give structure to a prism that I will make with 2 objectives; one that allows supporting a stick-up and two that divert the fumes inwards. I made a cardboard template with the side of the tile to mark 2 holes in both the brick and the tiles themselves. That way I lose 6-bit ribbing cuts so they hold better. Finished the front, I make the flagstone of the front. Both the chimney and the external part I plan to make it with a cementitious plate; I make a volley calculation of the quantities and buy 3 plates. I make scale templates of the pieces I want and the plates to optimize the cuts.
From here also 2 pieces come out for the slab, one from the side below, supported on the angle and locked with the highest spout; another one up to contain the material. The pipes remain inside by structure but will not be seen. I go to my friend Daniel Quebracho and choose a sleeper for the lintel; I bring it to me. I choose 2 good faces for the top and the front. I add a course more than 2 holes to the sides, the finest back and the front with tiles. I climb one more course with the gaps of 10 cm at the bottom and tiles on the periphery. It is difficult to cut them vertically at 45º for the match since they are very rude.
Chimney
I attack the chimney properly; I put some Durlock profiles against the wall with a Fisher every 20 cm. And I start to prepare the cementitious pieces. I am presenting and adjusting the parts so they stuff in the ceiling and I think how to make them warm since it is difficult to put the screws inside because I enter from below but it does not pass my chest and from above I could put some if the holes are made and it is only put your hand and screw them up.
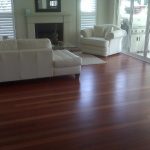
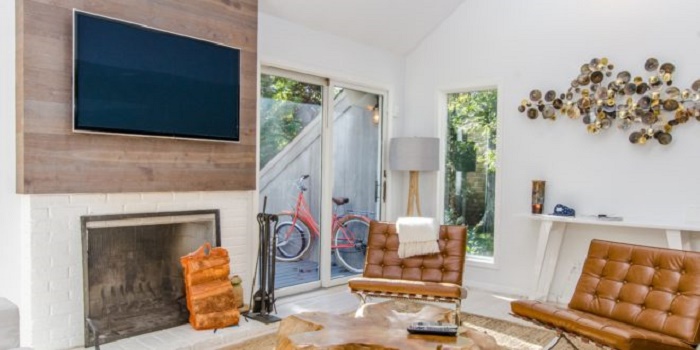
In the middle of the work and as you can see in several photos, additional decorations appear as I work on this project on weekends and then everything is assembled to follow the normal life of the house. Here, my birthday was celebrated and the place was decorated for that purpose. We continue with the floor of the sides, as the cuts are complicated a bit since the tiles are parallel to the edges.
I make some cardboard templates in the shape of the tiles that are 40 x 40 cm. And I am adjusting them to the place they will occupy. Then I make the cuts and I assemble the pieces. And fucking that I am the cuts that are straight and go to the edges roughing them a bit with the grinder to give a similar finish to the original bevels of the tiles.