Some people might not know how to install garage door weather stripping, but if you’re one of them, we’ve got the answers you need. This blog article will help you install siding in your garage so that it’s done right, without any headaches and surprises along the way.
Weather stripping is an effective way to keep drafts out of your garage. It can also help prevent moisture and corrosion from building up in the garage. The most important thing to remember when installing weather stripping is to use the right type for the job. Discover does polyester stretch?
How to Install Garage Door Weather Stripping
Weather stripping is a great way to keep your garage door from sticking, rattling, and making weird noises. It also helps to keep the inside of the garage warm in the winter and cool in the summer. This guide will show you how to install weather stripping on your garage door.
Here are four easy steps to installing garage door weather stripping:
1. Measure the width of the strip you’ll need and buy the appropriate length of strip. You’ll also need to buy a few extra inches so that you have enough material to overlap the ends of the strip by 1-2 inches.
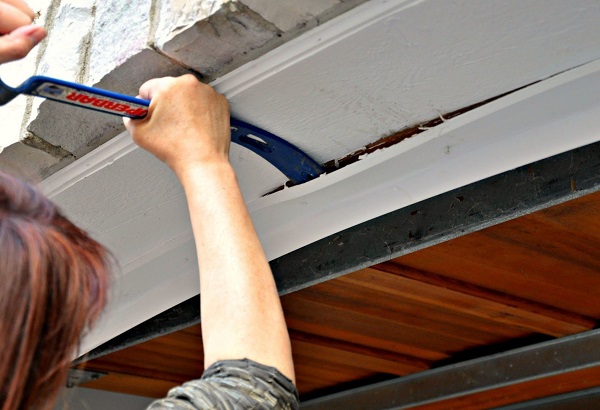
2. Remove any existing screws that hold your door closed.
3. position the strip on the inside edge of one garage door panel, with the long side facing outwards. Make sure that the edges of the strip are lined up with the edge of the panel.
4. Apply pressure to both ends of the strip, and screw it into place using screws that were already removed from Step. Be sure to tighten these screws evenly all around so that there is minimal movement in your garage door during Extreme Weather Conditions!
Tools and Materials Needed
-Stripping tool
-Ruler or straight edge
-Measurement tape
-Garage door weather stripping
-Cordless drill with 1/2 inch bit
-1 inch hole saw blade
-1 inch hole saw bit (optional)
-1 inch hole saw guide (optional)
-Paintbrush or roller
-Chisel or cutting wheel
-Sandpaper, medium grit or finer
When you’re completing your garage door weather stripping project, it’s important to have all of the necessary tools and materials on hand. Here’s a list of what you’ll need:
Stripping Tool: You’ll need a stripping tool to cut the strips of weather stripping. This can be a ruler or straight edge, along with measurement tape for determining the length of the strip. A cordless drill with a 1/2 inch bit is necessary for drilling the holes in the door. Do you know how much does a cast iron tub weigh?
Hole Saw Blade: You’ll need a hole saw blade to cut the holes in the door. The size of these holes will depend on the thickness of your weather stripping.
1 Inch Hole Saw Bit: If you’re using 1 inch hole saw bits, you ‘ll need a thick plastic cutting board to protect your work surface. This is the least expensive type of tool, and it’s cheap enough that you can buy a second spare in case you lose or break one. The blade might be plastic, so handle with care.
Sandpaper and Sanding Block: You’ll need sandpaper for roughing up the edges of the door and for smoothing out any imperfections in the weather stripping. For roughing up the edges of the door, use about 400-600 grit sandpaper. This will leave a very rough surface that’s easy to grab on to, but it won’t take off much material from the surrounding area.
Tips for Successful Installation
1. Follow the manufacturer’s instructions carefully.
2. If your garage door is old, it might not have weather stripping installed around the edge. You can install this yourself by following these steps: take a piece of 1/4-in.-thick plywood or Masonite and cut it to fit around the edge of your door, with a slight overhang on the top and bottom. Measure and mark the edges of the plywood so you know where to cut them; then use a jigsaw or coping saw to make the cuts. Nail or screw the plywood in place using galvanized screws or lag screws, depending on your door’s construction.
3. Apply weather stripping to both sides of the door using either double-sided adhesive tape (available at most home improvement stores) or strips of 1/4-in.-thick metal weather stripping that come in rolls (you will need two per side).Remove any wrinkles or bubbles from the strips before attaching them to the door by pressing them firmly against the surface they are going to cover, then pulling up on both ends of the strip until it snaps into place. Repeat on the other side of the door.
Conclusion
Whether you are a homeowner or a contractor, it is important to keep your home properly insulated in order for it to be comfortable inside and out during the winter months. One of the most effective ways to do this is by installing garage door weather stripping. This article will explain how to install garage door weather stripping and provide some tips on choosing the right type for your home.