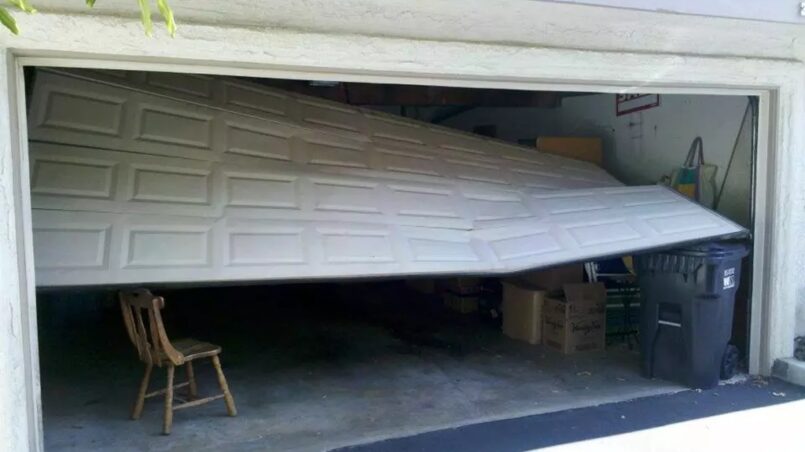
Dealing with a dent in your garage door can be annoying. You’re reminded that your property got damaged every time you see it. Even worse, it just doesn’t look nice! Luckily, you don’t need to call a professional to fix a dented garage door. You can knock out that dent with some essential tools and elbow grease. Then you can get your garage looking good as new again.
In this guide, I’ll walk you through the steps for fixing a dent in your garage door. We’ll cover how to fix a dent in a garage door. By the end of this guide, you’ll have the knowledge to fix that frustrating dent yourself. Then you can spend the money you saved on something more fun than house repairs!
Assessing the Dent and Garage Door Type
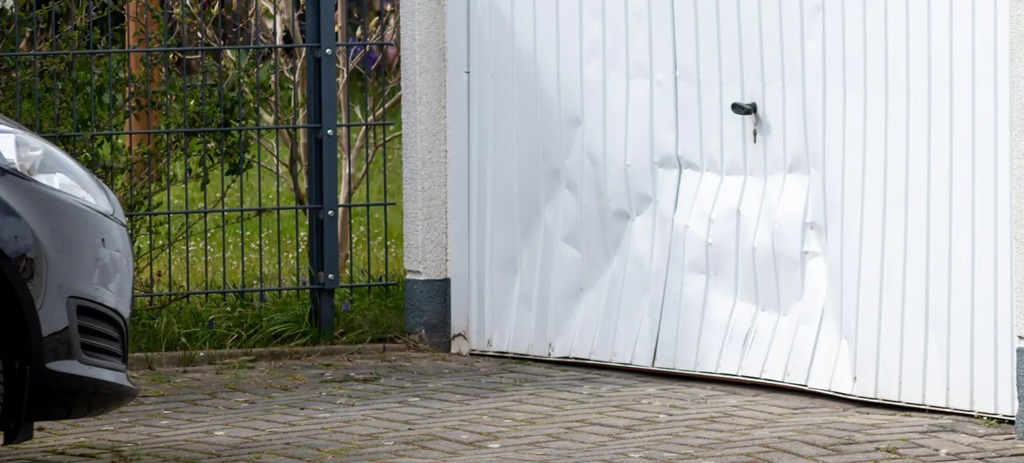
Before you pull out your tools, take a minute to examine the dented area. Determining the specifics of the damage will guide your repair approach. It also helps to know what material your garage door is made of.
Identifying the Severity and Size of the Dent
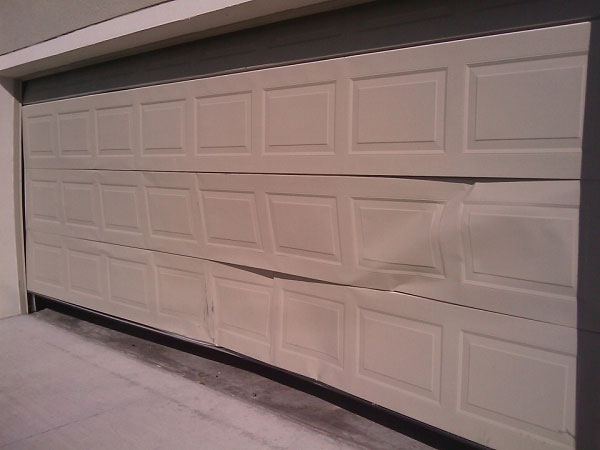
First, look at the depth of the dent. Is it a minor surface-level dimple? Or does it have sharper, deeper contours? Pay attention to the length and width, too. Measure across the longest and widest parts of the dent to know the coverage area.
More significant, deeper dents likely need more intensive repairs. You’ll need to apply filler and sand it smooth. More minor dings can usually be fixed with just a plunger. Knowing the scope of damage helps you plan the entire repair process.
Checking the Door Material
Standard modern garage doors are made of aluminum, fiberglass, steel, or wood. Examine your door to determine the material. Each requires slightly different prep and repair work.
Steel dents the easiest but also pops back out the easiest. Fiberglass and aluminum won’t dent as easily but may crack. Wood is the most delicate and will need filler.
Understanding your garage door material tells you how much pressure and force you need to pop the dent. It also dictates what filler or paint works best for aesthetic repairs.
Gathering Dent Repair Supplies You’ll Need
Fixing a garage door dent isn’t too complicated. But having the right tools for each step makes a difference. Here are the basic supplies I recommend having on hand:
- Pry bar – A long, stiff pry bar gives extra leverage for popping out dents. Get one at least 18″ to 24″ long.
- A rubber mallet – A 2-4 lb rubber mallet lets you hammer the pry bar for added force. Never use a metal hammer directly on the door.
- Plunger – For minor dents, a regular household plunger can work great. Get one with at least a 6″ suction cup.
- Suction cups – Suction cups designed for dent repair attach to drills for pulling out dents. They give you more control than a plunger.
- Drill – A standard electric drill works with suction cups. It needs to generate 75+ lbs of pulling force. A cordless drill usually won’t cut it.
- Body or wood filler – The filler smooths over holes and depressions after pulling the dent. Match it to your door material.
- Sandpaper – An orbital sander makes quicker work of it, but you can sand by hand. Use 120 to 220 grit.
- Primer – Primer helps new paint adhere after sanding. Use exterior-grade primer matched to your paint.
- Paint – Garage door paint is formulated to handle weather and sun exposure. Get the right color to match your existing door.
You probably have some of these supplies already at home. Pick up any other items at your local hardware store. Now, you’ll be fully prepped to fix that unsightly dent!
Preparing the Garage Door Surface
Before popping out the dent, you must prepare the door properly. Follow these steps to get it ready for repairs:
Clean the Area Thoroughly
Use a degreaser-like TSP substitute to clean the area around the dent. This removes dirt, oil, or grime so the filler and paint bond tightly.
Sand Around the Dent (Optional)
You can lightly sand the area surrounding the dent for easier painting later. This “feathers” the paint edge for a smoother transition. Just don’t sand too aggressively and remove existing paint.
Apply Heat to Soften the Surface (Optional)
For deeper dents, heating the area first helps release the dent. Use a professional heat gun or a hair dryer in the highest setting. Move it constantly to avoid burning or blistering the paint.
Don’t overheat fiberglass or wood doors, which can damage the material. Use caution and work in short increments.
Okay, your door is cleaned, sanded, and heated. Now, let’s get that pesky dent out!
Using a Plunger or Suction Cup to Pull Out the Dent
With minor prep work done, it’s time for the fun part – popping the dent out from the backside. This takes some force but goes smoothly if you follow a few guidelines.
Place a Wood Block Inside for Leverage
Put a piece of scrap wood (like a 2×4) inside the garage door behind the dent. This lets you push against something sturdy as you pull from the outside.
Position Your Body Strategically
Standing perpendicular to the dent, place one foot before the other. Pull the plunger toward your back hip to engage your body weight. This gives you more strength. Keep your upper body aligned with your lower body.
Create a Tight Seal with the Plunger
The rubber suction cup must completely contact the dent for the plunger to work. Start by pushing straight in to adhere the cup to the center. Then, slowly pull toward the outer edges to flatten it out.
Pull Steadily Outward Without Twisting
Pull directly outward once your plunger or suction cup has a tight seal. Apply force slowly and steadily to draw out the dent gradually. Avoid jerking or twisting the plunger, or the seal will break.
Use a Pry Bar or Hammer for Extra Force
If the plunger alone can’t pop it out, wedge a pry bar into the gap behind the plunger’s suction cup. Tap the top of the pry bar with a rubber mallet to apply more force. This helps yank out stubborn dents.
Be patient and keep trying from different angles if the dent won’t release. Eventually, getting that satisfying “pop” would be best as it pulls free from the door.
Applying Filler Material to Smooth Out Dents
Simply pulling won’t do the trick for deeper dents that leave a hole. It would be best to coat the area with thick filler to even it out. Here’s how:
Choose the Right Filler for Your Door Material
Body filler works on steel doors. Use a metal- or wood-specific epoxy filler formulated for exterior repair for aluminum or wood. Fiberglass may require a specialty filler, too. Read labels to match the filler to your door.
Apply in Thin Layers
Scoop a small amount of filler onto a putty knife or spreader. Hold it at a 45° angle and apply it across the dent, pressing firmly to fill in gaps. Do thin, even coats, allowing each layer to partially dry before adding more.
Level with “Wet Sanding”
Once partially dry, use 120-grit sandpaper to smooth and flatten the filler. Add another thin layer and repeat sanding. The filler will still be somewhat pliable for easier sand. Finish up with 220 grit for a polished surface.
Prime Before Painting
When the filler is fully hardened, coat the area with primer specially made for garage doors. This preps the surface so the top paint coat bonds tightly. Allow the primer to dry completely before painting.
Sanding Away Imperfections for a Smooth Finish
The popped-out dent likely left some surface irregularities, even if you don’t need filler. Sanding evens this out for a flawless painted finish.
Sand by Hand or Use an Orbital Sander
Wrap 120-150 grit sandpaper around a sanding block to smooth ripples or ridges. Rub it across the area using firm, even pressure. For larger areas, an orbital sander speeds up the job.
Work Your Way Through Finer Grits
Do an initial pass with coarser 120-150 grit to remove bulk irregularities. Then, use 180 grit for minor smoothing. Finish by hand sanding with 220 grit in long, straight strokes for a polished surface.
Wipe Away Dust Between Grits
As you transition between sandpaper grits, wipe off all dust with a dry cloth. This prevents the dust from interfering with the finer grit paper. Your final 220-grit pass should leave the door dent-free and silky smooth.
Repainting for a Seamless, Professional Finish
The final step is to repaint the repaired area so the color matches the rest of your garage door. Follow these tips for the best results:
Choose Exterior Garage Door Paint
Regular house paint won’t hold up. Use specially formulated exterior acrylic latex paint matched to your garage door’s original finish. Take a paint sample to the hardware store for accuracy.
Carefully Mask Surrounding Areas
Cover all areas around the damaged portion with painter’s tape and plastic sheeting. Cut in precise edges with a paintbrush. Take your time prepping for super clean paint lines.
Apply Two Coats of Paint
Use a small foam roller, brushing smoothly with the grain of the garage door. Allow the first coat to fully dry before adding the second. Two coats provide sufficient coverage and protection.
Remove Paint Masks Promptly
As soon as the final coat is dry, peel off the painter’s tape and plastic before the paint seals it on permanently. Touch up edges if needed. Then step back and admire your dented door restored to its former glory!
Maintaining Your Garage Door to Prevent Future Dents
Taking good care of your garage door helps avoid dents and other damage in the first place:
- Inspect the door seal and mechanics annually. Fix any issues immediately.
- Reseal wooden doors every 1-2 years for water protection.
- Check for rust or paint cracks and touch up as needed.
- Regularly clean the door with a power washer to prevent grime buildup.
- Be careful pulling in/out of vehicles, and warn kids not to play ball near the door.
- Install vinyl or metal wall protection panels if the garage interior is narrow.
- Bumper-mount hinges also protect against dings from inside impacts.
With proper use and maintenance, your freshly fixed garage door will stay pristine and dent-free for years. No more ugly dings marring your home’s curb appeal!
Frequently Asked Questions
How much does it cost to get a garage door dent repaired?
Following this guide, the costs are minimal if you fix it yourself – usually under $50 for supplies. Hiring a pro ranges from $75 for a minor dent to $400 for extensive repairs.
What’s the easiest way to remove minor dents from a garage door?
You can often use a plunger to pop them out from the backside for light surface dimples. Cover the area with the plunger and pull firmly straight outward.
What type of filler do you use on aluminum garage doors?
An epoxy filler formulated especially for aluminum works best. Do not use wood or drywall filler, as they will not bond properly. Always read labels to match the filler to the door material.
Can I sand a garage door dent without using plungers or filler?
For very minor dings, sanding alone may suffice to smooth the surface. But deeper dents must be physically pushed or pulled out before filing. A filler is also required for holes or gaps in the door.
How long does new paint on a garage door dry before regular use?
Allow 24 hours of drying before putting any stress on the painted area, like opening and closing the door. Give it 2-3 days to cure before potential impacts fully.
The Bottom Line on Fixing Garage Door Dents
Dents and dings in your garage door are unsightly but unavoidable over time. Luckily, this type of damage doesn’t require calling in the pros. With some basic DIY techniques, you can knock out dents and restore your garage door’s smooth, pristine surface.
Remember to assess the damage, gather the right dent repair supplies, and adequately prep the door. Then, use a plunger, suction cups, body filler, and sandpaper to even out the surface before repainting. With time and effort, you’ll have a perfectly dented-free garage door to showcase your home again.
Learning how to program your garage door opener is just the first step in taking control of your home’s functionality. So don’t settle for annoying dings and divots marring your property. Roll up your sleeves, pull out your tools, and fix that frustrating garage door dent yourself. You got this!