A shingle roof can be a fantastic, low-maintenance option for your home. Asphalt shingle roofs are designed to withstand the elements and provide protection from rain, snow, sun, and wind. However, over time, moss, mold, mildew, and algae can build up on your roof, which not only looks unsightly but can shorten the lifespan of your shingles. Giving your roof a good cleaning from time to time is an essential part of roof maintenance.
Cleaning your shingled roof might seem intimidating, but it doesn’t have to be with the proper preparations and methods. We’ll walk through everything you need to know how to clean shingle roofs efficiently and safely.
Why You Should Clean Your Shingle Roof
Here are some of the key reasons you’ll want to make roof cleaning a regular task:
- Removes moss, mold, mildew & algae – These growths can discolor and deteriorate shingles over time if left unchecked. Cleaning removes these organisms and stains.
- Improves longevity – Removing roof growths will help your shingles last longer and avoid costly repairs or replacements.
- Enhances curb appeal – Clean shingles look better, improving your home’s aesthetic. This is especially important before selling.
- Lets you spot problems – Cleaning enables you to closely examine your roof to spot any damaged, loose, or missing shingles that need replacing.
- May impact insurance – Some insurance companies require regular roof cleaning and maintenance to maintain coverage.
Don’t wait until roof growth is visible or let years go by between cleanings. Routinely washing your roof every 1-2 years helps keep it in optimal shape.
How To Clean A Shingle Roof
Cleaning a shingle roof involves a few key steps. Here is an overview of the complete process:
- Inspect the roof and gather supplies
- Mix roof cleaning solution
- Apply cleaning solution from top down
- Rinse the roof thoroughly from top to bottom
- Inspect and spot-treat any remaining stains
- Allow the roof to dry completely
- Dispose of cleaning solution properly
Next, let’s look at each of these steps in more detail.
Inspect the Roof and Gather Supplies
Your first step is to walk around your entire roof to understand the overall condition and how dirty it is. This will help determine what supplies you’ll need. Here are some valuable items to have on hand:
- Ladder or scaffolding – This allows safe access to the roof for cleaning. Use caution when selecting a position.
- Garden hose with spray nozzle – This is for rinsing the roof after cleaning. Make sure it can reach all areas.
- Stiff bristle broom – Useful for scrubbing the shingles. Look for one with an extended handle.
- Mildew remover – Special cleaners formulated to remove roof stains. More on solution options later.
- Safety gear – Don’t forget goggles, gloves, sturdy shoes, and other gear to protect yourself.
- Scrub pads/brushes – For extra scrubbing power in heavily stained areas.
- Bucket – For mixing up your cleaning solution. 5-gallon works well.
Once you’ve gathered supplies, it’s gone time! Safety should always come first when working on a roof. Have someone available to assist, don’t work in wet conditions, and take precautions against falls.
Mix Your Roof Cleaning Solution
There are a couple of options when it comes to selecting a shingle roof cleaning solution:
Bleach solution – Many use a mix of bleach and water. Mix 1 part bleach to 3 parts water in your bucket. Never use undiluted bleach directly on shingles.
Commercial cleaners – Look for moss, mold, or mildew-removing formulas. Many attach to a garden hose for easy application.
DIY natural solutions – Mix your natural cleaning solution using ingredients like borax, vinegar, hydrogen peroxide, or TSP.
Review product labels and test solutions in an inconspicuous area before applying them to the entire roof. Check that it doesn’t cause damage or discoloration.
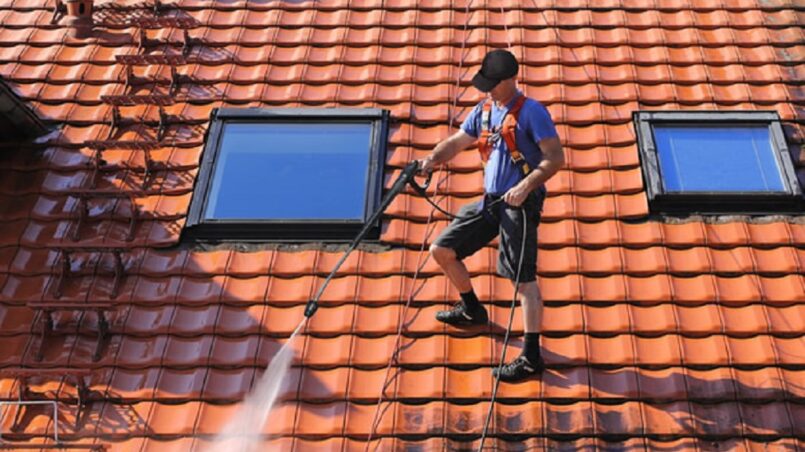
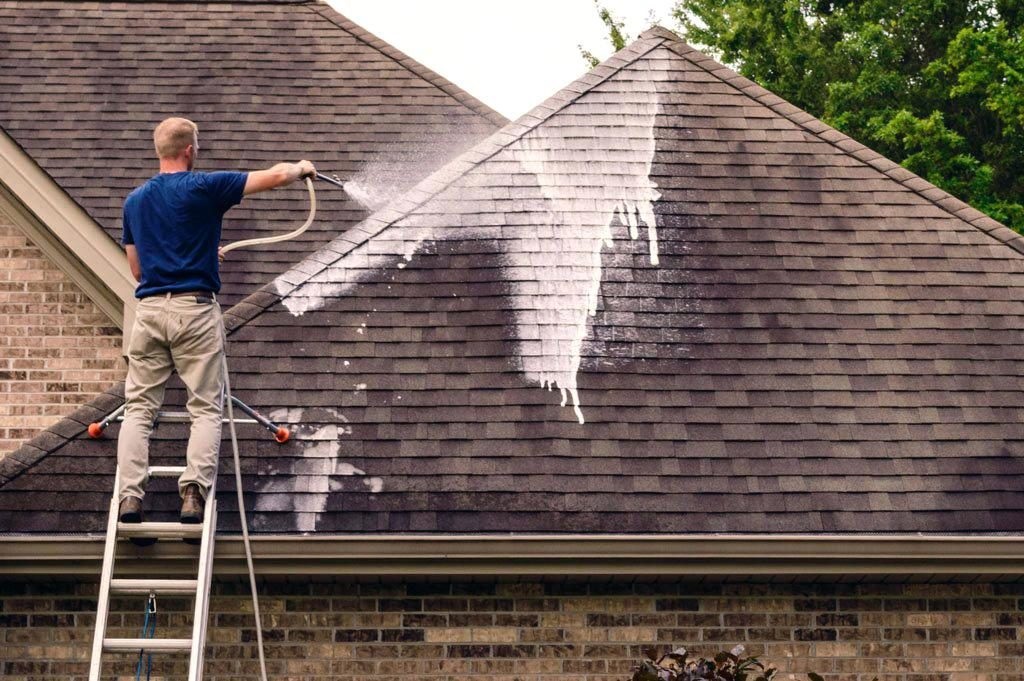
Apply Cleaning Solution from Top Down
Once your cleaning mixture is prepped, it’s time to get scrubbing! The best approach is to apply your solution at the roof’s peak and work downward in sections. Follow these tips:
- Dampen roof first – Wet down a section of the roof with your garden hose before applying a cleaning solution. This prevents streaking.
- Use bucket or sprayer – You can bucket and brush on the cleaning mixture or attach a tank sprayer to your hose for easy application. Don’t use high pressure.
- Scrub with a broom – Let the solution sit briefly, then scrub vigorously with a stiff bristle broom to agitate. This lifts mold and other gunk.
- Rinse before moving down – Always clean the cleaner thoroughly before advancing to the next section. Prevent streaks.
Take your time and be thorough as you work across and down the roof. Watch for any areas with heavy staining or buildup that need extra scrubbing.
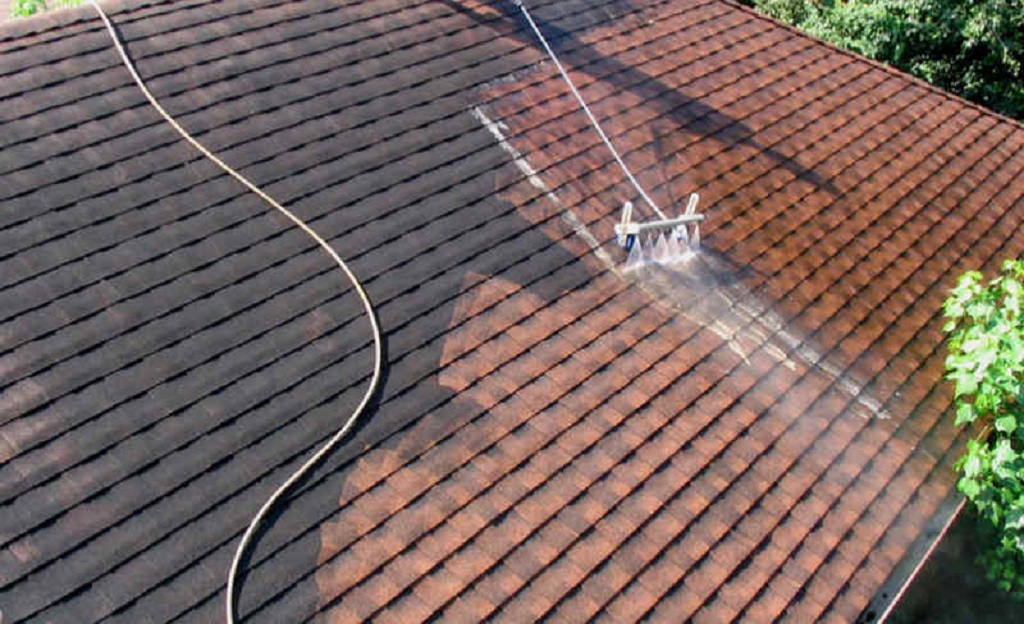
Rinse Roof Thoroughly From Top To Bottom
Once you’ve covered every section with cleaner and given it a good scrub, the final step is rinsing. You’ll want to rinse from the peak downward as you clean.
Follow these tips for effectively rinsing away all leftover cleaning residue:
- Use a nozzle, not a pressure washer – High pressure can damage shingles. Stick to a regular garden hose nozzle.
- Let sections soak – Allow fresh water to flow into each roof section to flush away any lingering cleaning solution.
- Scrub troublesome spots – Use your broom to gently scrub as you rinse to remove stubborn stains.
- Ensure no sudsing – Check that all cleaner is removed and no more foam or suds are in the runoff water.
- Dry thoroughly – Allow the roof to air dry completely before moving on. Remaining moisture can cause streaking.
Thorough rinsing is critical to prevent chemical cleaner residue from continuing to eat away at your shingles. Never leave cleaning solutions sitting.
Inspect and Spot Treat Any Remaining Stains
Once your roof has dried, it’s time to look around. Inspect any remaining moss, mold, or other stains you may have missed. Mix up a fresh batch of cleaning solution for minor spots just for that area. Scrub, rinse, and dry.
If you have large stubborn stains that simple cleaning won’t remove, you may need to bring in a professional for pressure washing or chemical treatment. This is also advised for heavy moss buildup.
Examining your roof after cleaning is also a great chance to spot any damaged, cracked, or missing shingles that need repair. Make a note to take care of any issues.
Allow the Roof to Dry Completely
As a final step, after you’ve cleaned and spot-treated the entire roof, give it a good 24-48 hours to dry out thoroughly. Remaining moisture or cleaning chemicals can lead to new mildew growth.
To prevent water streaks, avoid using your roof or setting up ladders against it while drying. After a day or two, one last inspection lets you ensure your roof is clean and undamaged before removing cleaning supplies.
Tips For Effective Shingle Roof Cleaning

Now that you’re familiar with the overall roof cleaning process follow these handy tips for getting the job done right:
Choose a mild, overcast day
Avoid cleaning on excessively hot or sunny days. Direct sun can dry solutions too fast, leading to streaking. Cooler temperatures are ideal.
Work section by section
Don’t attempt to clean the entire roof all at once. Break it down into smaller sections for a systematic approach.
Let solutions soak
Give cleaning mixtures 5-10 minutes before scrubbing to allow them to penetrate and lift stains.
Scrub with care
Excessive pressure can damage shingles, so it is unnecessary to overdo it when scrubbing.
Watch for rust stains.
Rust from nails requires a rust remover. Oxalic acid or rust converters can also be used.
Wear protective gear
Don’t forget goggles, gloves, masks, and other gear to protect yourself during cleaning.
Check all sides
Don’t forget to clean and rinse the undersides of overhanging eaves and the top roof.
Hire a pro for heavy moss.
If you have a moss-covered roof, professional cleaning may be needed to treat and kill it thoroughly.
Upgrade your hose nozzle.
Look for adjustable nozzles to control the spray pattern and pressure. Very useful!
Work early in the day.
It’s best to start cleaning in the morning before the roof gets too hot. Heat can dry out cleaners quickly.
Softly sweep to lift debris.
Before applying cleaners, use a soft broom to gently sweep and remove any branches, leaves, or other debris.
Use an extension pole.
Attach your broom or scrub brush to an extension pole. This allows you to reach the roof safely from the ground.
Watch your footing
If working from a ladder, maintain secure footing and do not overextend or lean too far. Move the ladder as needed.
Start at the top.
Work top down so debris and runoff don’t re-dirty sections you already cleaned below.
Rinse from the peak.
Similarly, rinse starts at the peak and moves downward. Follow the same path you cleaned.
Clean gutters afterwards
Rinse and clear debris from gutters once finished so they flow freely after cleaning.
Check all ventilation
Rinse attic vents, turbine vents, and other openings to remove residue.
Allow 3-5 days for curing.
Some cleaners continue working for a few days after rinsing. Avoid going on the roof during this time.
Upgrade old shingles
A new roof installation may be warranted if your roof is filthy, worn, or full of moss.
Following all these tips will ensure you can clean your shingle roof properly, safely, and efficiently. Let me know if you need any clarification or have additional questions!
FAQs
How often should I clean my shingle roof?
Plan to clean an asphalt shingle roof at least once every two years. Annual cleaning is even better for roofs with lots of moss/mildew growth.
What is the best roof-cleaning solution?
Mixing 1 part bleach to 3 parts water is a common and effective cleaning solution. Commercial cleaners made for roofs are another excellent option.
Is pressure washing safe for shingle roofs?
No, it would be best never to pressure wash a shingle roof. The high-powered spray can damage shingles. Use low-pressure rinsing only.
Should I clean my roof in summer or winter?
The ideal time is early spring or fall when temps are mild. Avoid extreme heat in summer or cold winters.
How can I tell if my roof needs a deep cleaning?
Signs like visible dark streaks, heavy moss growth, and green or black spots mean your roof needs a thorough cleaning.
In Conclusion
Keeping your asphalt shingle roof properly cleaned is an essential maintenance task. While it may seem daunting, breaking the process into manageable steps makes DIY cleaning feasible.
Focus on safe setup, pre-rinsing, applying cleaner from the top down, scrubbing, and thoroughly rinsing. Repeat annually or biannually. Taking proper precautions allows you to safely clean and extend your roof’s life.
Wondering how to tell if your roof has hail damage? Keep an eye out for dents, cracks, or missing shingles. If you’re uncertain or notice any signs, don’t hesitate to call a professional for a deep clean, especially if your roof is filthy or overrun with stubborn moss or stains that you can’t tackle on your own. Otherwise, with the right supplies and techniques, you can handle washing your shingled roof yourself and keep it looking fresh.