Getting clean paint lines can feel tricky. Many homeowners finish a project only to find wobbly edges, bleed-through, or uneven borders. However, with the right steps, anyone can achieve sharp, professional-looking results at home. You do not need expensive tools or years of experience. All you need is patience, preparation, and a few smart techniques.
This guide walks you through everything. From choosing the right tape to applying the final coat, you will learn how to paint clean, crisp lines every time.
Why Clean Lines Matter
Paint lines define a room. They separate colors, highlight trim, and give walls a finished, polished look. When lines are sloppy, even a beautiful color choice can look amateurish. Therefore, taking time to get your edges right is always worth the effort.
Clean lines also protect surfaces. A sharp border between the wall and the ceiling, for example, keeps paint where it belongs. Additionally, neat lines reduce the need for touch-ups, saving you time and money in the long run.
Gather Your Tools Before You Start
Preparation is everything in painting. Before you pick up a brush, make sure you have the right supplies on hand. Having everything ready prevents rushed mistakes mid-project.
Here is what you will need:
- Painter’s tape (blue or green, not masking tape)
- A quality angled brush (also called a cutting-in brush)
- A small roller for large wall sections
- A putty knife or credit card for pressing tape edges
- A clean, damp cloth for wiping mistakes
- Primer if you are painting over a dark or new surface
Using the correct tape matters more than many people realize. Standard masking tape is too porous and lets paint bleed underneath. Painter’s tape, however, has a special edge that seals tightly against walls.
Prepare Your Surface Properly
Clean lines start with a clean surface. Dust, grease, and old paint chips all cause tape to lift and paint to spread unevenly. Therefore, always clean your walls before taping or painting.
Wipe down the surface with a damp cloth. For kitchens or bathrooms, use a mild detergent to remove grease. Let the wall dry completely before moving on. A dry surface ensures the tape sticks firmly and the paint adheres evenly.
Next, fill any holes or cracks with spackling compound. Sand the area smooth once it dries. Even small bumps can catch the edge of your tape and create gaps where paint sneaks through.
Finally, apply a coat of primer if needed. Primer creates a uniform base and helps paint stick better. It also prevents dark colors from bleeding through lighter ones. This step is especially important when switching between very different shades.
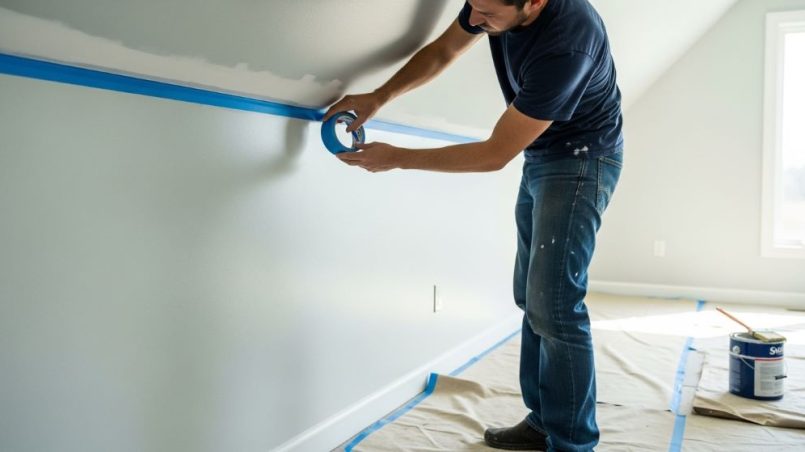
How to Apply Painter’s Tape the Right Way
Applying tape seems simple, but small mistakes lead to big problems. Most paint bleed happens because tape is applied too loosely or too quickly.
Start by pressing the tape firmly along the edge you want to protect. Use your fingernail, a putty knife, or the edge of a credit card to seal the tape completely. Run it slowly along the entire length of the tape. Pay extra attention to corners and edges where gaps form easily.
Additionally, always apply tape to a dry surface. Tape placed on fresh paint or damp walls will lift and peel, taking paint with it. If you are working near a freshly painted area, wait at least 24 hours before applying new tape.
For perfectly straight lines along ceilings or trim, use a level or a long ruler as a guide while placing the tape. This small extra step makes a noticeable difference in the final result.
The Sealing Trick That Stops Bleed-Through
Here is one of the most effective wall paint tips that professionals use. Once you apply your painter’s tape, paint over the tape edge with the same color that is already on the surface. Let that coat dry completely.
This technique seals the tape edge with the existing paint. Therefore, when you apply your new color, it has nowhere to bleed. Any seepage goes under the tape, but it blends right in because it matches the original color.
This single trick eliminates most paint bleed problems. It is simple, fast, and makes a dramatic difference in the sharpness of your lines.
Cutting In for Sharp Edges
Cutting in means painting the edges of a wall by hand before rolling the larger sections. This technique is a cornerstone of painting precision and gives you control over your borders.
Use an angled brush for this step. The slanted bristles make it easier to guide the paint along a straight line. Dip the brush about halfway into the paint and tap off the excess on the inside of the can, not the rim.
Hold the brush like a pencil, near the base of the bristles. This gives you more control. Apply the paint in slow, steady strokes. Start about an inch from your edge and work toward it gradually. This approach reduces the risk of applying too much paint near the tape.
Additionally, keep a wet edge as you work. Do not let the cut-in section dry completely before rolling the rest of the wall. Wet edges blend more smoothly with rolled paint, preventing visible lines or lap marks.

Removing Tape at the Right Time
Timing is everything when it comes to removing painter’s tape. Remove it too late and the dried paint pulls away in chunks. Remove it too soon and the paint smears.
The best time to remove tape is when the paint is still slightly tacky, not fully dry. This is usually 30 to 60 minutes after the final coat, depending on your paint type and room temperature.
When removing the tape, pull it back slowly at a 45-degree angle. Do not yank it straight off the wall. A slow, steady pull keeps the paint edge intact. If the tape resists, score along the edge lightly with a craft knife before pulling.
If a small section of paint pulls away with the tape, do not panic. A small angled brush and a steady hand can fix most mistakes easily.
Using an Edger Tool for Beginners
If cutting in by hand feels too intimidating, a paint edger tool is a great option. These plastic tools have a small pad and a guide wheel that rolls along the trim or ceiling. They help beginners achieve painting precision without needing a perfectly steady hand.
However, edger tools work best on flat, smooth surfaces. Textured walls or uneven trim can make it harder for the guide wheel to grip properly. In those cases, tape and a good brush are still your best options.
Practice with the edger on a scrap piece of cardboard before moving to the wall. Getting a feel for how much pressure to apply and how fast to move makes the process much easier.
Dealing with Textured Walls
Textured walls are the biggest challenge when painting clean lines. The uneven surface creates tiny gaps where tape cannot seal completely, allowing paint to bleed through.
One solution is to use a flexible, thin-edge painter’s tape designed for textured surfaces. These tapes conform better to uneven walls. Additionally, pressing the tape down firmly with your thumb in a back-and-forth motion helps it follow the texture more closely.
Another trick is to apply a thin bead of paintable caulk along the tape edge before painting. Smooth it with your finger, let it dry slightly, and then paint over it. The caulk fills the gaps between the tape and the texture, creating a much sharper line.
Furthermore, using thicker paint or two coats helps cover uneven surfaces more evenly, reducing the appearance of imperfect edges.
Touch-Up Techniques for Small Mistakes
Even careful painters make small mistakes. The good news is that most errors are easy to fix. You do not need to repaint an entire wall over a small smudge.
Keep a small artist’s brush handy while painting. Dip it in the correct color and gently fill in any spots where paint bled through. Work slowly and use minimal paint on the brush to avoid creating a raised edge.
For dried paint mistakes, use a damp cloth immediately if the paint is water-based. For older, dried mistakes, lightly sand the area with fine-grit sandpaper and touch up with a small brush.
Additionally, always save leftover paint in a sealed container. Touch-ups done months later need to match the original color exactly, and stored paint makes this much easier.
Conclusion
Getting clean paint lines at home is absolutely achievable with the right approach. The key steps are simple. Prepare your surface carefully, apply painter’s tape firmly and seal it properly, cut in slowly with an angled brush, and remove the tape at just the right moment.
Following these wall paint tips consistently will transform your results. You will spend less time fixing mistakes and more time enjoying a beautifully finished room. Whether you are a first-time painter or someone looking to sharpen their skills, these techniques make the process easier and the results far more rewarding.
Remember, painting precision comes from patience more than talent. Take your time at each stage, and your walls will reflect that care every single time.
Frequently Asked Questions
Question 1: What is the best tape for clean paint lines?
Blue or green painter’s tape works best for most surfaces. It has a sealed edge that prevents bleed-through better than standard masking tape. For textured walls, use a tape specifically labeled for textured or rough surfaces.
Question 2: How long should I leave painter’s tape on after painting?
Remove the tape when the paint is still slightly tacky, usually 30 to 60 minutes after the final coat. Waiting too long allows the paint to dry and harden along the tape edge, which can cause it to peel away when removed.
Question 3: Why is paint bleeding under my tape?
Paint bleed usually happens because the tape was not pressed down firmly enough. Always seal the tape edge completely using a putty knife or your fingernail. Additionally, try the sealing trick of painting the tape edge first with the base color before applying your new color.
Question 4: Can I get clean lines without painter’s tape?
Yes, with enough practice. Using a high-quality angled brush and cutting-in slowly allows skilled painters to create clean lines freehand. However, for beginners or tricky edges, tape provides a reliable safety net and is always recommended.
Question 5: How do I fix a wobbly paint line after it dries?
Use fine-grit sandpaper to lightly sand the uneven edge once dry. Then touch up carefully with a small angled brush and the correct paint color. Work slowly and use minimal paint to blend the correction smoothly into the surrounding area.
Related Topics:
How to decor wall and add personality to your home
Citristrip Paste Vs Gel: Which Is The Best Choice For Your Project?