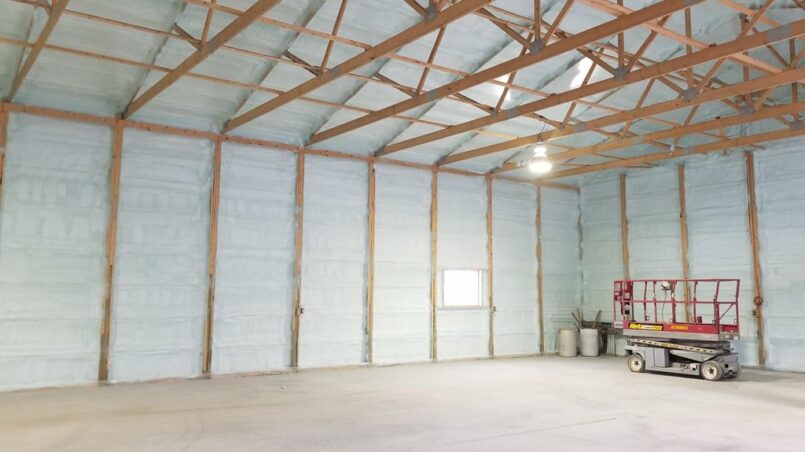
Insulating a pole barn is one of the most innovative and cost-effective things you can do. An insulated barn will help regulate temperatures year-round, protecting your valued items and making the space more comfortable for you, your vehicles, livestock, or whatever else you store inside.
But where do you start? It can get overwhelmingly fast with so many insulation products and installation methods. Don’t worry – this guide will walk you through everything you need to know about how to insulate a pole barn, from selecting suitable insulation materials to proper installation techniques. We’ve also included five key questions homeowners often ask at the end.
Fiberglass Insulation – An Industry Standard for Good Reason
Regarding insulating pole barns, fiberglass reigns supreme for many homeowners and contractors. Why is it so popular? Fiberglass insulation offers an unbeatable combination of effectiveness, affordability, and ease of installation.
Fiberglass is made from beautiful fibers of glass arranged into a texture similar to cotton candy. This texture traps air pockets, creating resistance to heat flow for excellent insulating power. The fibers also make fiberglass flexible and easy to work with.
You can choose from batt, loose fill, and rigid board fiberglass insulation, depending on your project’s needs:
- Batt insulation – Pre-cut rolls fitted between wall studs or rafters.
- Loose-fill insulation – Loose fibers are blown into spaces using special equipment.
- Rigid insulation – Sturdy boards fixed directly to walls or roofs.
No matter the type, fiberglass insulation is a smart choice for pole barns in most climates. The only downside is that it can be irritating to work with – be sure to use proper protective gear like gloves, long sleeves, and pants.
Spray Foam Packs a Powerful Insulating Punch
If you’re looking for maximum R-value insulation in hard-to-fill spaces, spray foam could be your product. This liquid plastic insulation expands and hardens to seal cracks and fill building cavities.
The closed-cell structure of cured foam resists conductive and convective heat flow. In other words, it blocks warm air from escaping and cold exterior air from entering your barn. And because it adheres tightly to building materials, spray foam minimizes gaps, allowing air infiltration.
Spray foam insulation typically offers an exceptionally high R-value in R6 to R8 per inch. So even a few inches of foam and a much thicker layer of batt insulation can insulate. It’s also very effective at reducing unwanted air leakage.
On the downside, spray foam is harder for DIYers to install correctly. You’ll need proper protective gear and training on using foam insulation kits. Professionally installed spray foam costs more upfront compared to other insulation types but can still pay off in the long term from energy savings.
Don’t Forget Vapor Barriers for Moisture Control
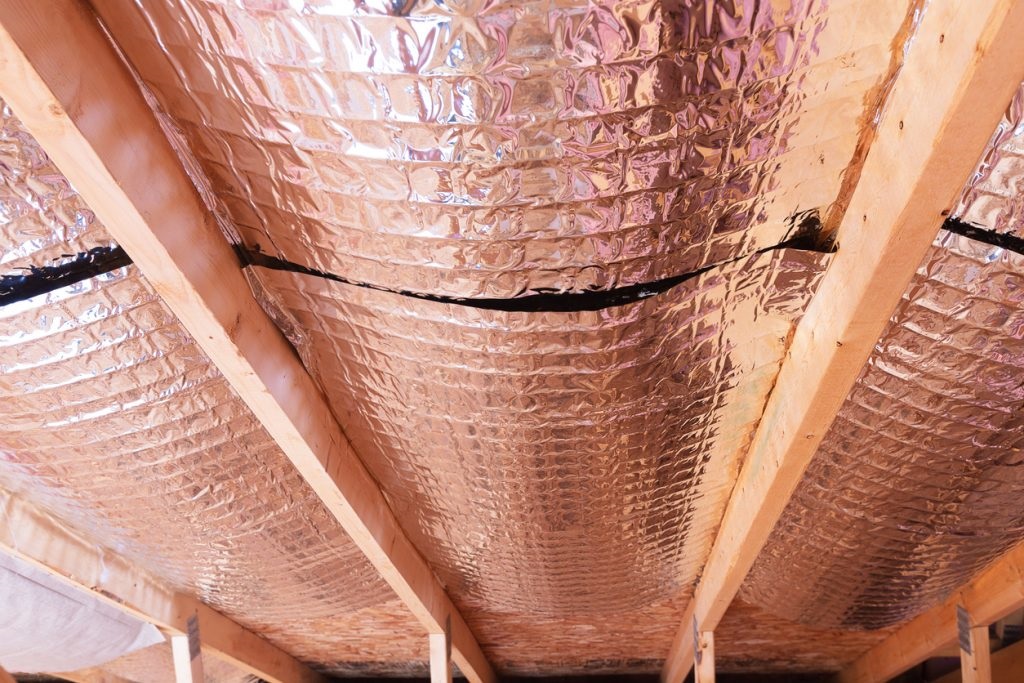
Water and moisture pose threats that insulation alone doesn’t address. Managing moisture, from interior humidity to outdoor rain and snowmelt, is crucial for pole barn performance and longevity.
This is where vapor barriers come in – materials like plastic sheeting, foil-faced insulation, or vapor barrier paint that block the passage of moisture through walls and ceilings. Installing an appropriate vapor barrier is critical to preventing condensation buildup, mold growth, and rotting of wood structures.
Where and which type of vapor barrier you need depends partly on your climate and the orientation of wall and ceiling surfaces. In cold northern regions, vapor barriers often go on a building’s warm interior side to prevent warm, moist indoor air from reaching the cold exterior sheathing.
In hot southern climates, vapor barriers may be warranted on a building’s exterior sheathing before the siding to prevent outdoor humidity from infiltrating and condensing once it hits cold, air-conditioned indoor air.
An insulation contractor familiar with local building practices can advise the best moisture control plan for pole barns in your area.
Mineral Wool and Cotton – Safe but Pricey Options
If scratchy fiberglass isn’t your style, mineral wool and cotton insulation provide safe, comfortable alternatives:
- Mineral wool – Made from natural igneous rock or steel slag melted into fibers
- Cotton insulation – Recycled cotton scraps treated with non-toxic boron salts for fire and pest resistance.
Both feature high recycled content and natural fire resistance, and cotton also offers excellent sound dampening. On the downside, these less ubiquitous insulation materials cost significantly more than traditional fiberglass.
Mineral wool and cotton share a similar texture with fiberglass, so respirator masks and skin protection are still an intelligent call during installation.
23 Tips for Insulating Your Pole Barn Right
Now let’s get down to the details – here are 23 insider tips for adequately insulating your pole barn roof, walls, foundation, and more:
1. Install a Layer Between the Poles
Unlike traditional stud walls, pole barn framing doesn’t leave room for wall cavities to pack with insulation. But you can compensate for this by sandwiching insulation horizontally between each set of poles.
Fiberglass batts or rigid foam boards placed perpendicular to the wall surface leave minimal thermal breaks compared to insulating just the poles. Use boards or batts sized to fit snugly from pole to pole.
2. Wrap Individual Poles for Extra Protection
Insulating between the pole barn framing is crucial, but adding another layer directly around each pole takes thermal protection to the next level.
Start by wrapping poles with unfaced fiberglass insulation secured with twine or wire. Then, protect the insulation by finishing it with weather-resistant rigid foam boards or closed-cell spray foam.
Encasing insulation this way resists moisture intrusion while maximizing warmth retention and cooling needs.
3. Don’t Forget the Band Joists
The “band joist” is the box rim board for transitioning between a building’s foundation and walls. It’s common for this area to get skipped when insulating floors and walls, but plugging these gaps is essential for controlling air infiltration.
Use spray foam or cut rigid foam boards to custom fit into joist bays. Caulk cracks for extra sealing power against outdoor air sneaking through unseen cracks.
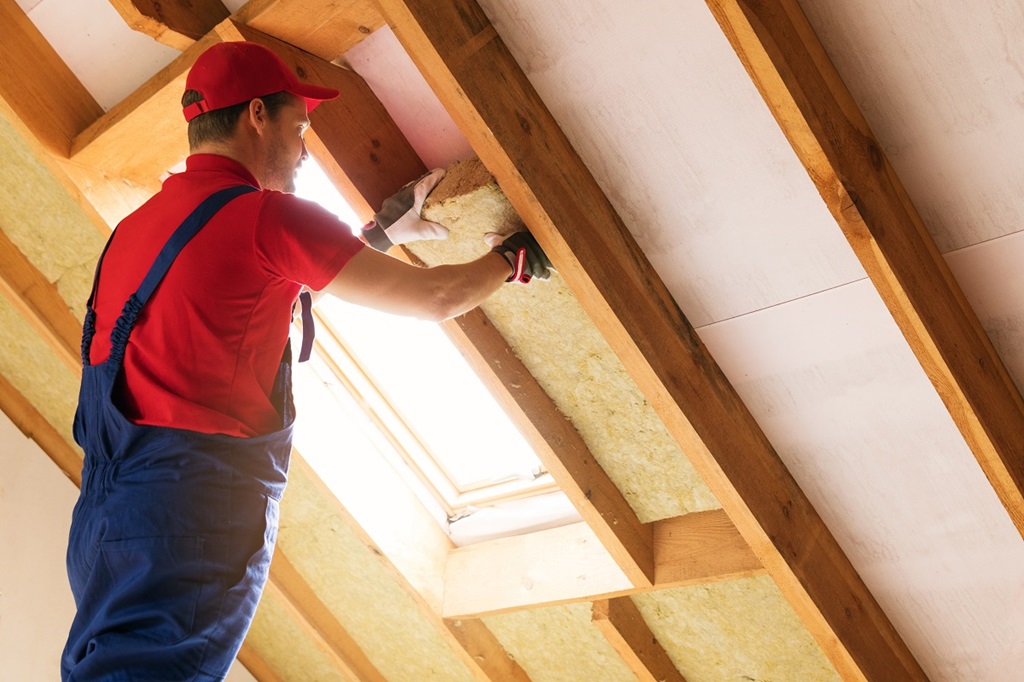
4. Insulate Attics to Roof Peak
Pole barn attic spaces offer a prime spot for fluffy insulation, but only if it spans to the roof’s peak. If attic insulation leaves gaps at the roof edges, warm interior air can penetrate and condense on the cold roof sheathing.
Mounded loose-fill insulation is most accessible for full attic coverage, though blown-in fibers work, too. Ensure insulation meets or exceeds the roof peak to prevent condensation issues.
5. Install Vapor Barriers Correctly
Properly installing vapor barriers is imperative, but messing this up can do more harm than good. Attaching a vapor barrier to the wrong wall or ceiling surface can condense the vapor barrier and the structure.
Consult local codes and manufacturer instructions to determine which side vapor barriers belong based on your climate. Adhesives for vapor barrier application help create air-tight seals around seams and edges.
6. Plug Wall Penetrations
Insulating the cavity between walls is excellent, but tiny gaps from electrical outlets, conduits, vents, and more still allow unwanted airflow if left unsealed. Luckily, it’s easy to plug these potential leaks with minimal effort.
Apply weatherstripping pads, expanding foam sealant, or caulk around all wall, floor, and ceiling penetrations. Don’t forget exterior wall edges abutting concrete pads or adjacent building sections. Stop air infiltration through every access point possible.
7. Hang an Insulated Ceiling
Hanging insulated ceiling panels helps contain indoor heat while covering up unsightly roof framing and utilities. Polystyrene ceiling tiles come pre-cut for simple drop-in installation. Use furring strips screwed to the underside of roof purlins to attach tiles.
For insulation value exceeding polystyrene’s R-4, opt for vinyl-wrapped fiberglass or polyiso ceiling panels. Cut them to fit between pole supports and fasten to furring strips like polystyrene tiles. Finish by painting boards white to maximize reflected light.
8. Blow Loose Fill Insulation on Top of Existing Batts
If your pole barn already has batt insulation between roof rafters, consider adding loose fill on top for an insulation boost. Cellulose and fiberglass loose fill have no issue going over existing insulation.
However, proper dense-pack installation is critical for the insulation to work correctly and remain in place. Hire a professional insulation contractor with the right blowing equipment to achieve proper density and coverage.
9. Insulate Under Concrete Slabs
Cold concrete floors make for uncomfortable barn interiors, not to mention energy loss into the ground below. Luckily, adding a sub-slab insulation layer is straightforward:
After compacting and leveling the soil base, unroll fanfold rigid foam insulation over the area, taping seams with insulation tape. Cover with 6-mil plastic sheeting as a vapor barrier before pouring the concrete floor. 2-3 inches of foam insulation provides ample cold protection.
10. Wrap Support Posts in Rigid Foam
Metal support posts conduct cold readily, creating condensation and comfort issues. Prevent this by insulating posts with rigid foam covers.
Use foil-faced polyiso or EPS foam boards sized to slip around posts with minimal gaps. After securing boards with tape or zip ties, finish protecting them with plywood covers as needed.
11. Install Rigid Foam Above Grade Before Backfill
If your barn has stem walls extending above ground level, insulating this exposed concrete is wise to prevent frost-heaving issues:
Adhere rigid insulation boards directly to the above-grade wall portion before backfilling. Extend board insulation at least 24 inches below grade for optimal protection from frost and warmth retention.
12. Choose Roof Insulation With High Heat Resistance
Pole barn roofs can reach incredibly high temperatures in summer sun exposure. Some insulation types, like paper-faced batts, run major fire risks on hot roofs.
Instead, choose non-paper insulation designed for high heat tolerance, like foil-faced isocyanurate (polyiso) boards or loose-fill cellulose. Proper installation per product guidelines is still a must for attic fire safety.
13. Layer Different Insulation Materials
While most homeowners use just one insulation type per application, combining multiple materials can provide better performance thanks to differences in how they slow heat transfer.
For example, loose-fill insulation atop fiberglass batts in a wall fills gaps that batts miss, creating more resistance to convection while the batts slow conduction through building materials. Getting creative with insulation pairings optimized for each building space allows you to maximize energy efficiency.
14. Remove Exterior Cladding Before Installing New Wall Insulation
Want to beef up wall insulation beyond the existing cavity fill? Removing siding before blowing in dense pack cellulose or spraying foam is best. This allows the insulation to adhere directly to the wall structure rather than compressing existing insulation.
Removing siding lets you replace damaged building paper or house wrap before re-installing fresh weatherproof siding over the new insulation.
15. Install Insulation Below the Frost Line
In northern climates, soils heave and shift each winter as moisture in the ground alternately freezes and thaws. Allowing this freeze-thaw cycle to act on a building’s foundation wreaks havoc over time.
Installing foundation perimeter insulation to the frost line depth (around 4 feet below grade in cold regions) helps prevent soil temperatures from fluctuating at building walls. Maintaining warmth also avoids moisture issues leading to cracks and structural decay.
16. Use Z-Flashing Above Insulation Joints
Vertical gaps between different insulation layers allow water intrusion into building materials if unprotected. Cover these transitions with Z-shaped flashing material bent over the insulation edge to direct water down and out.
For example, flashing at the top edge of the exterior below-grade rigid foam keeps water from getting behind it and soaking into the foundation wall level with or below grade. Take flashing under siding at least 6 inches.
17. Install Insulated Headers Over Large Openings
Central door and garage door headers span wider than standard wall cavities, leaving little room for insulation. Poorly insulated headers waste energy through the large surface area above large openings.
Choose factory-made insulated door headers rather than solid lumber headers. Or make your insulated header assembly out of rigid foam glued between two pieces of header lumber. This leaves cavity space for fill insulation while the foam boosts the overall R-value.
18. Insulate Interior Partition Walls
Uninsulated walls around conditioned barn space allow significant heat transfer to any unheated areas they border. For example, a partition wall beside a tack room loses warmth to an uninsulated storage garage on the other side.
Installing cavity insulation in interior partition walls maintains stable temperatures room-to-room for comfort and efficiency. Use unfaced batts so interior water vapor can dry properly toward building interiors.
19. Install Rigid Foam Behind Knee Walls
Knee walls with cavity insulation still transmit heat rapidly through wall framing members. Supplement by adding a layer of rigid foam insulation on the unconditioned attic side before the knee wall surface is finished.
Choose foil-faced polyiso or EPS foam for maximum insulation value and moisture resistance in attic conditions. Supported on horizontal furring strips, rigid foam turns small knee wall spaces into thermal superstars.
20. Use Radiant Barrier Paint on Roofs
Radiant barrier coatings contain microscopic metal particles that reflect solar radiation rather than absorbing it. White reflective metal roofs already provide some glowing barrier effects. For maximum reflection, look for insulation paint with the highest listed brilliant barrier rating to limit solar heat gain.
21. Install Insulated Shutters on Windows
Barn windows are prime locations for heat loss and air infiltration despite their smaller size than walls. Boost window insulation by constructing exterior shutters from rigid insulation sandwiched between wood or moisture-resistant materials.
Shutting these insulated panels over windows at night and during extreme cold provides interior warmth far better than regular shutters. Make sure shutters are sealed tightly around each window opening.
22. Insulate Water Lines
Don’t allow water pipes running to livestock areas, bathrooms, or other equipment to freeze just because you overlooked them. Pipe insulation works wonders for keeping flowing water and storage tanks from losing heat in cold weather.
Choose pipe wrap insulation sized for a snug fit and rated for cold temperatures like polar zones and permafrost. Install heating tape protected under insulation as supplemental freeze protection if your climate demands it.
23. Add Interior Storm Windows
Interior storm windows offer an affordable alternative to more expensive exterior storm windows. Mounted on the room side of existing windows, internal storms create an insulating air gap that reduces conductive heat transfer through the glass.
Look for thick, clear acrylic or polycarbonate panels sealed with weatherstripping in durable tracks or frames. While not as effective as exterior storms, interior add-ons are simple to install as a retrofit to boost window insulation.
Last Words
A properly insulated pole barn makes life easier across seasons. With the proper insulation techniques, your barn interior will stay warmer in winter, cooler during summer heat, and more comfortable year-round. Your valued vehicles, equipment, livestock, and other contents will thank you, too.
Applying all 23 tips here might sound overwhelming to do at once. Don’t worry – even making incremental insulation improvements as time and money allow, focusing on priority zones like the roof and attic will dramatically cut energy costs and boost interior comfort.
And remember, investing in insulation, moisture barriers, and stopping air leakage pays back many times more over a building’s lifespan than if you get by with minimal insulation now but deal with preventable heating and cooling costs for years. Your future self will be glad you took advantage of this pole barn’s open framing as a spotless slate for insulation best practices.
FAQs
What R-value insulation should I use?
Recommended insulation R-values for buildings depend heavily on climate and building use. In northern states, batt wall insulation with an R-value of R-13 to R-15 is usually sufficient. Prioritize higher value insulation in the roof and attic area where heat loss is most significant – R-30 to R-50 in the roof is ideal.
Can I install insulation in my pole barn myself?
Determined DIYers can take on insulation projects in their pole barns if desired. Simple tasks like installing batt insulation take more time and muscle than skill. Just be sure to use safe practices – protection gear, fall restraints on roofs, caution around electrical, etc. Tasks like blowing dense pack loose fill or applying spray foam have a steeper learning curve, and specialty equipment needs best left to insulation pros.
Should I insulate the interior or exterior of my pole barn?
Ideally both! Layering exterior rigid foam covered by siding and interior cavity fill insulation gives maximum insulation capacity that neither approach alone entirely solves. External insulation also shields sheathing from temperature swings. Insulating just one side works, too, but combining exterior and interior insulation is best.
Where can I save money on pole barn insulation?
Focus any insulation investments on the building envelope – walls, ceilings, floors – before worrying about extras like pipe insulation. Select the most economical insulation materials that meet your performance needs rather than paying extra for premium brands in most cases. Also, consider DIY installation instead of outsourcing labor – simple projects like installing unfaced batts in walls and ceilings or blowing loose fill in open attics allow homeowners to save substantially.
What mistakes do people make when insulating pole barns?
Some of the most common insulation slip-ups include:
- Forgetting to insulate band joists and rim boards
- Illogical or incorrect vapor barrier installation
- Insufficient attic insulation coverage and attic ventilation
- Assuming concrete slab insulation isn’t worthwhile
- Skipping insulation on internal dividing walls beside conditioned rooms
- Leaving wall intersections and penetrations unsealed
Paying attention to often-forgotten insulation zones and properly managing moisture with clever vapor barrier methods helps avoid issues down the road. Don’t cut corners on preparations, either.