
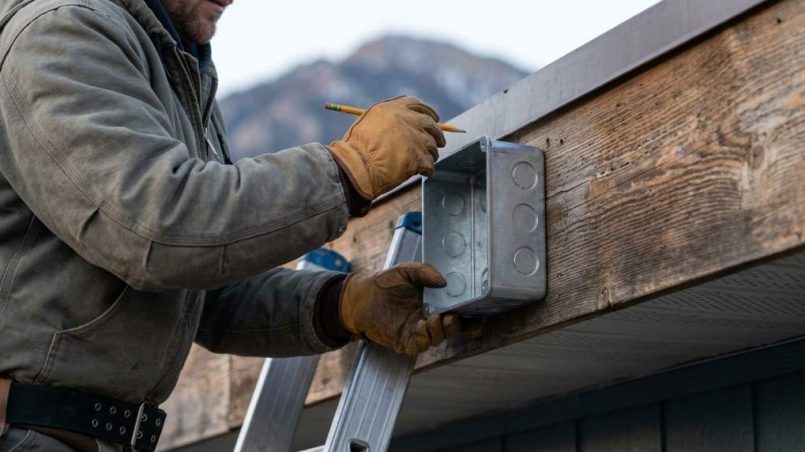
To secure heavy tech safely in Helena, MT, attach its load path to structural framing, not the facia board alone. Helena lists a minimum 30 psf roof snow load and 106 mph wind speed, so weak attachments can fail quickly. A properly planned starlink ridge mount guide can help illustrate secure rooftop equipment placement. The same principle applies to antennas, cameras, sensors, and other roof-mounted technology.
Key Takeaways Before You Start
- Never treat a facia board as the sole structural anchor for heavy equipment.
- Connect mounting hardware to rafters, trusses, blocking, or other verified structural members.
- Account for equipment weight, wind uplift, snow accumulation, vibration, and maintenance loads.
- Use weatherproof flashing and compatible sealants around every roof penetration.
- Check Helena permit requirements before installing permanent rooftop equipment.
- Inspect the mounting system after severe weather and at regular maintenance intervals.
Why Facia Boards Alone Create a Serious Problem
Many homeowners see a sturdy-looking facia board and assume it can support heavy technology. However, fascia usually finishes the roof edge rather than carrying concentrated equipment loads. Its actual strength depends on its thickness, attachment pattern, supporting framing, and connection details.
Heavy equipment creates forces that differ from ordinary trim loads. Wind can pull upward, snow can increase downward pressure, and vibration can loosen connections over time. Therefore, the mounting system needs a continuous load path into the building structure.
Start by identifying exactly where the fascia connects with rafters or trusses. Then determine whether those structural members can accept the proposed load without excessive movement. If the equipment requires substantial reinforcement, consult a qualified contractor or structural professional before drilling.
For roof-edge projects, also consider how weather affects exposed materials. A practical clean shingle roof approach helps reveal damaged shingles, debris, and weak areas before installation.
Understand the Difference Between Trim and Structure
Fascia boards often support gutters and protect roof edges from weather exposure. They generally do not replace rafters, trusses, structural blocking, or engineered framing. Consequently, installers should avoid transferring heavy equipment loads into fascia alone.
Instead, use the fascia as a location reference when the equipment sits near the roof edge. Locate the structural member behind or above it before selecting fasteners. This approach creates a stronger attachment while reducing unnecessary stress on the roof edge.
Check Helena’s Weather and Structural Demands
Helena’s local requirements make weather loading an important part of rooftop equipment planning. The city lists a minimum design roof snow load of 30 pounds per square foot. It also lists a 106 mph wind speed for its design requirements.
Those figures matter because heavy technology rarely experiences weight alone. A rooftop antenna, satellite system, camera mast, or sensor can behave like a small sail. Strong wind can therefore create uplift and sideways forces that exceed the equipment’s static weight.
Snow creates another concern near roof edges, valleys, ridges, and equipment supports. Accumulated snow can add significant temporary weight around mounting points. Review the roof’s structural capacity before adding concentrated loads.
Helena currently enforces the 2021 International Building Code and related adopted codes. Montana also maintains statewide building-code requirements and amendments. Therefore, verify project-specific requirements with the local building authority before permanent installation.
Account for More Than Equipment Weight
Calculate the complete design load rather than reading only the equipment’s shipping weight. Include brackets, rails, fasteners, cables, protective hardware, and any support structure. Then consider snow, wind, maintenance access, and dynamic forces.
For example, a compact device mounted high above the roof can experience substantial leverage. A taller bracket increases the distance between the force and its attachment point. That leverage can amplify stress at fasteners and structural connections.
Likewise, equipment that vibrates can gradually loosen hardware. Fans, motors, moving antennas, and mechanical devices deserve additional attention. Use manufacturer-approved hardware and follow the specified torque requirements.
Choose the Right Structural Attachment Point
The strongest installation usually connects directly with verified roof framing. Depending on the building, that framing may include rafters, engineered trusses, beams, or properly installed blocking. Avoid guessing structural locations based only on visible nails or trim seams.
Use drawings, attic access, framing measurements, or professional inspection methods to locate structural members. Never cut, notch, or modify engineered trusses without appropriate professional approval. Helena’s residential guidance specifically addresses restrictions around modifying roof trusses.
When framing does not align with the equipment bracket, add engineered blocking rather than forcing an unsuitable connection. Blocking can distribute the load across multiple structural members. However, the reinforcement itself must connect correctly to the existing structure.
Roof design also influences attachment strategy, especially when equipment sits near a ridge or roof edge. Understanding different types of roofs helps explain why one mounting method cannot suit every property.
When Fascia Attachment Can Still Make Sense
Fascia can sometimes support lightweight accessories when the manufacturer specifically approves that mounting method. However, heavy technology requires much more scrutiny. The key question concerns the complete structural load path rather than the board itself.
For example, a bracket may pass through fascia and connect into a rafter tail behind it. In that arrangement, the fascia helps position or finish the installation. The structural member carries the meaningful equipment load.
Use appropriately sized through-bolts, lag screws, or manufacturer-approved structural fasteners. Select fastener length carefully so the hardware reaches solid framing without damaging hidden components. Never rely on short screws that grip only thin trim material.
Build a Weatherproof Mounting System
A strong structural connection still needs proper weather protection. Every roof penetration can create an entry point for water if the installer handles it poorly. Use compatible flashing, sealants, washers, and mounting components designed for the roof material.
First, inspect the roof surface around the planned attachment. Replace damaged materials before installing the equipment. Then keep penetrations away from vulnerable areas whenever the mounting design allows it.
Next, follow the roofing manufacturer’s requirements for flashing and sealants. Different roofing materials require different installation techniques and compatible products. Professional residential roofing techniques can also help guide decisions around roof protection.
Protect Shingles, Membranes, and Metal Roofing
Asphalt shingles require careful flashing around every penetration. Avoid crushing shingles beneath brackets or creating channels where water can collect. Keep fasteners properly aligned and seal penetrations according to the roofing system.
Metal roofs require different details because panels expand, contract, and shed water differently. Use the manufacturer’s approved attachment method whenever possible. Do not improvise fasteners or sealants simply because they appear convenient.
Low-slope membrane roofs need equally careful treatment around penetrations. Poor detailing can compromise the membrane and create leaks far beyond the mounting location. Consider a professional roofing contractor when the installation requires membrane alterations.
Use a Step-by-Step Installation Process
A disciplined installation process reduces both structural and waterproofing mistakes. Begin with planning, then verify the structure, select hardware, install the mount, and inspect every connection.
- Identify the equipment: Record its weight, dimensions, mounting pattern, manufacturer requirements, and operating conditions.
- Map the load: Determine where vertical, lateral, and uplift forces will travel through the mounting system.
- Locate framing: Confirm rafters, trusses, beams, or blocking before drilling any attachment holes.
- Inspect the roof: Check shingles, flashing, sheathing, membranes, and surrounding drainage paths.
- Select hardware: Choose corrosion-resistant fasteners rated for the structural connection and environment.
- Install reinforcement: Add properly connected blocking when existing framing cannot align with the mounting pattern.
- Install the mount: Follow the equipment manufacturer’s spacing, orientation, and torque requirements.
- Weatherproof penetrations: Install flashing and compatible sealants using the roofing system’s approved method.
- Test the assembly: Check movement, fastener tightness, cable routing, drainage, and equipment clearance.
- Document the installation: Record equipment details, hardware, photographs, and maintenance requirements for future inspections.
Keep Cables and Conduits Secure
Cables can create another failure point when installers leave them loose near roof edges. Wind can repeatedly move unsupported cables against shingles, metal, or flashing. Secure cables without creating sharp bends or unnecessary roof penetrations.
Route wiring away from drainage paths and areas where snow can accumulate. Use weather-rated cable management components for exterior installations. Also protect electrical connections from moisture according to applicable electrical requirements.
Know When You Need Professional Help
Some installations remain simple, but heavy rooftop technology can quickly become a structural project. Professional help makes sense when the equipment adds significant concentrated weight or creates substantial wind exposure.
Hire a qualified professional when you cannot identify structural framing confidently. Seek structural review when reinforcement, truss modification, or unusual load paths enter the project. Roofing expertise also helps when the installation requires multiple roof penetrations.
Electrical work deserves separate attention when the technology needs new circuits, disconnects, or permanent wiring. Helena requires electrical permits for many installations and requires state-licensed electrical professionals for covered work. Confirm the exact permit requirements before beginning electrical modifications.
Permit Questions Matter in Helena
Do not assume that small equipment automatically qualifies as exempt work. Helena’s permit rules contain specific exemptions, but those exemptions depend on the project and installation conditions. Permanent structural or mechanical work may require review even when equipment appears compact.
Prepare equipment specifications, mounting details, roof plans, structural information, and electrical details when applicable. Clear documentation helps reviewers understand the proposed load path and installation method. It also gives future contractors useful information during repairs or replacement.
Because local requirements can change, contact the City of Helena Building Division before starting an uncertain project. Confirm current building, mechanical, electrical, and roofing requirements for your specific installation.
Inspect the Mount After Installation
Installation does not end when the final fastener reaches its specified torque. Heavy technology needs periodic inspection because weather, vibration, thermal movement, and roof aging can change conditions.
Inspect the mounting hardware after major wind events and heavy snow periods. Look for loose fasteners, cracked sealant, distorted brackets, movement, corrosion, and damaged roofing materials. Address small problems before they develop into structural or water-intrusion failures.
Also inspect the surrounding roof rather than focusing only on the equipment. A secure bracket can still damage shingles if it shifts during severe weather. Check nearby flashing, drainage routes, gutters, and exposed wiring during each inspection.
Create a Simple Maintenance Schedule
Review the installation at least annually and after unusually severe weather. Equipment with moving parts may require more frequent checks. Follow the manufacturer’s maintenance schedule whenever it exceeds your basic inspection plan.
Keep photographs of the original installation for comparison. Mark fastener locations, cable routes, and structural attachment points where practical. These records can help identify gradual movement that casual inspections might miss.
Common Mistakes to Avoid
The most common mistake involves treating fascia as structural framing. Another mistake involves choosing fasteners based on convenience instead of verified load requirements. Both decisions can create failures that remain invisible until severe weather arrives.
- Using fascia alone: Connect significant loads to verified structural framing instead.
- Ignoring wind uplift: Evaluate upward and lateral forces, not only downward weight.
- Skipping reinforcement: Add engineered blocking when the existing framing cannot support the mounting pattern.
- Overlooking snow: Account for local roof snow requirements and equipment-related accumulation.
- Improvising flashing: Follow the roofing system’s approved waterproofing details.
- Overtightening fasteners: Follow manufacturer torque requirements to avoid damaging components.
- Ignoring corrosion: Select exterior-rated hardware that suits the local exposure conditions.
- Forgetting maintenance: Leave practical access for inspection, servicing, and eventual replacement.
Final Checklist for a Secure Helena Installation
Before considering the project complete, verify the entire mounting system from equipment to building structure. Every connection should have a clear purpose and a defensible load path.
- Equipment specifications confirmed.
- Structural attachment points verified.
- Snow and wind forces considered.
- Fasteners selected for the actual structural connection.
- Roofing materials protected.
- All penetrations properly flashed and sealed.
- Cables routed safely and securely.
- Electrical requirements reviewed.
- Permit requirements confirmed.
- Final inspection completed and documented.
Conclusion
The safest way to secure heavy tech to facia boards in Helena is to avoid making fascia the primary structural support. Instead, transfer equipment loads through properly sized hardware into verified rafters, trusses, beams, or engineered blocking.
Helena’s snow and wind requirements make careful structural planning especially important. Therefore, inspect the roof, verify the load path, protect every penetration, and confirm local permit requirements before installation.
If your equipment sits near a roof edge, contact a qualified roofing or structural professional before drilling. A careful installation costs less than repairing a failed mount, damaged roof, or falling piece of equipment.
FAQs
Can heavy equipment attach directly to a fascia board?
Heavy equipment should not rely on fascia alone because fascia usually does not provide sufficient structural capacity.
What should support heavy rooftop technology in Helena?
Use verified rafters, trusses, beams, or properly engineered blocking connected to the building’s structural system.
Does snow load matter for small rooftop technology?
Yes, snow accumulation can add concentrated loads and change the forces acting on mounting hardware.
Should roof penetrations receive special waterproofing?
Yes, every roof penetration needs flashing and compatible weatherproofing suited to the specific roofing system.
Do rooftop technology installations require permits in Helena?
Some installations require permits, so confirm current building, mechanical, electrical, and roofing requirements before starting work.