Window treatments can transform any space, but sometimes you need to remove your blinds for cleaning, painting, or replacement. Whether you’re a seasoned DIY enthusiast or tackling this project for the first time, understanding the proper technique is essential. The experts at H Decor Ideas have compiled this comprehensive guide to help you master this common household task.
Corded blinds are among the most popular window covering options due to their affordability and functionality. However, many homeowners feel intimidated when it comes to removal and reinstallation. The good news is that with the right approach and tools, this process becomes straightforward and manageable.
Following proper window blinds removal instructions ensures you won’t damage your blinds or window frame during the process. This guide covers everything from initial preparation to final installation, giving you the confidence to handle this task efficiently.
Understanding Your Corded Blind System
Before beginning any removal process, take time to examine your blind system carefully. Most corded blinds consist of several key components that work together to provide light control and privacy.
The headrail serves as the main support structure, typically mounted either inside the window frame or on the wall above it. This component houses the mechanism that raises and lowers the blind slats. The lift cords run through the slats and connect to the headrail mechanism.
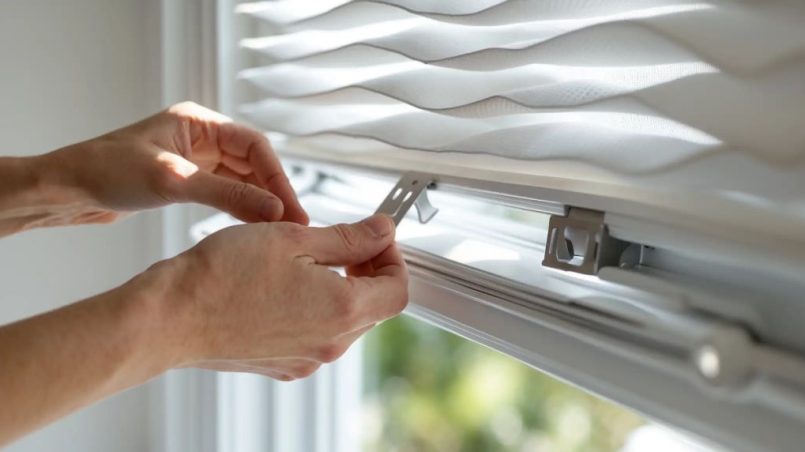
Side brackets hold the headrail in place and determine how securely your blinds attach to the window area. These brackets vary in design depending on the manufacturer and mounting style. Understanding your specific bracket type will make removal much easier.
The tilt mechanism controls the angle of the slats, allowing you to adjust light levels without fully raising the blinds. This system usually involves a separate cord or wand that connects to a gear mechanism in the headrail.
Essential Tools and Preparation
Gathering the right tools before starting will save time and prevent frustration during the removal process. Most of these items are common household tools you likely already own.
You’ll need a screwdriver set with both flathead and Phillips head options. A drill can speed up the process if you’re removing multiple sets of blinds. Keep a stepladder or sturdy chair nearby for reaching higher installations safely.
Have a clean cloth or vacuum handy for cleaning the blinds and window area. Plastic bags or containers help organize small parts like screws and brackets. Consider laying down a drop cloth to protect your flooring from dust or debris.
Take photographs of your blind installation before removal. These images serve as helpful references during reinstallation, especially if you’re working on multiple windows with different mounting configurations.
Step-by-Step Removal Process
Start by fully extending the blinds to their lowest position. This step relieves tension on the lift cords and makes the headrail easier to handle. Gently tilt the slats to a horizontal position for better access to the mounting hardware.
Locate the mounting brackets on either end of the headrail. Most brackets have a release mechanism that allows the headrail to slide out or lift away. Some designs require you to push a small tab or lever while lifting the front of the headrail.
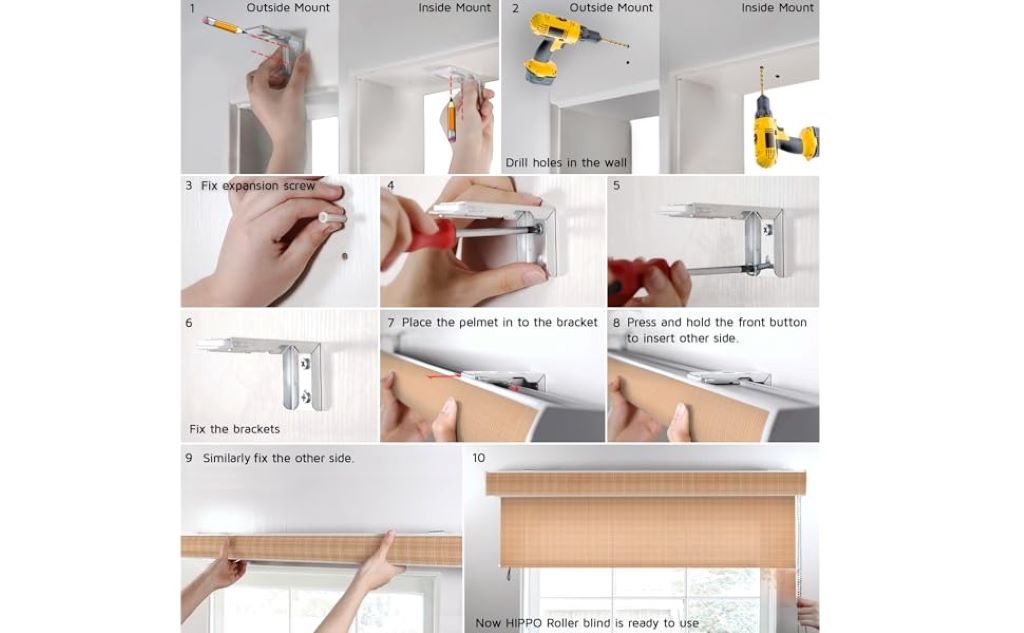
For inside-mount installations, the brackets typically clip or slide into place within the window frame. Outside-mount brackets usually attach directly to the wall or window trim with screws. Identify your mounting style before proceeding.
Carefully lift the headrail from the brackets, supporting both ends to prevent damage. If the headrail feels stuck, double-check that you’ve properly released all locking mechanisms. Never force the removal as this can break the brackets or headrail.
Once free from the brackets, set the entire blind assembly on a flat surface. Keep all components together to avoid losing small parts during cleaning or storage.
Cleaning and Maintenance During Removal
With your blinds removed, this presents an excellent opportunity for thorough cleaning and maintenance. Start by dusting the slats with a microfiber cloth or vacuum brush attachment.
For deeper cleaning, you can wash vinyl or aluminum slats with mild soap and water. Wood blinds require more careful treatment with specialized wood cleaners to prevent warping or discoloration.
Inspect the lift cords for fraying or damage while cleaning. Replace any worn cords before reinstallation to prevent future failures. Check the headrail mechanism for smooth operation and lubricate if necessary.
Clean the window area and mounting brackets thoroughly. Remove any accumulated dust, paint chips, or debris that might interfere with proper reinstallation.
Re-attachment and Installation Process
When you’re ready to reinstall your blinds, start by ensuring the mounting brackets are clean and properly positioned. If you removed the brackets completely, use your reference photos to restore the correct placement.
Check that the brackets are level and securely fastened to prevent sagging or uneven operation. Use a level tool to verify alignment, especially for longer blinds that require multiple mounting points.
Position the headrail over the brackets, aligning the mounting slots or clips properly. Most systems require you to hook the back of the headrail into the bracket first, then lower the front until it clicks into place.
Test the locking mechanism by gently trying to lift the front of the headrail. It should feel secure and not move when properly installed. If it feels loose, remove and reinstall to ensure proper engagement.
Testing and Final Adjustments
After successful reinstallation, test all blind functions before considering the job complete. Raise and lower the blinds several times to ensure smooth operation of the lift mechanism.
Check the tilt function by adjusting the slats through their full range of motion. Listen for any unusual sounds that might indicate installation issues or mechanical problems.
Verify that the blinds hang straight and level. Minor adjustments to bracket positioning can correct slight tilting or uneven hanging. Make sure the bottom rail sits parallel to the window sill.
Test the cord tension by ensuring the blinds stay in position when partially raised. If they drift up or down, the cord tension may need adjustment within the headrail mechanism.
Common Troubleshooting Issues
Sometimes blinds don’t cooperate during removal or reinstallation. Stuck headrails often result from paint buildup around the brackets or debris in the mounting slots.
If brackets seem damaged or won’t hold the headrail securely, replacement may be necessary. Most manufacturers sell replacement brackets that match their blind systems.
Cord tangling can occur during removal if you’re not careful. Take time to keep cords organized and untangled throughout the process to prevent operational issues after reinstallation.
Misaligned brackets cause uneven hanging and poor operation. Always double-check bracket positioning and use a level during installation to avoid these problems.
Safety Considerations and Best Practices
Window blind removal involves working at height and handling potentially sharp components. Always use proper ladder safety techniques and have someone assist with longer or heavier blinds.
Corded blinds pose potential safety risks, especially in homes with young children. Consider this an opportunity to upgrade to cordless alternatives if safety is a concern in your household.
Handle all components carefully to avoid cuts from sharp edges on metal slats or brackets. Wear safety glasses when working overhead to protect your eyes from falling debris.
Store removed blinds in a safe location where they won’t be damaged or create tripping hazards. Proper storage prevents costly damage and makes reinstallation easier.
Conclusion
Removing and re-attaching corded blinds becomes a manageable task when you understand the process and take proper precautions. Following these window blinds removal instructions ensures successful completion without damage to your blinds or windows.
The key steps include proper preparation, understanding your bracket system, careful removal technique, and systematic reinstallation. Taking time to clean and inspect components during removal adds value to the process.
Remember that practice makes perfect with this type of project. Each blind system has slight variations, so don’t be discouraged if your first attempt takes longer than expected. With the right approach and attention to detail, you’ll master this essential home maintenance skill.
Frequently Asked Questions
How often should I remove my blinds for cleaning? Most corded blinds benefit from thorough cleaning every 6-12 months, depending on your environment. Homes with pets, smokers, or high dust levels may require more frequent attention.
Can I remove corded blinds by myself, or do I need help? While possible to do alone, having an assistant makes the process safer and easier, especially for wider blinds or high installations. The extra hands help prevent damage and accidents.
What should I do if my mounting brackets are damaged during removal? Contact the blind manufacturer or visit a home improvement store with the damaged bracket to find a suitable replacement. Most standard brackets are readily available.
Is it normal for blinds to be difficult to remove the first time? Yes, blinds that haven’t been removed for years often require extra effort due to dust buildup or settling in the brackets. Gentle persistence usually overcomes initial resistance.
Should I replace the cords when I have the blinds down for cleaning? Inspect the cords carefully for fraying or wear. If they show signs of damage or are several years old, replacement during cleaning is a good preventive maintenance practice.
Read More:
THINGS YOU MUST KNOW ABOUT YOUR WINDOW REPLACEMENT COMPANY
WHAT TYPES OF BLINDS EXIST AND HOW TO CHANGE THE TAPE OF A BLIND